

If this tutorial is what you’ve been looking for, then that is cool! Sorry, I can’t help myself. In this tutorial, we explore IFTTT functions using an ESP8266.
IFTT
IFTTT, also known as If This Then That, is a free web platform that allows devices to do specific things such as composing an email, posting a tweet, and sending an SMS. These are called services and IFTTT offers quite a lot of them. You can check them all here.
For the most part, IFTTT just does what its name says. It makes use of Applets which are tiny programs that use triggers (If This) to carry out actions (Then That). An applet might look like this: Every time someone opens a particular door (If This), send an SMS to this particular phone number (Then That).
Now if we integrate this with an ESP8266, our DIY projects become a lot powerful. To demonstrate, we interface a DHT22 sensor with an ESP8266 to send an email when it reaches a threshold value.
Setup
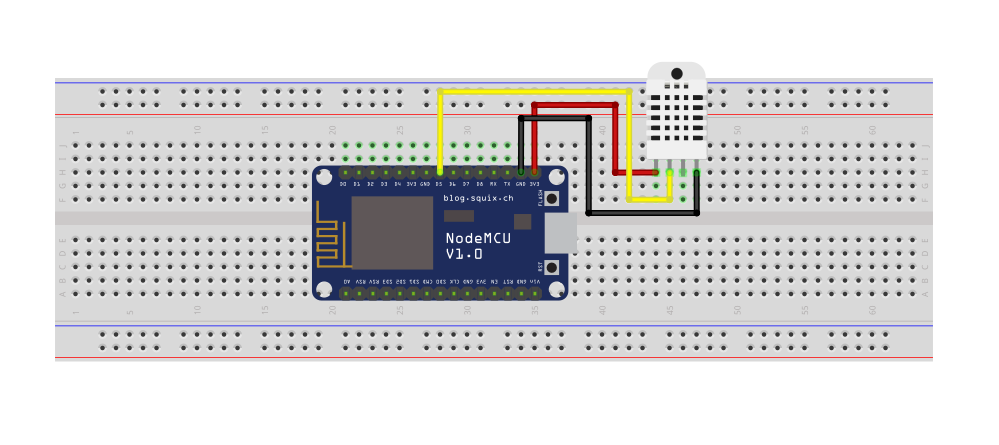
For the sample project, you need the following parts:
- NodeMCU
- DHT temperature sensor
- Breadboard
- Jumper Wires
Connect the components using jumper wires as shown below.
Creating an Applet
First, create an IFTTT account. The procedure is pretty standard. You can continue by using your Apple, Google, or Facebook account.

Then, once logged in, proceed to the top right toolbar on your homepage. Select create.
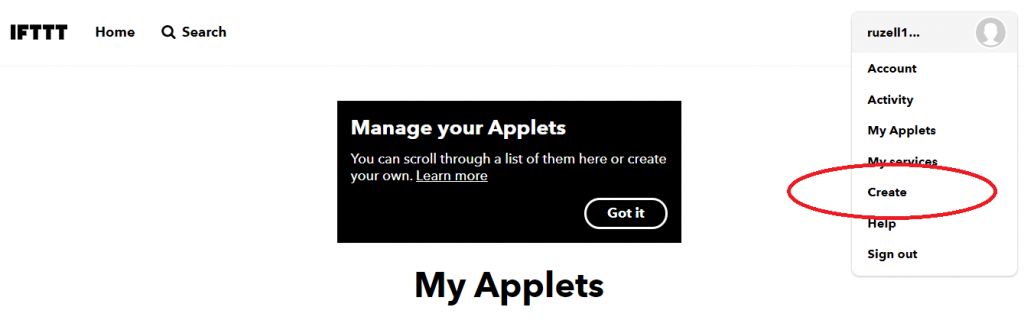
Next, on the create page, press This.

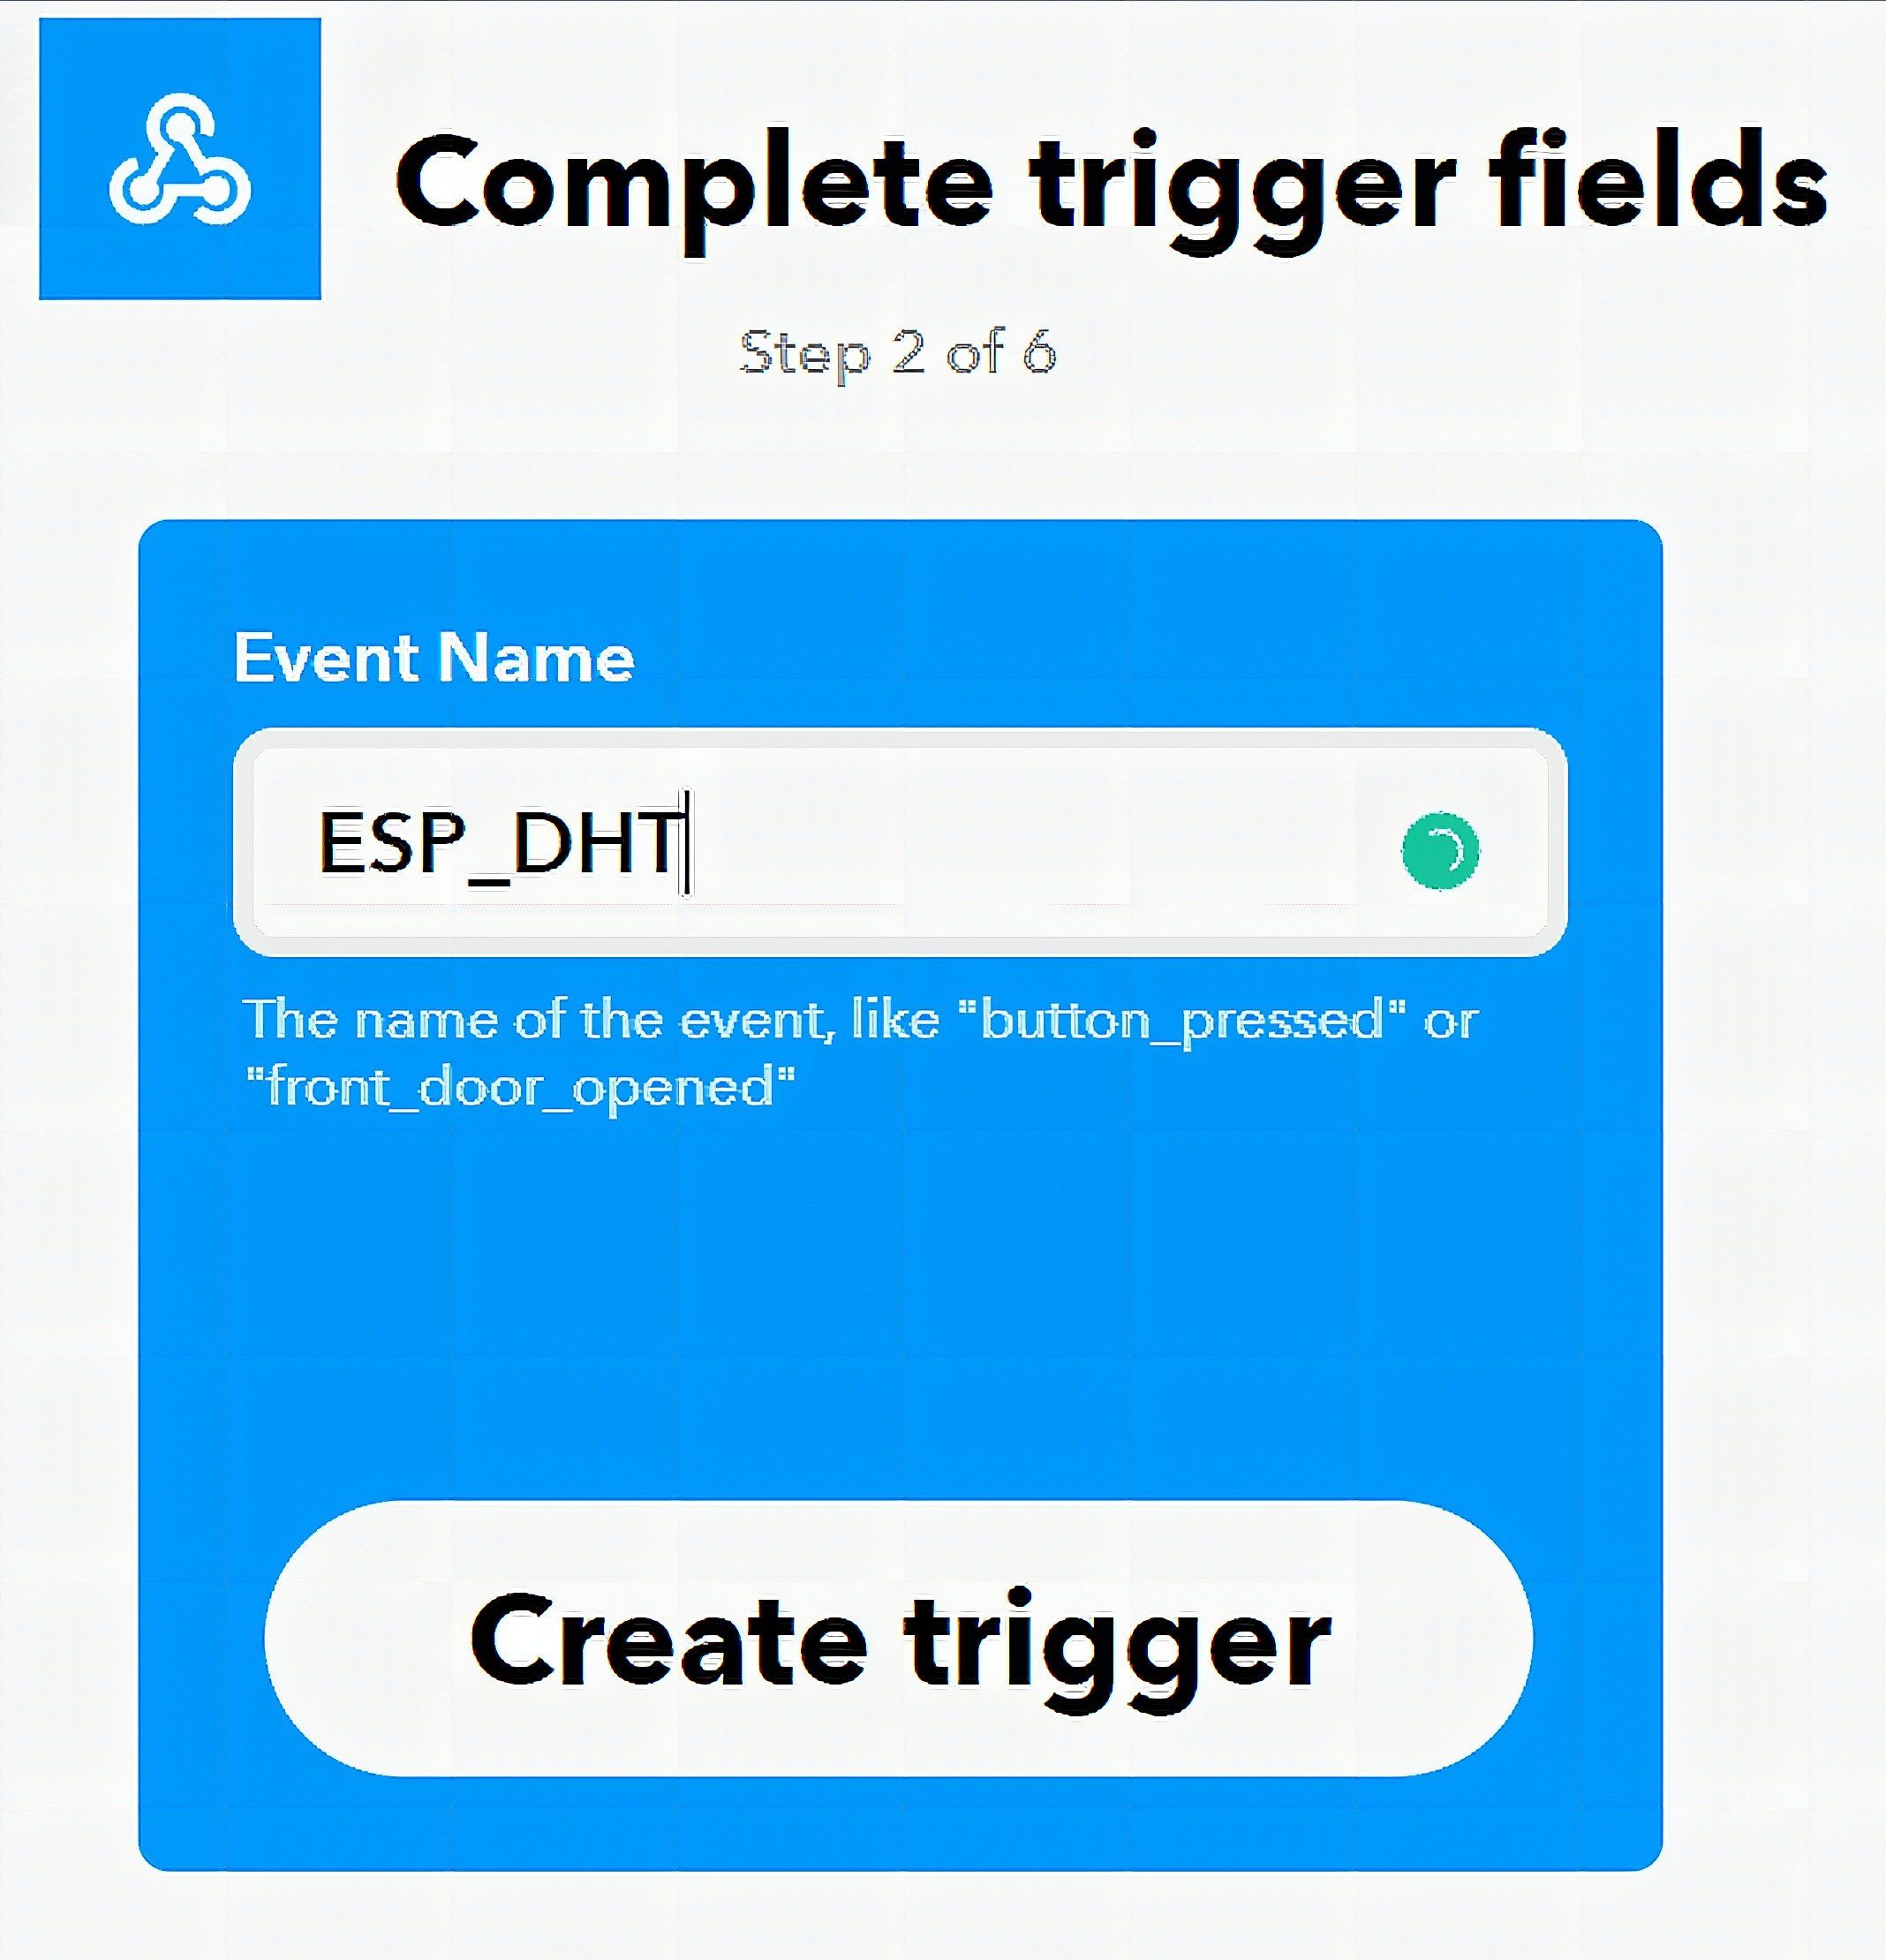
After that, search for webhooks.

Then, choose receive web request and name the event name.
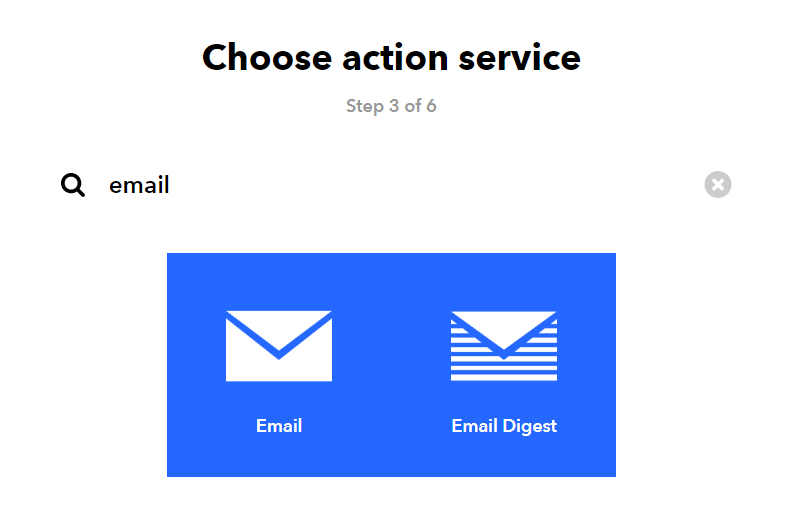
Next, set the That action.

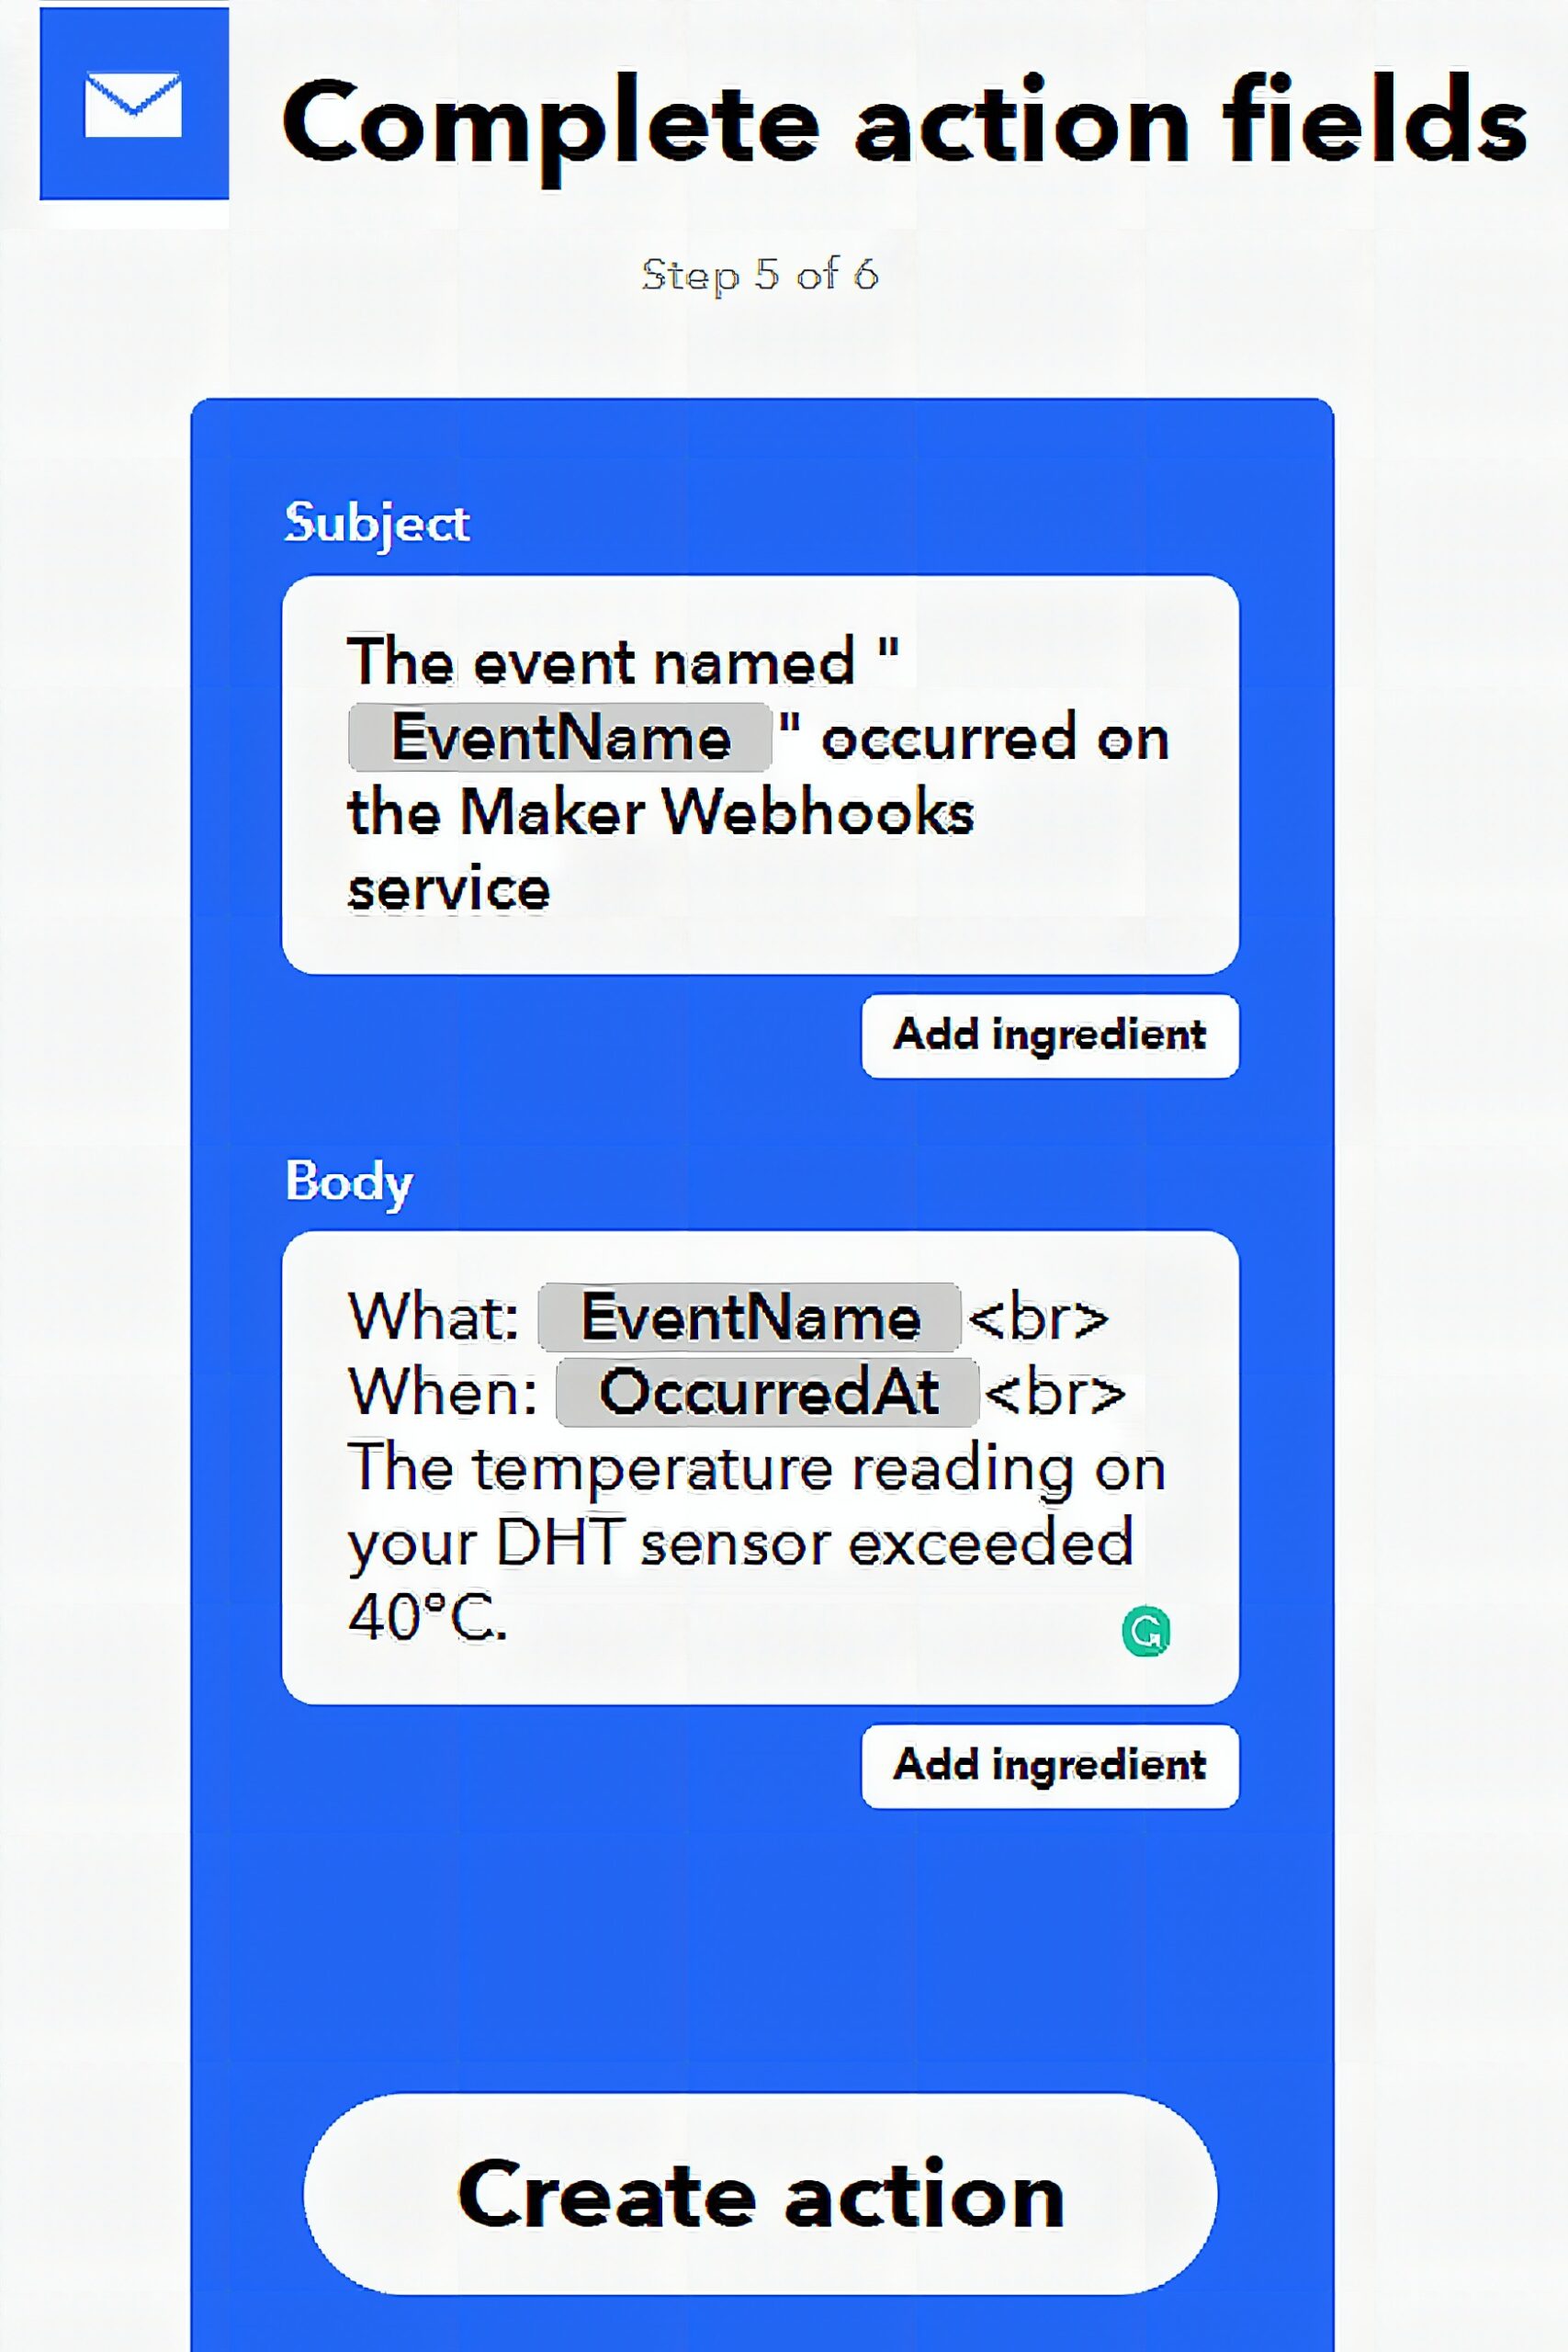
Search for email.

Next, compose the email by completing the action fields. EventName contains the name of the event. On the other hand, OccurredAt displays the date and time when the event is triggered.
Lastly, review the details.
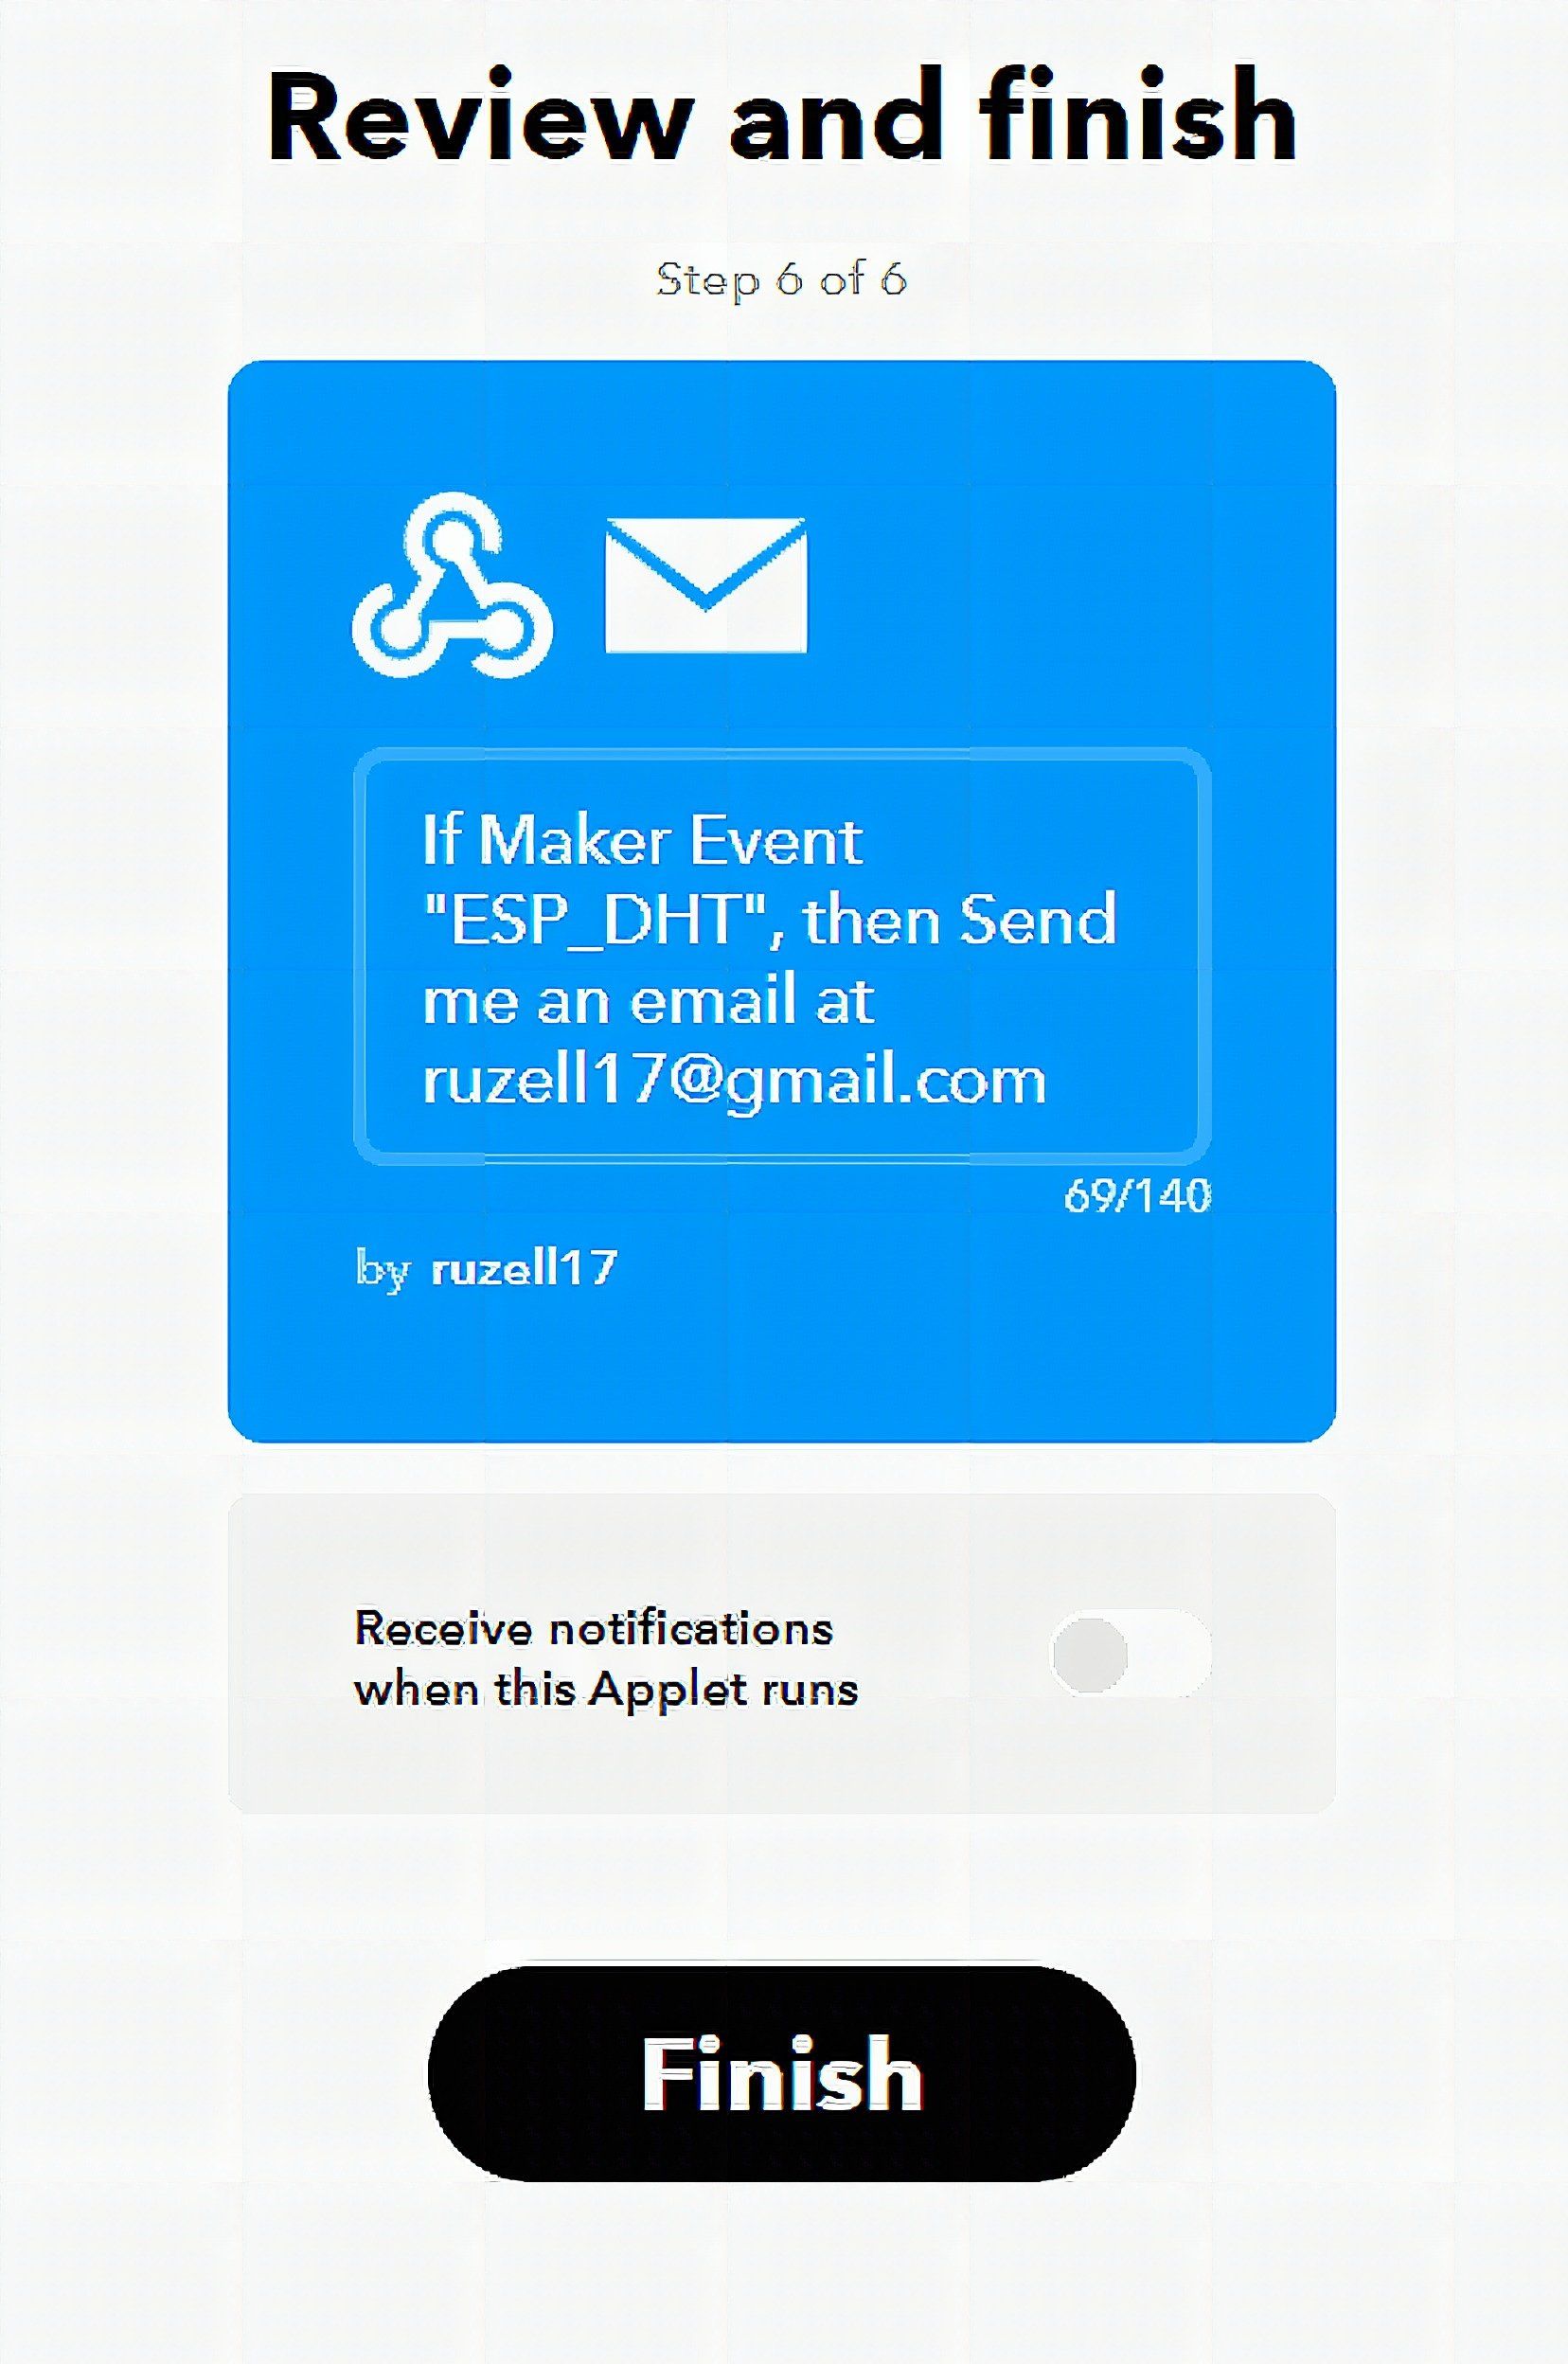
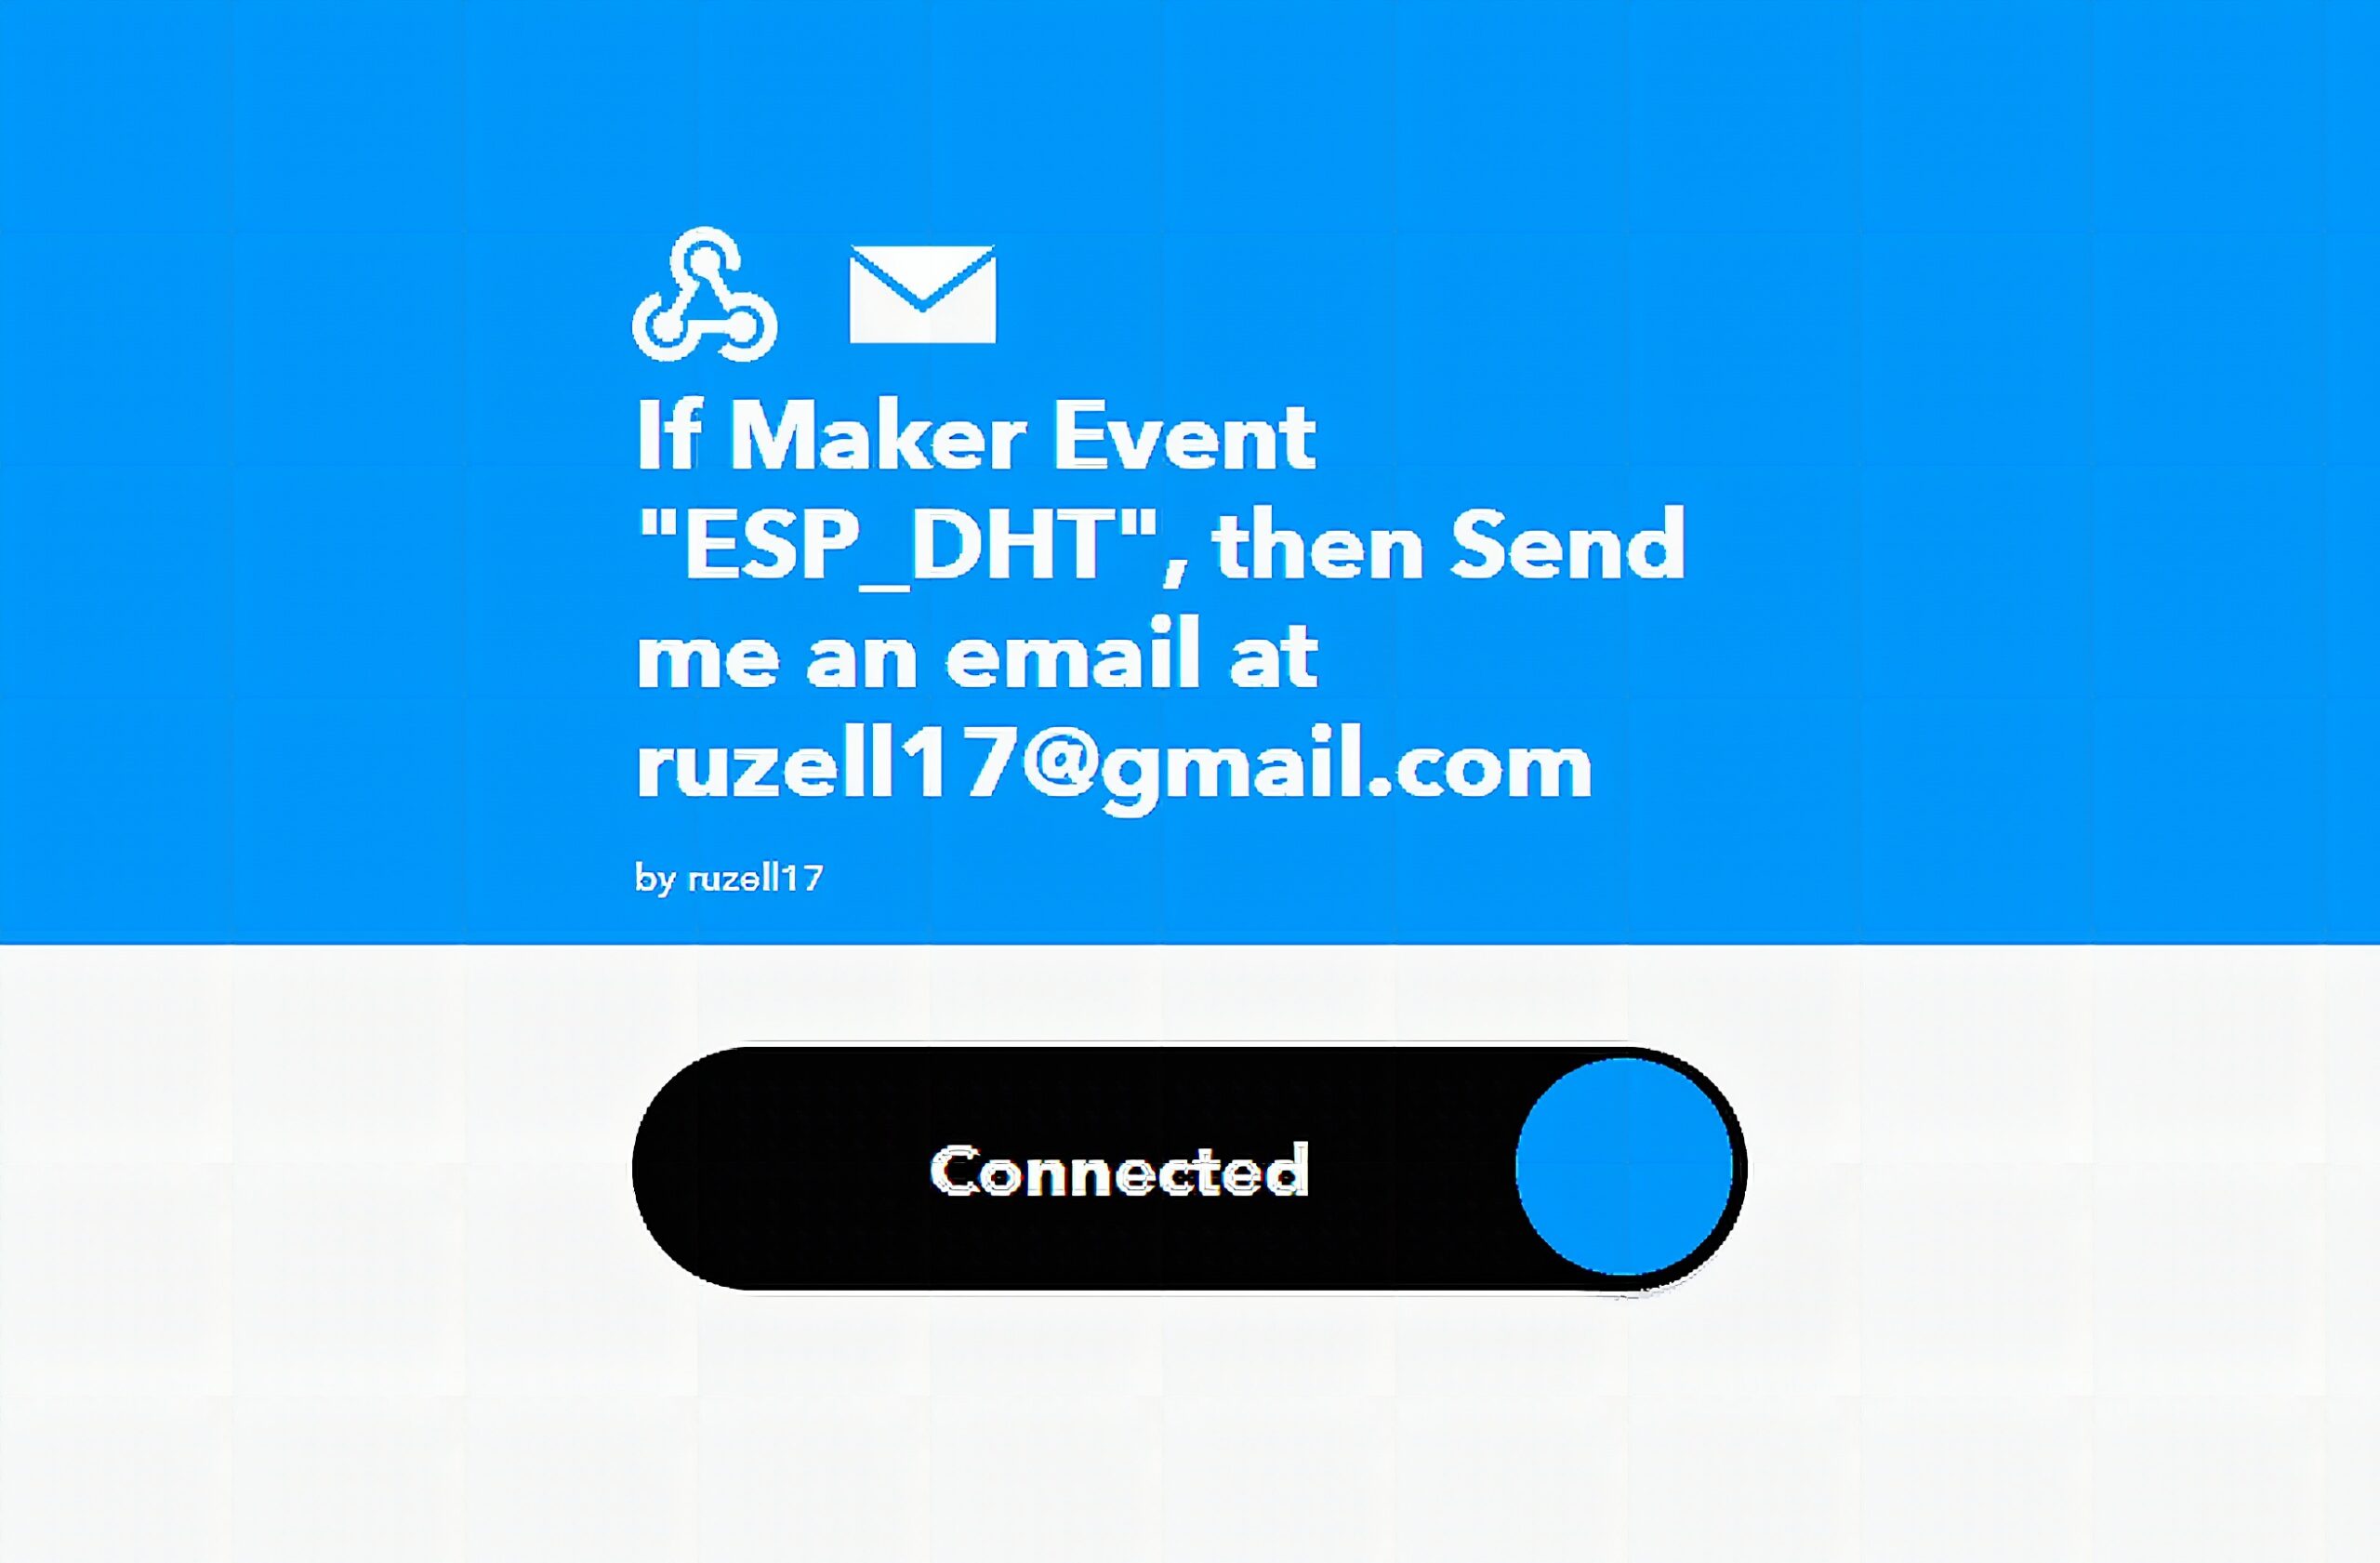
By now, the applet is already created. To check if it’s already working, go to the applets page.
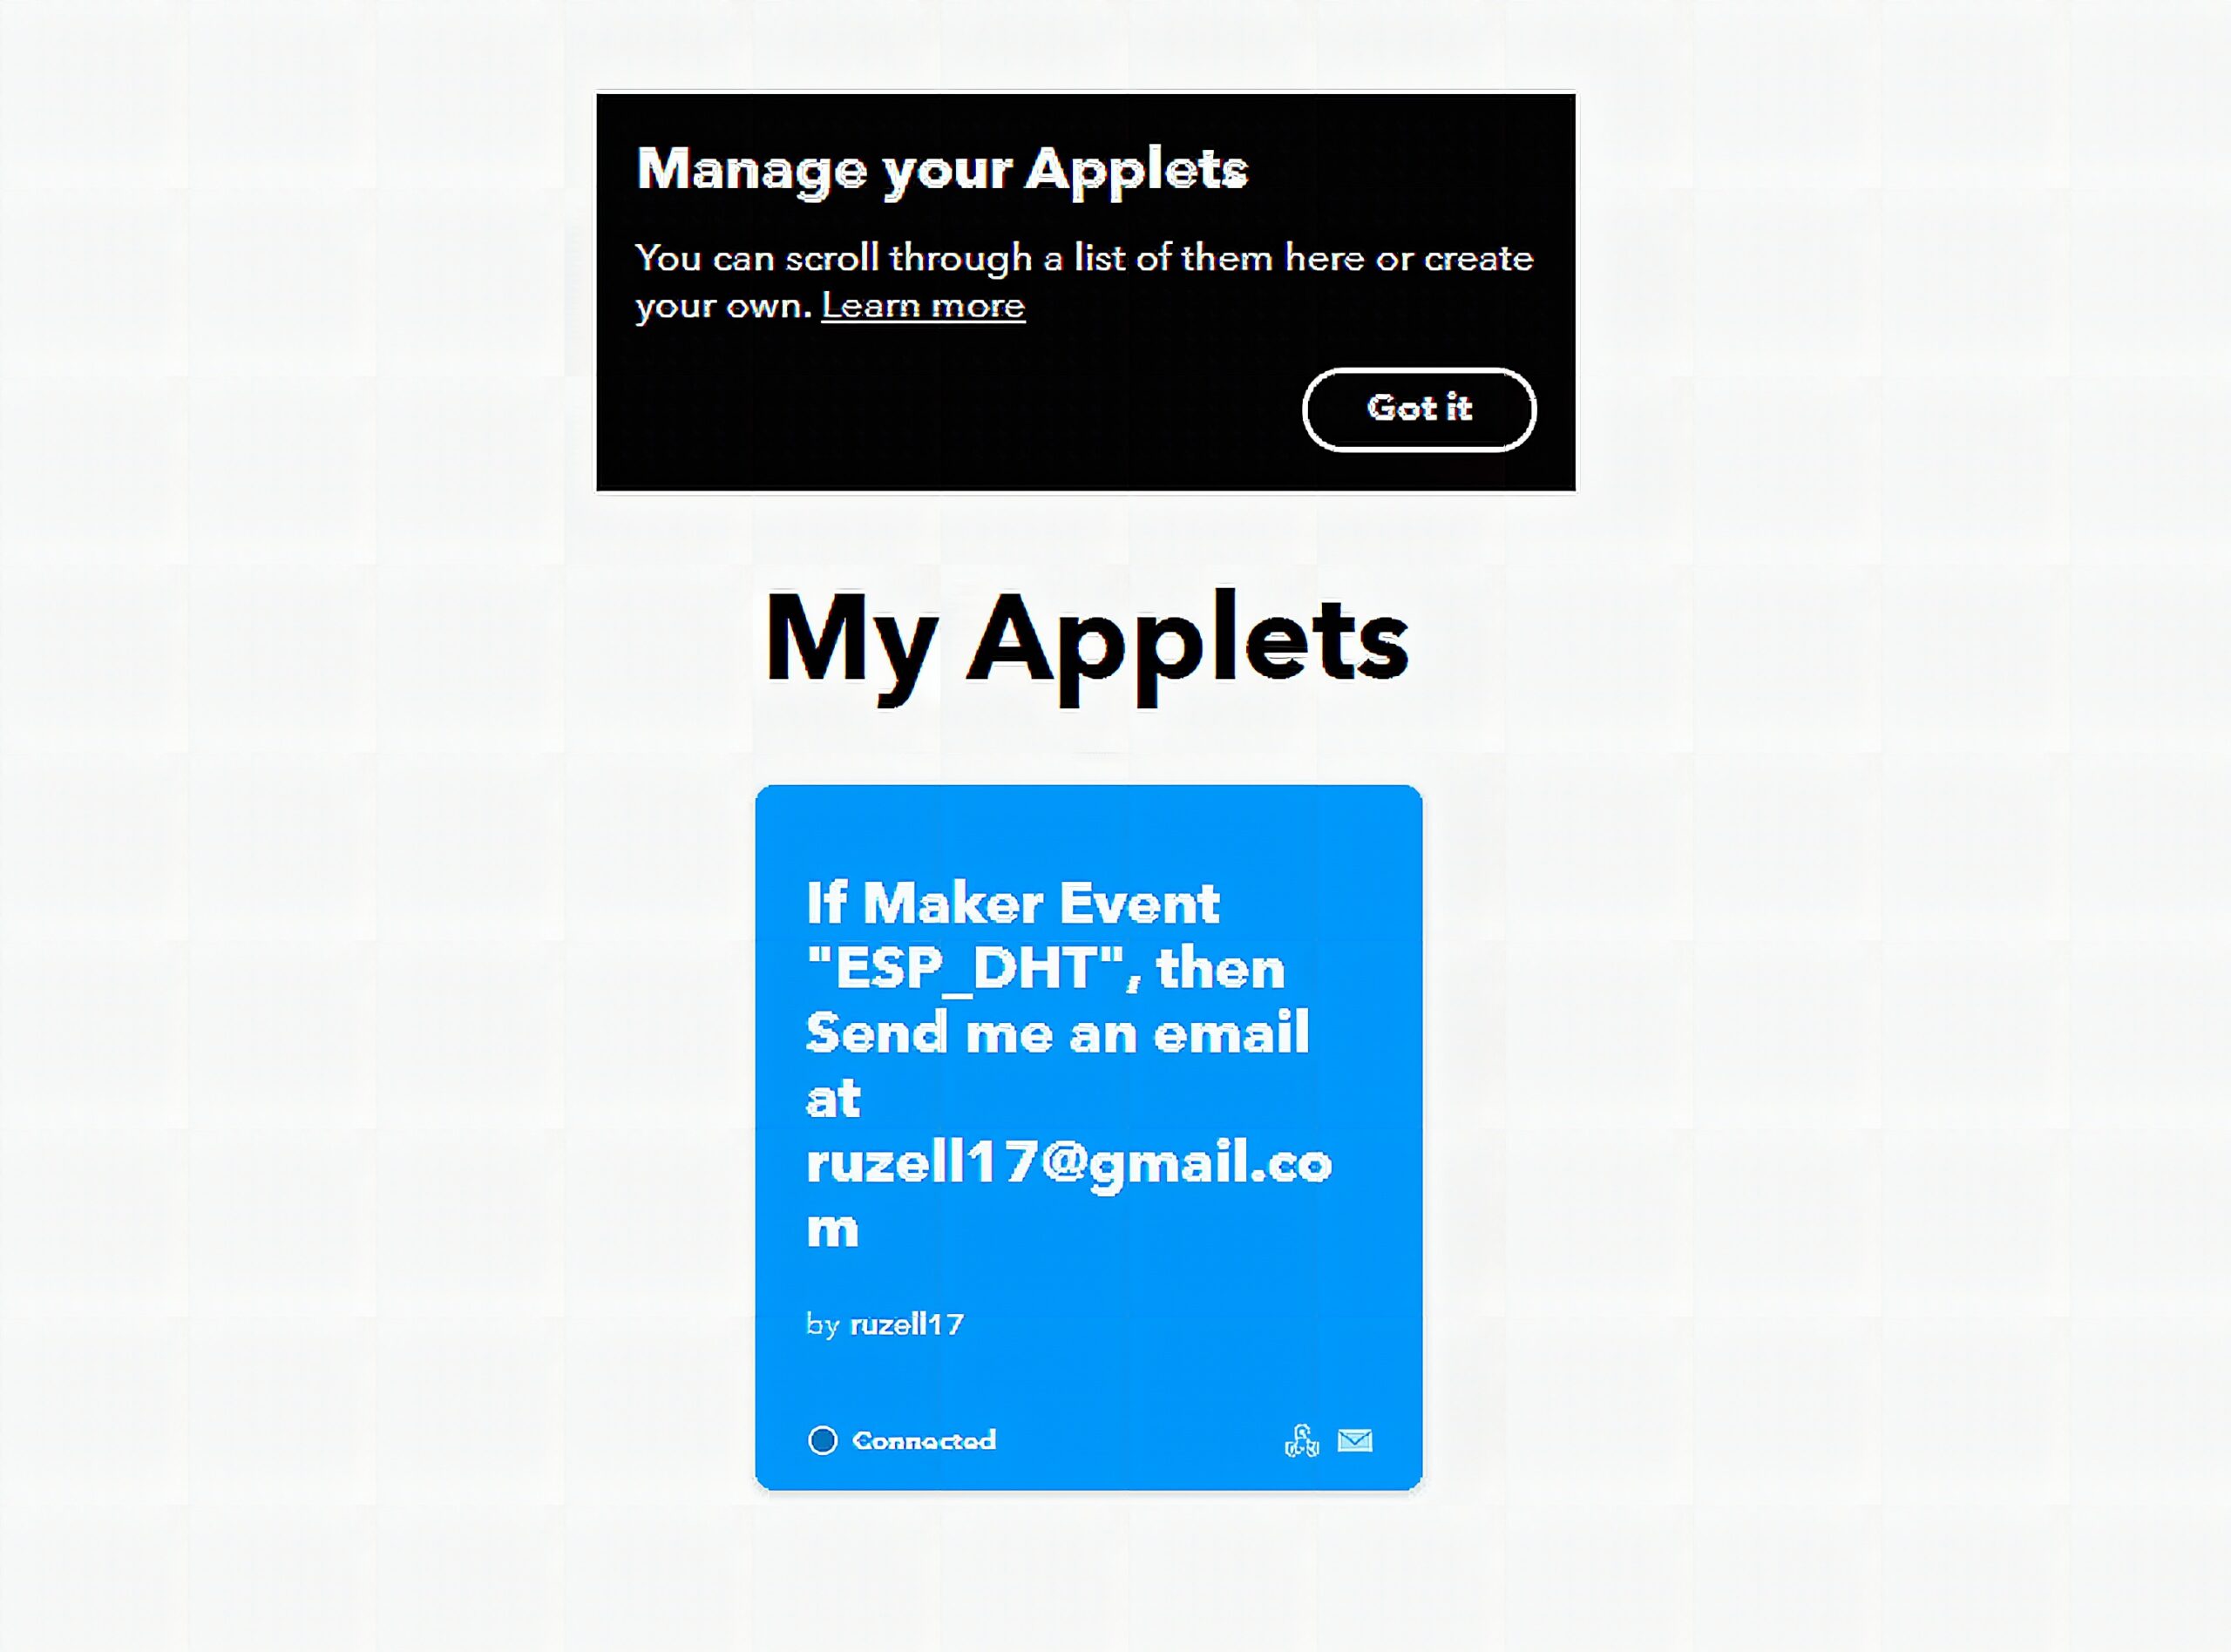
It must show connected when you select the applet.
Obtaining the Request and Key
Next, to know the key to trigger the event. Go to the search bar on the top left of the home page. Search for web hooks.

The search bar directs you to another page. Web hooks is on the Services section.
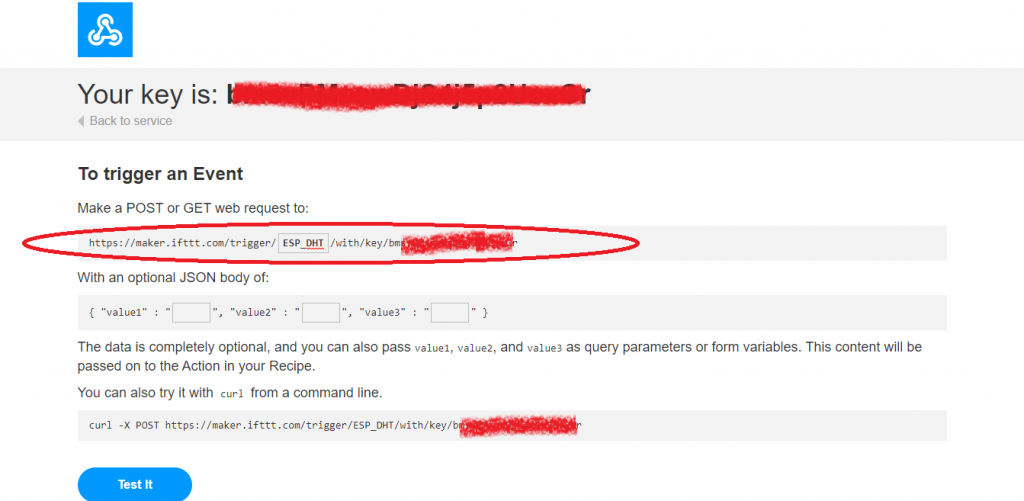
Click Documentation on the Webhooks page.

Finally, a page displays your personal key and the complete web request for your event. The web request should always include the event name and the key. This way, webhooks can easily determine the event that has been triggered.
Code
Copy the sketch to your Arduino IDE.
#include <ESP8266WiFi.h>
#include <DHT.h> #define DHTTYPE DHT22 #define DHTpin 5
float T; DHT dht(DHTPin, DHTTYPE); const char* ssid = "Wifi network name";
const char* password = "WiFi password"; const char* resource = "https://maker.ifttt.com/trigger/YOUR EVENT NAME HERE/with/key/YOUR KEY HERE";
const char* server = "maker.ifttt.com"; void setup() {
dht.begin();
} void loop() { T = dht.readTemperature(); if (T>40) { WiFiClient client; client.print(String("GET ") + resource + " HTTP/1.1rn" + "Host: " + server + "rn" + "Connection: closernrn"); int timeout = 5 * 10; // 5 seconds while(!!!client.available() && (timeout-- > 0)) { delay(100); } while(client.available()) { Serial.write(client.read()); } client.stop(); } else { return; } } }
Code Explanation
First, install the required libraries.
#include <ESP8266WiFi.h>
#include <DHT.h>
Then, replace these with your network credentials.
const char* ssid = "Wifi network name";
const char* password = "WiFi password";
These stores the web request URL to a string. Replace YOUR EVENT NAME HERE with the name of your event. In my case, it is ESP_DHT. In the YOUR KEY HERE section, replace it with your personal key.
const char* resource = "https://maker.ifttt.com/trigger/YOUR EVENT NAME HERE/with/key/YOUR KEY HERE";
const char* server = "maker.ifttt.com";
The main program constantly reads the temperature value of the sensor until it exceeds 40. When it does, it sends a web request using the string we created earlier. The server “maker.ifttt.com” then receives the request and triggers the event.
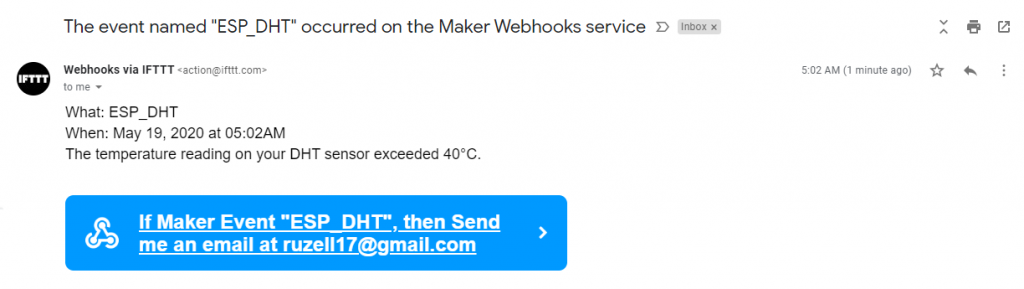
void loop() { T = dht.readTemperature(); if (T>40) { WiFiClient client; client.print(String("GET ") + resource + " HTTP/1.1rn" + "Host: " + server + "rn" + "Connection: closernrn"); int timeout = 5 * 10; // 5 seconds while(!!!client.available() && (timeout-- > 0)) { delay(100); } while(client.available()) { Serial.write(client.read()); } client.stop(); } else { return; } } }Finally, check your email inbox. You should receive an IFTTT notification just like this.
That’s it for our IFTTT tutorial. If you’re new, make sure to check the first part of the ESP8266 series. See you later!
Frequently Asked Questions
What does this Automate your Life with IFTTT and ESP8266 tutorial cover?
If this tutorial is what you’ve been looking for, then that is cool! Sorry, I can’t help myself.
Why won't my ESP8266 connect to home Wi-Fi?
ESP8266 only supports 2.4GHz. If your router is on 5GHz only, switch the SSID to a 2.4GHz band. Also check WPA2 (not WPA3) and that the SSID is broadcasting.
Should I use ESP8266 or ESP32 for the Automate your Life with IFTTT and ESP8266 build?
ESP8266 (NodeMCU/Wemos D1) is cheaper and fine for one Wi-Fi sensor + one I/O. ESP32 gives BLE, more GPIO, dual core, touch pins — pick it for richer projects.