
Want a reliable Pi that just works with touchscreens and everyday projects? The Raspberry Pi 3B+ is a compact and powerful single-board computer with built-in Wi-Fi, Bluetooth, and full-size HDMI support. Makers, students, and professionals widely use it in projects ranging from DIY electronics to smart home systems and light desktop setups.
Firstly, the Pi 3B+ stands out because of its balance of size, connectivity, and performance. Moreover, its affordability makes it accessible for both beginners and advanced users.
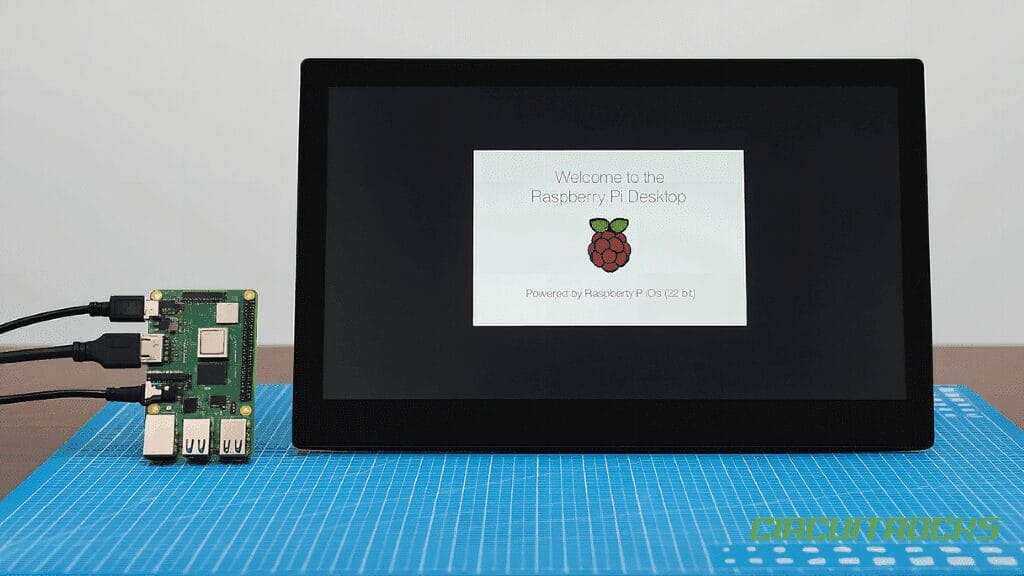
To extend its usability, you can connect it to a 13.3-inch HDMI LCD from Waveshare. You connect the display via HDMI for video and USB for touchscreen control. As a result, you instantly get a larger and more interactive workspace. With its sharp resolution and responsive touch, this setup works perfectly for dashboards, media centers, user interfaces, and portable workstations.
What You’ll Learn
- Prepare your microSD card with Raspberry Pi OS
- Connect and configure the 13.3″ HDMI LCD
- Edit the
config.txtfile for proper display setup - Troubleshoot common issues
This setup is perfect for turning your Raspberry Pi into a portable workstation, interactive dashboard, or media center. With the large 13.3-inch Waveshare HDMI LCD, you’ll have plenty of screen space for coding, monitoring projects, or even watching videos. The touchscreen support also makes it great for smart home control panels, kiosks, and educational projects, where both display clarity and user interaction are important.
If you’re interested in smaller boards, you may also want to check out our guides for the Raspberry Pi Zero W with a 3.5-inch HDMI LCD Setup and the Raspberry Pi Zero 2 W with a 7-inch HDMI LCD Setup. These boards are more compact but still very capable for lightweight projects and portable computing.
What You’ll Need
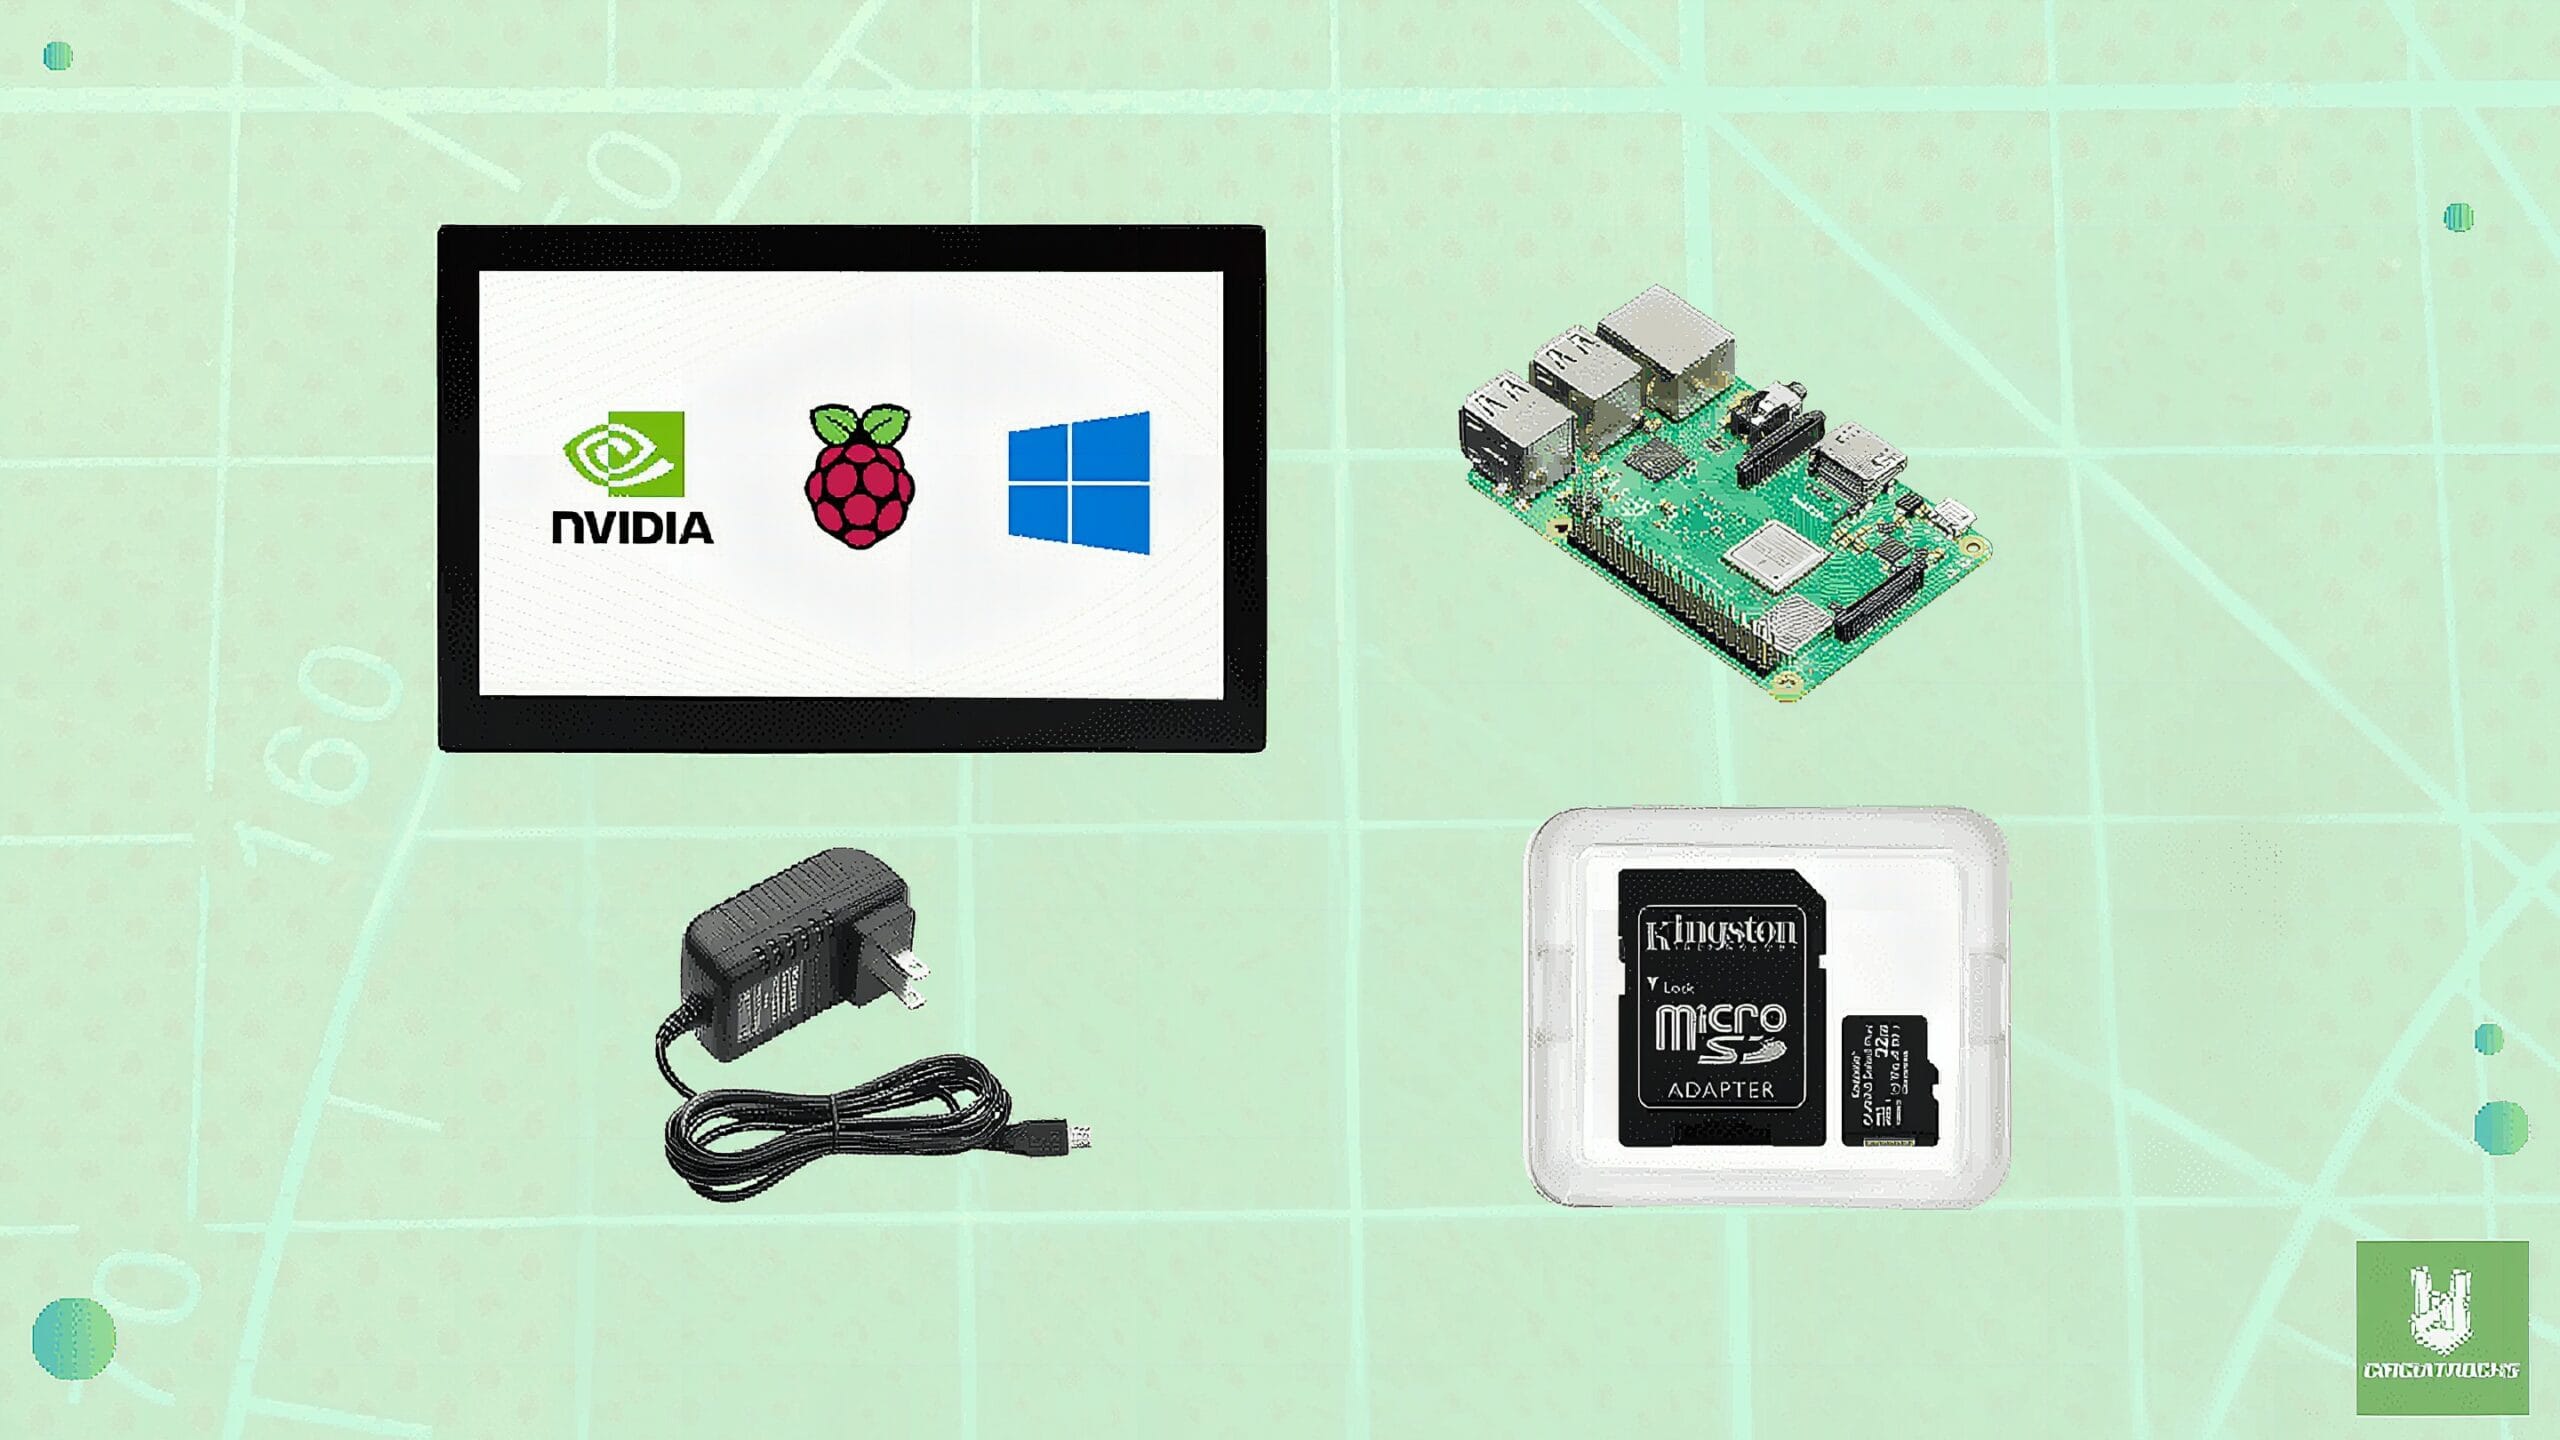
Components
Step-by-Step:
Here’s a quick guide for you on how to set up your Raspberry Pi 3B+ with a 13.3 inch HDMI LCD (H).
Step 1: Prepare the microSD Card
- When setting up your Raspberry Pi 3B+ with a 13.3 inch HDMI LCD (H) Waveshare, it’s important to start with a properly formatted microSD card. If the card is new or has been used in another device, you should quickly reformat it using the SDCard.org formatter. This step ensures the card is clean and ready for the Raspberry Pi OS. Make sure to choose the Quick Format and Overwrite Format options for the best results, as this helps prevent errors during the installation process.

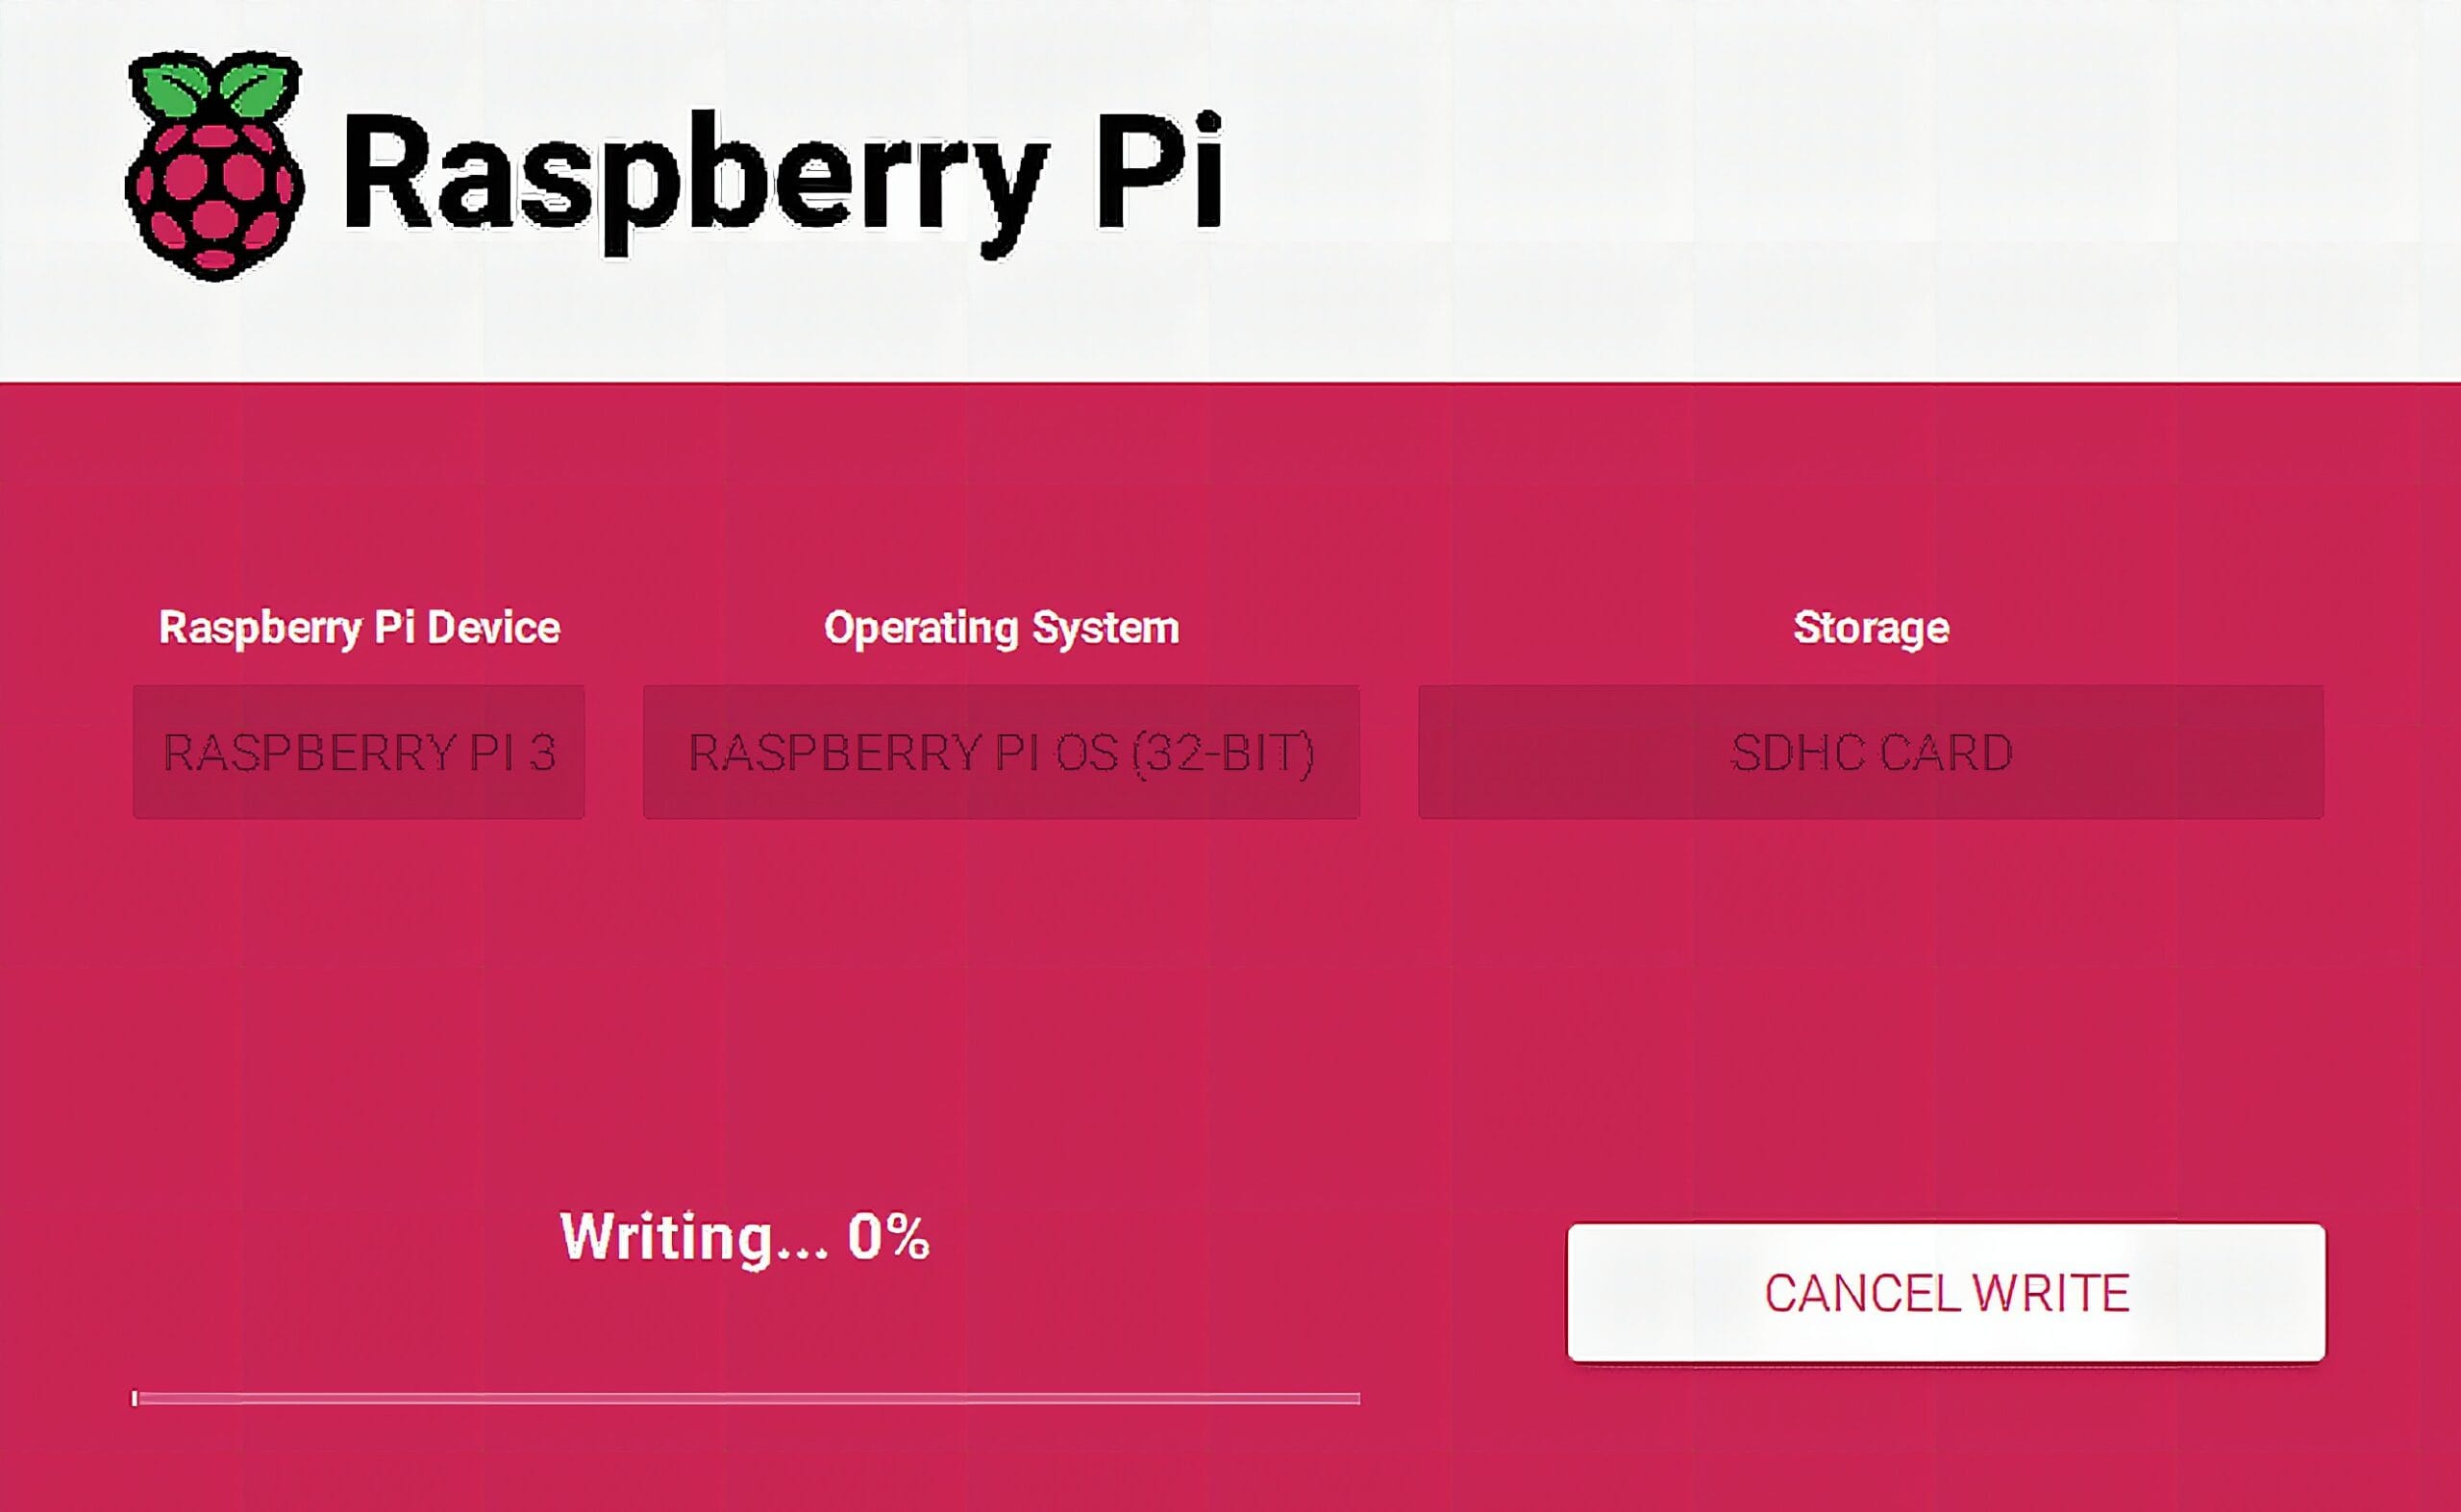
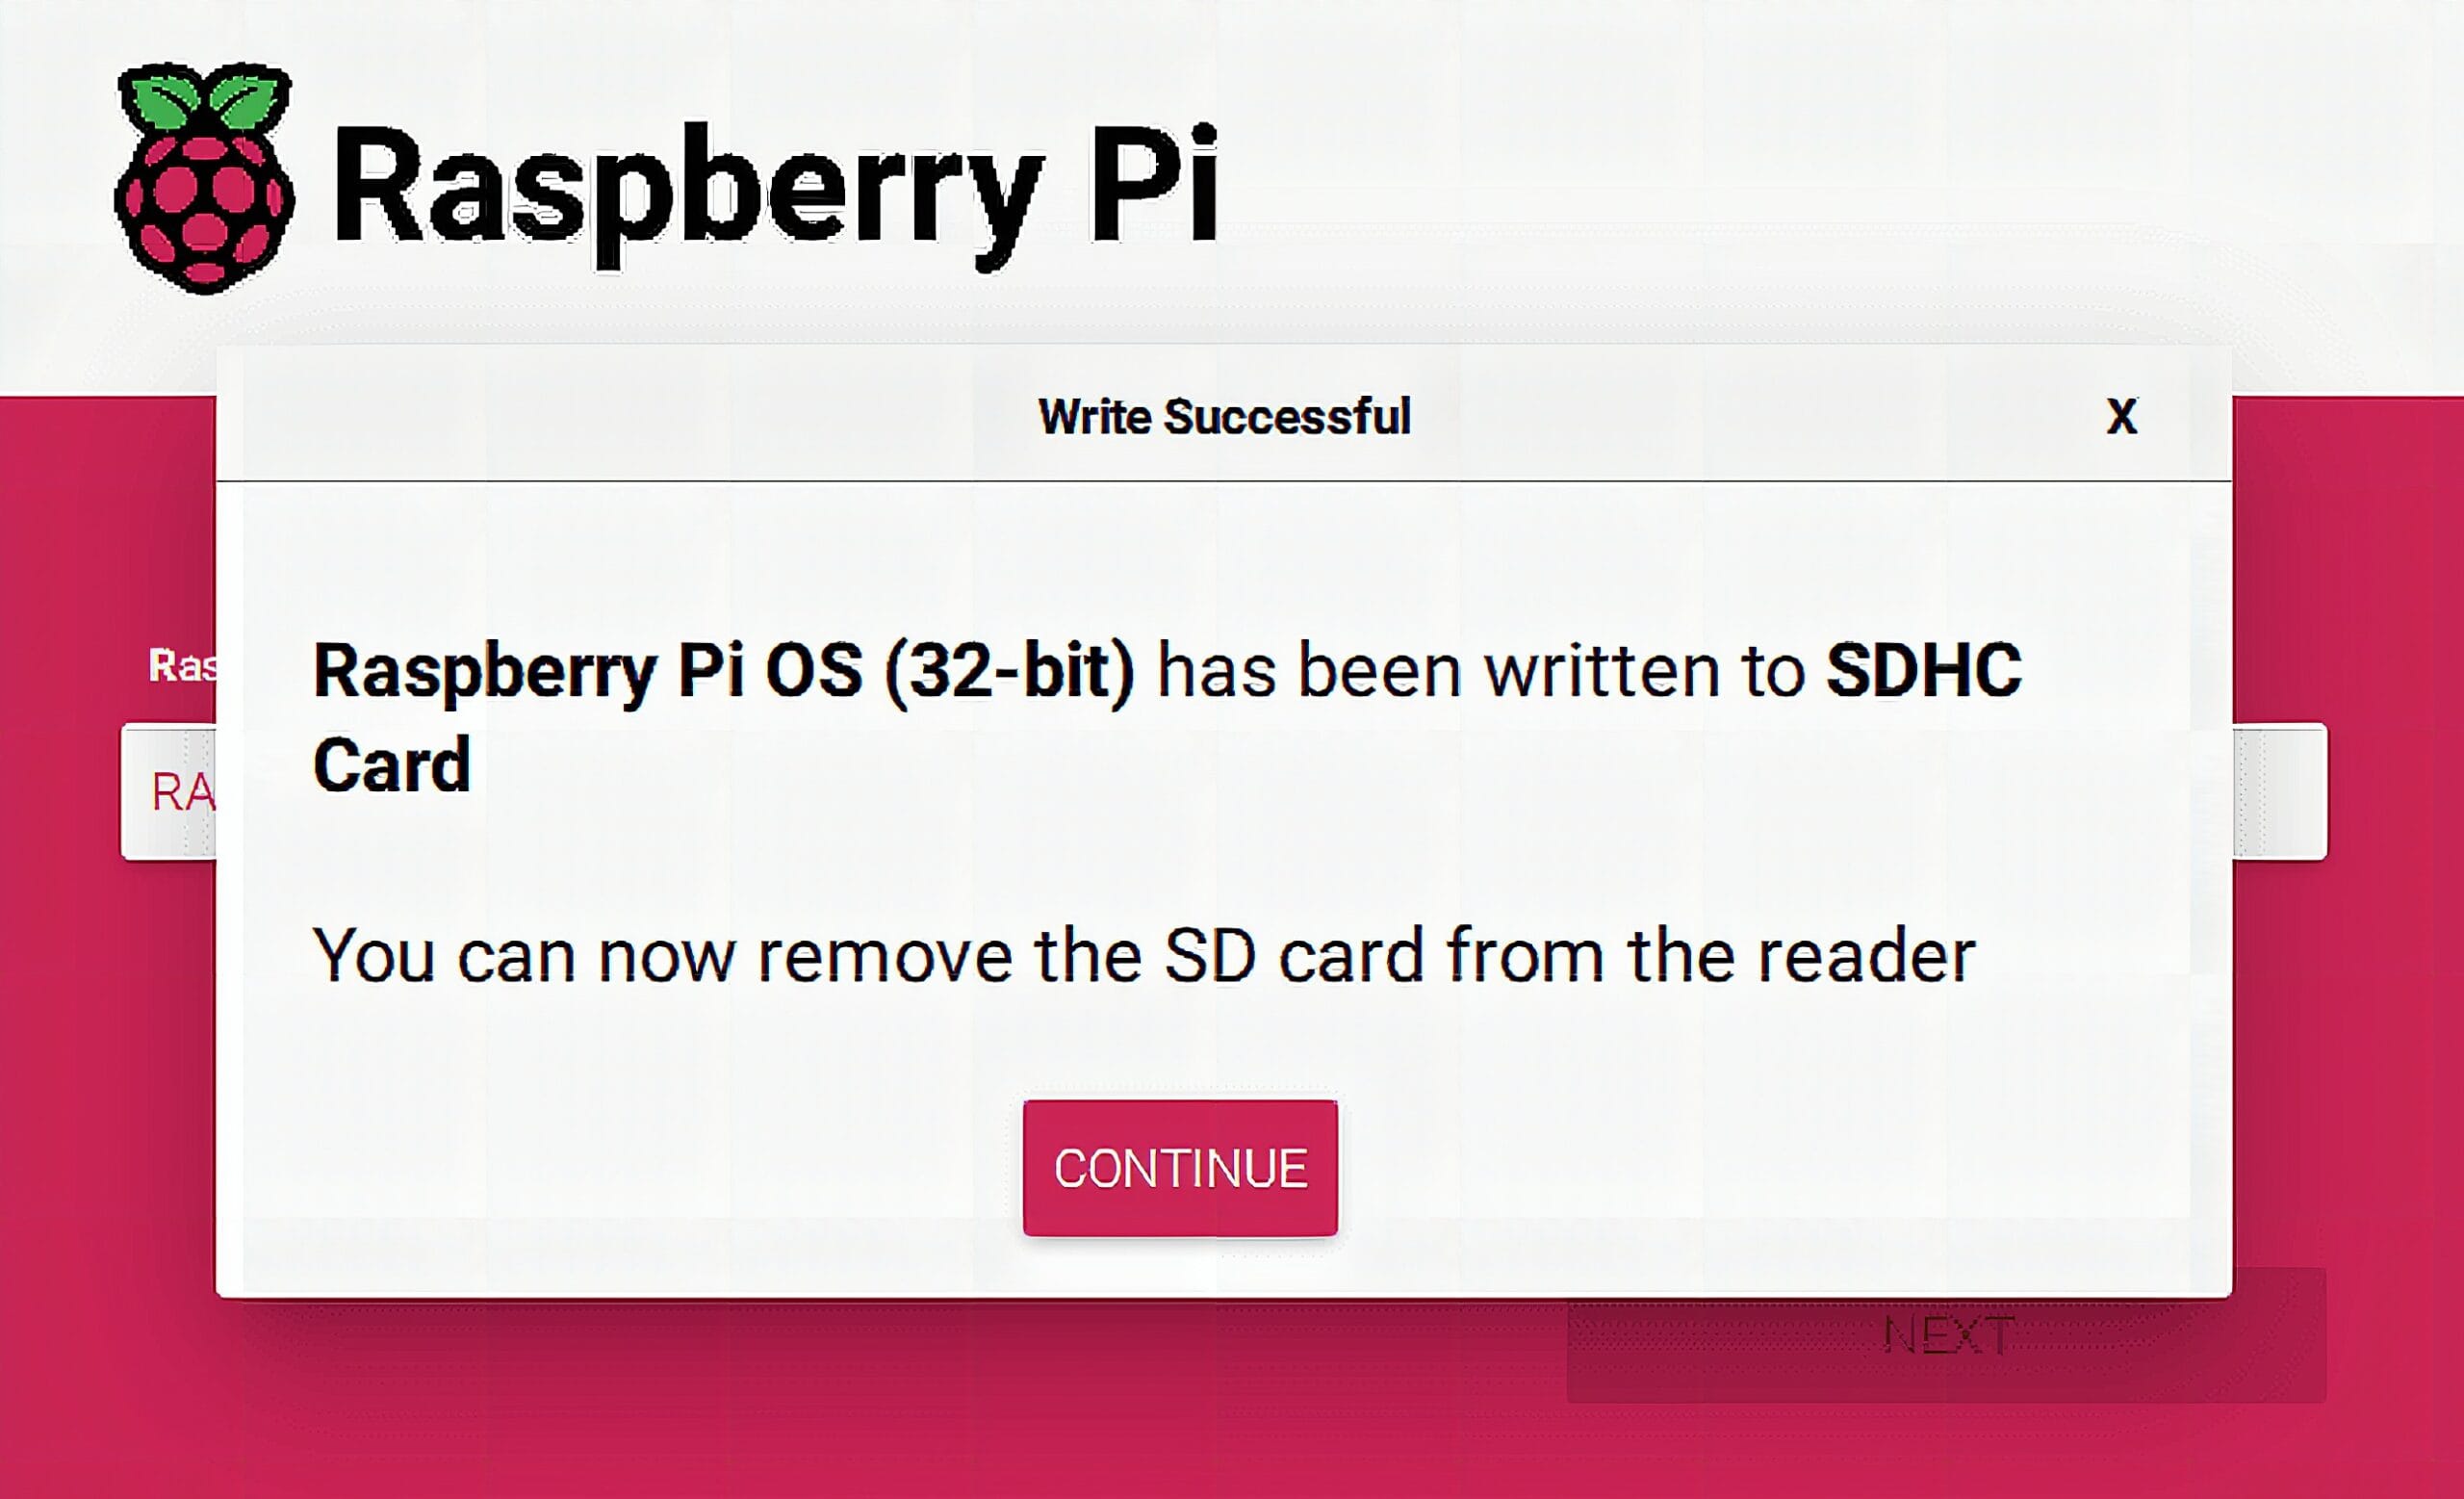
- Start by downloading the Raspberry Pi OS from the official Raspberry Pi website. Then, use the Raspberry Pi Imager to write the OS onto a microSD card. For best compatibility with the Raspberry Pi 3B+, choose the 32-bit version of the operating system.
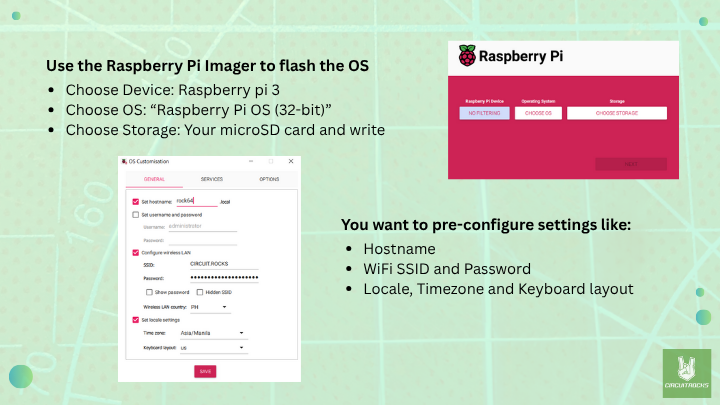
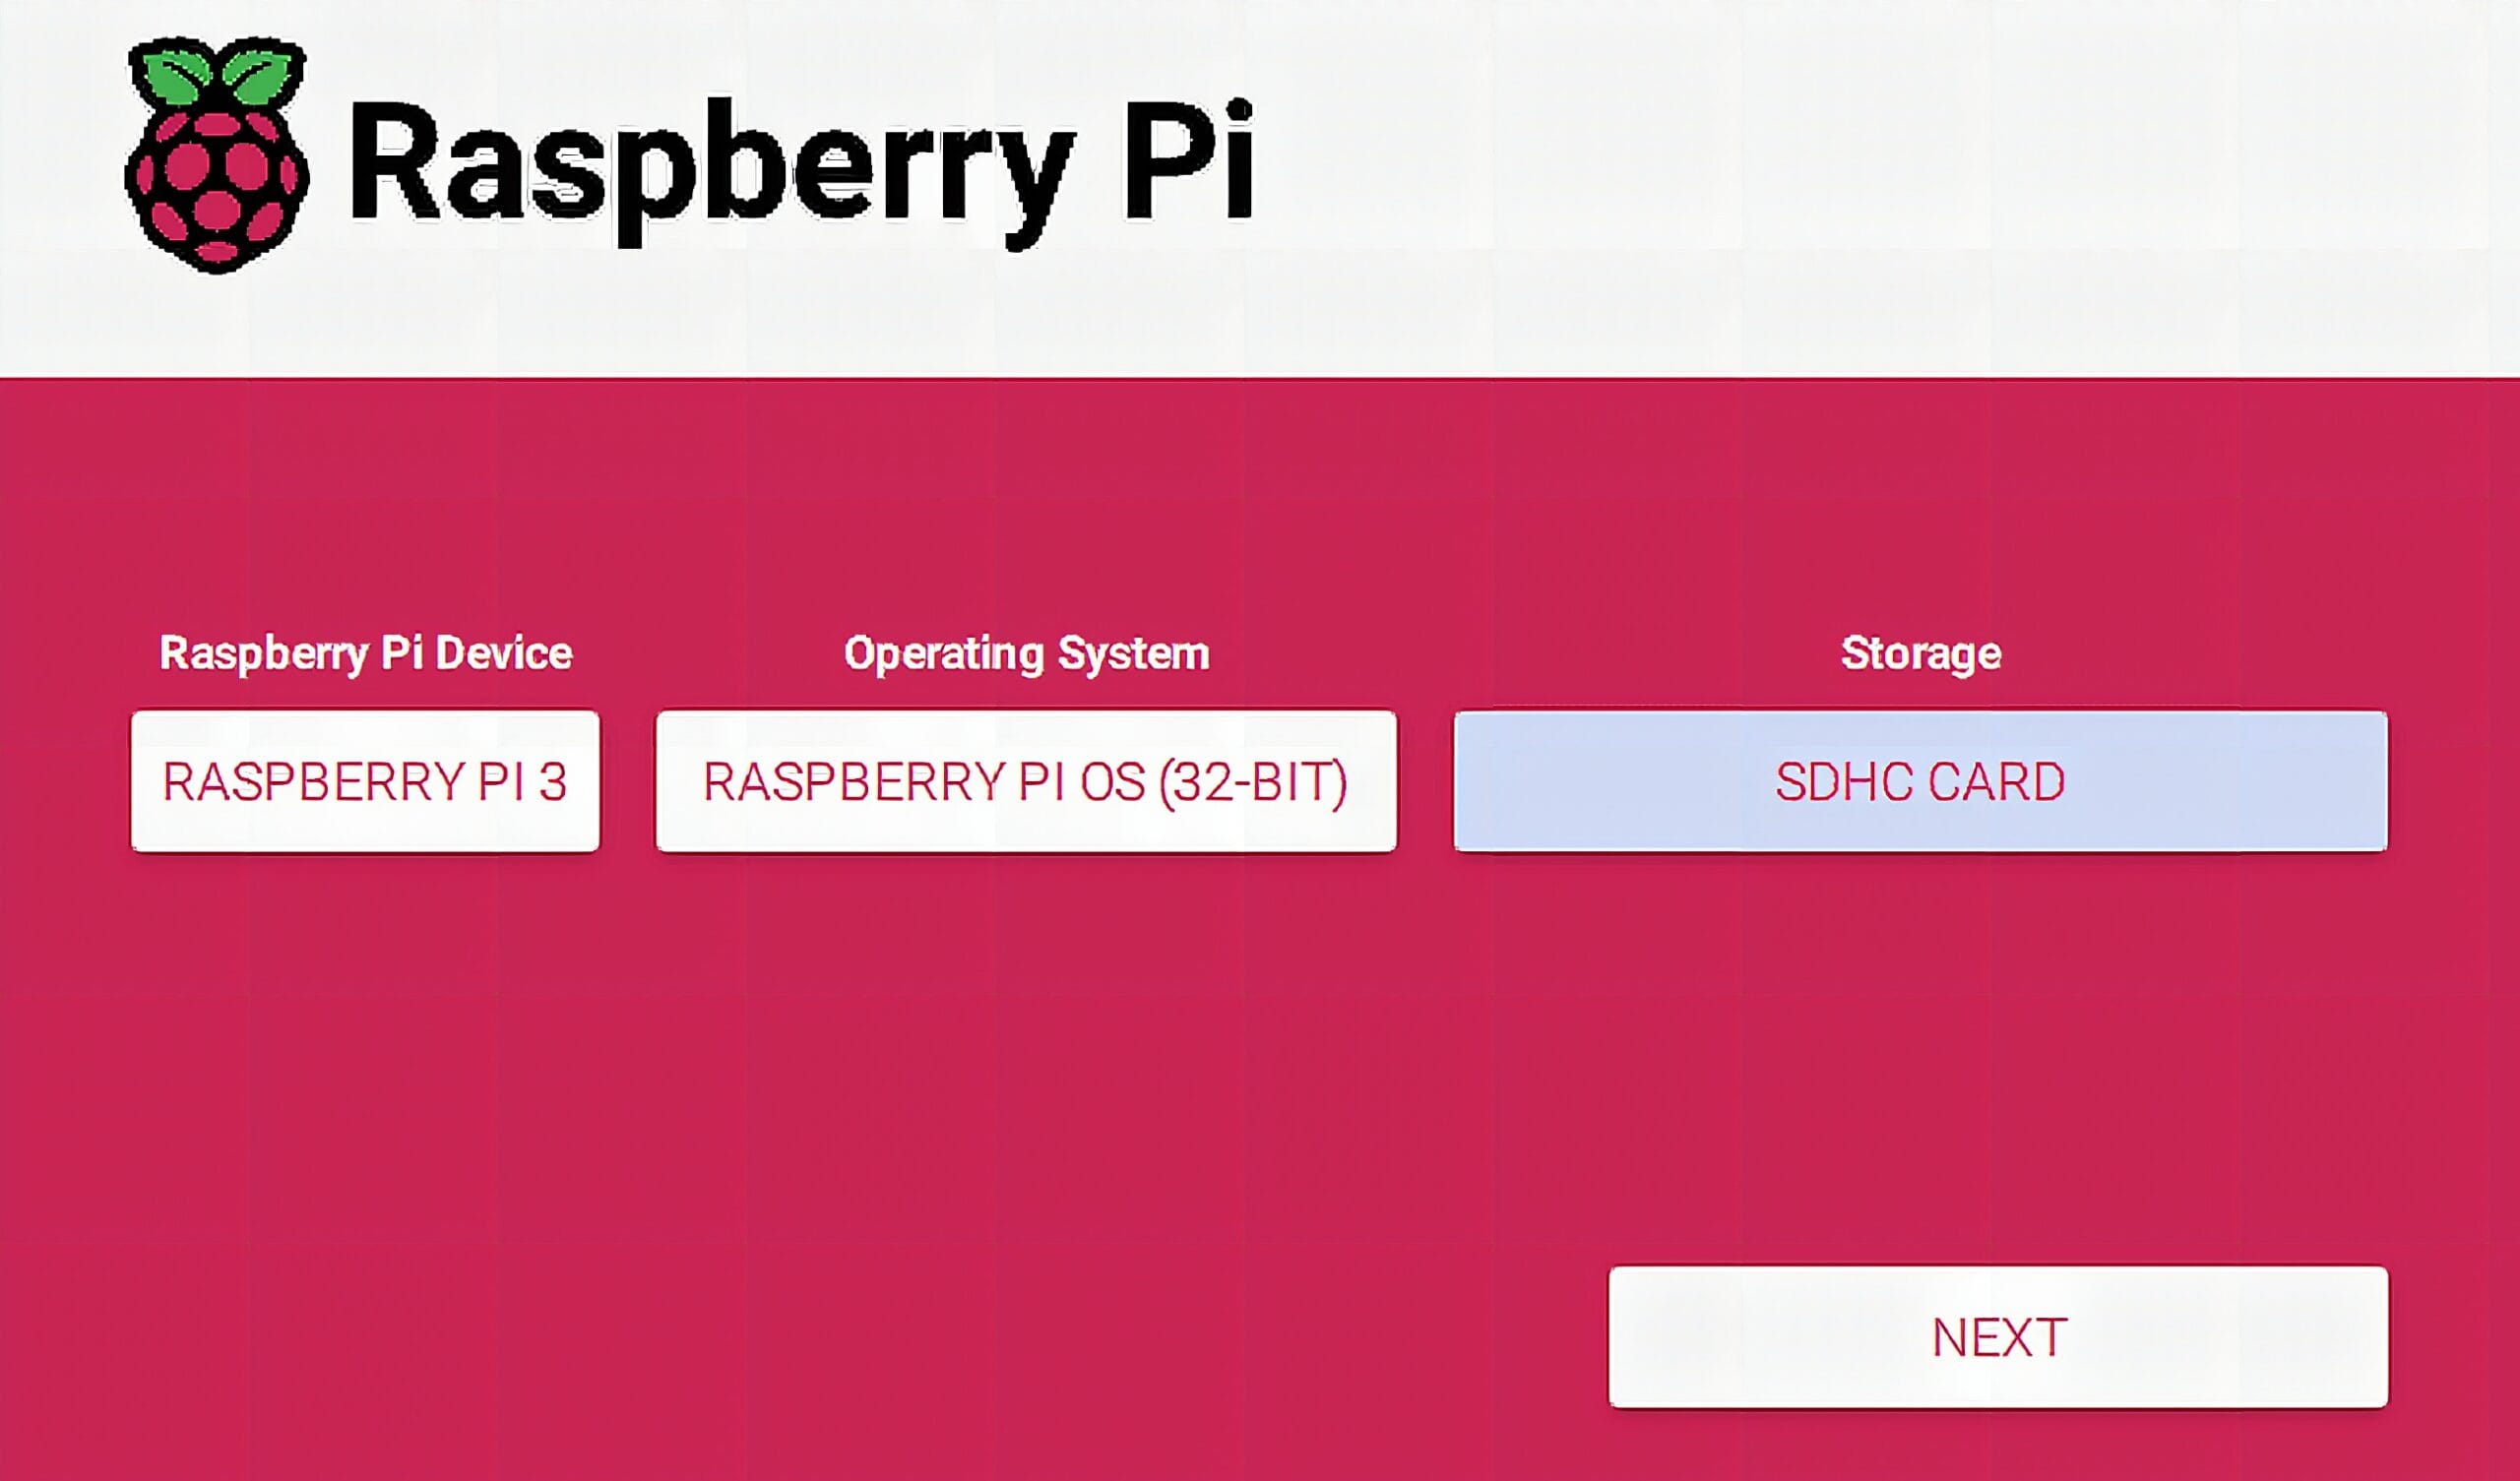
Choose “YES” if you want to pre-configure settings
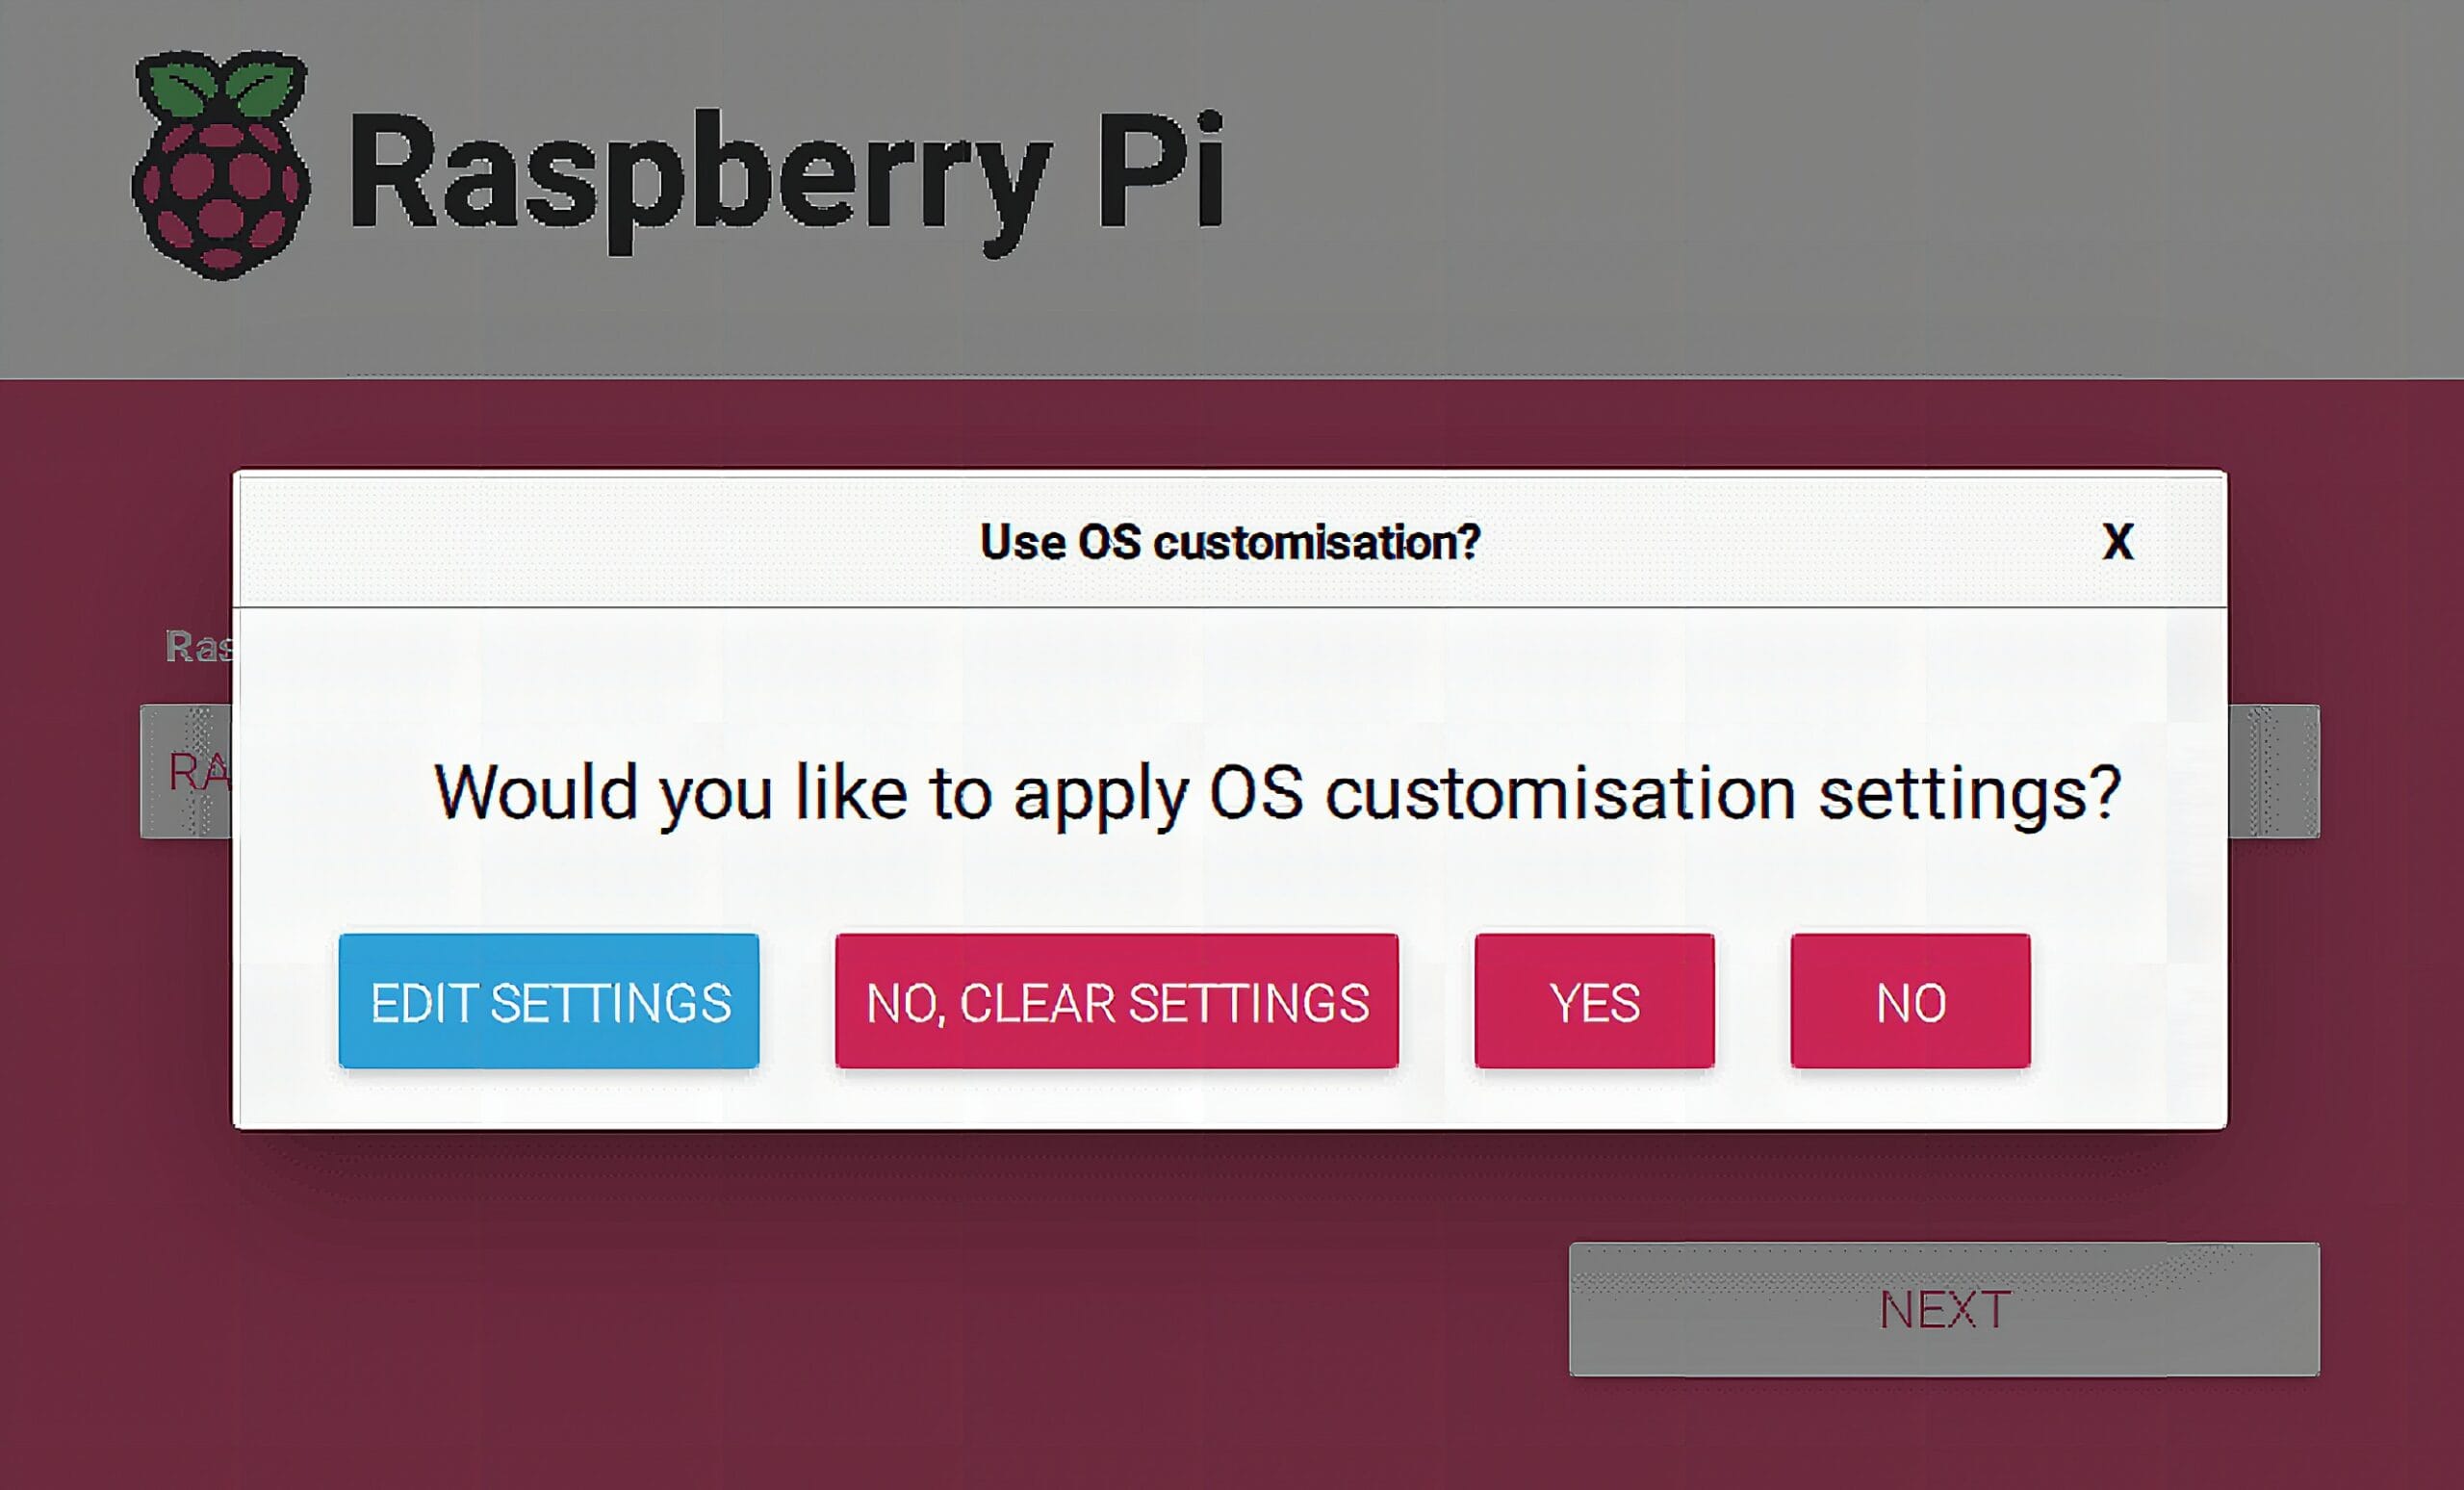
Choose “YES” if you are ready to erase all data on the SDHC Card and proceed with flashing the Raspberry Pi OS.

Step 2: Connect the LCD
- Insert the prepared microSD card into the Raspberry Pi.
- Connect:
- HDMI cable from Pi → LCD (video)
- USB cable from Pi → LCD (touch control)
- Power supply to Raspberry Pi
- Power on the Pi – you should see the boot screen on the LCD.
What These Settings Do:
hdmi_force_hotplug=1 → forces HDMI even if display not detected. config_hdmi_boost=7 → strengthens HDMI signal for stable output. hdmi_group=2 → sets mode to DMT (PC monitors). hdmi_mode=87 + hdmi_cvt → custom resolution (1920x1080 @ 60Hz). display_hdmi_rotate=1 → rotates display (optional).
To ensure the LCD works correctly, edit and the config.txt file and add the following lines:
# For more options and information see
# http://rptl.io/configtxt
# Some settings may impact device functionality. See link above for details # Uncomment some or all of these to enable the optional hardware interfaces
#dtparam=i2c_arm=on
#dtparam=i2s=on
#dtparam=spi=on # Enable audio (loads snd_bcm2835)
dtparam=audio=on # Additional overlays and parameters are documented
# /boot/firmware/overlays/README # Automatically load overlays for detected cameras
camera_auto_detect=1 # Automatically load overlays for detected DSI displays
display_auto_detect=1 # Automatically load initramfs files, if found
auto_initramfs=1 # Enable DRM VC4 V3D driver
dtoverlay=vc4-kms-v3d
max_framebuffers=2 # Don't have the firmware create an initial video= setting in cmdline.txt.
# Use the kernel's default instead.
disable_fw_kms_setup=1 # Disable compensation for displays with overscan
disable_overscan=1 # Run as fast as firmware / board allows
arm_boost=1 [cm4]
# Enable host mode on the 2711 built-in XHCI USB controller.
# This line should be removed if the legacy DWC2 controller is required
# (e.g. for USB device mode) or if USB support is not required.
otg_mode=1 [cm5]
dtoverlay=dwc2,dr_mode=host [all] hdmi_force_hotplug=1
config_hdmi_boost=7
hdmi_group=2
hdmi_mode=87
hdmi_cvt 1920 1080 60 6 0 0 0
display_hdmi_rotate=1
Save the file and reboot the Pi.
How It Works
- HDMI carries video signals from the Raspberry Pi to the LCD.
- USB provides power for the touch controller and enables touchscreen input.
- The Pi reads the
config.txtfile at boot to configure resolution, rotation, and signal strength.
Troubleshooting
If you encounter issues during setup, here are common problems and solutions:
- No Display on the LCD
- Check that the HDMI cable is firmly connected to both the Pi and the LCD.
- Make sure
hdmi_force_hotplug=1is added to theconfig.txtfile. - Verify your power supply (the Pi and LCD both require stable 5V, at least 2.5A).
- Try another HDMI cable or port on the Pi.
- Display Resolution is Wrong / Screen is Cut Off
Edit the config.txt and confirm these lines are present:
hdmi_group=2
hdmi_mode=87
hdmi_cvt=1920 1080 60 6 0 0 0
If the display edges are clipped, add:
disable_overscan=1
- Touchscreen Not Working
- Ensure the USB cable is connected (video uses HDMI, touch uses USB).
- Try a different USB port on the Pi.
- Run
lsusbin the terminal to confirm the Pi detects the touchscreen. - If not detected, reboot and recheck connections.
- Pi Doesn’t Boot’
- Re-flash the microSD card with Raspberry Pi Imager.
- Use the 32-bit Raspberry Pi OS for best compatibility.
- Double-check that the SD card is not write-protected or corrupted.
- Screen Flickers or Shows “No Signal”
Increase HDMI signal strength in config.txt:
config_hdmi_boost=7
Try lowering the resolution temporarily to confirm stability.
Ensure the HDMI cable is of good quality (cheap cables may cause signal loss).
Frequently Asked Questions
What does this Ultimate Guide: Raspberry Pi 3B+ and 13.3 HDMI LCD tutorial cover?
Want a reliable Pi that just works with touchscreens and everyday projects? The Raspberry Pi 3B+ is a compact and powerful single-board computer with built-in Wi-Fi, Bluetooth, and full-size HDMI support.
Which Raspberry Pi model fits the Ultimate Guide: Raspberry Pi 3B+ and 13.3 HDMI LCD project?
Pi 4 (4GB) or Pi 5 for desktop apps and AI workloads. Pi Zero 2 W is enough for headless / sensor builds. Pi 3 B+ works but is slower for camera or ML.
How do I auto-start the Ultimate Guide: Raspberry Pi 3B+ and 13.3 HDMI LCD script on boot?
Use systemd. Create /etc/systemd/system/myproject.service with ExecStart=/usr/bin/python3 /home/pi/script.py and Restart=always. sudo systemctl enable myproject.