
Looking for a compact light you can actually build and maintain yourself? This DIY 3D LED Flashlight delivers a bright, pocket-friendly beam using nine 5 mm white LEDs in a simple, beginner-safe circuit.
The 3D-printed shell keeps the build sturdy yet light, with room for a basic on/off switch and coin-cell power. The layout is intentionally straightforward so you can assemble, test, and use it the same day.
Want it to match your style? Swap front caps, add a diffuser, or pick a different color temperature. The design is modular, so cosmetic changes don’t affect the electronics – perfect for learning while you personalize.
This project also connects with its colorful sibling, the 3D RGB Flashlight, which works on the same concept but allows you to switch between red, green, or blue LEDs. Together, they show how one simple idea can branch into different versions – whether you prefer a bright white torch or a playful RGB twist, both capture the spirit of making technology your own.
Why Build a DIY 3D LED Flashlight?
Store-bought flashlights are fixed; this one is yours to tune – from the look of the case to the beam character. You’ll end up with a tool that fits your pocket and your preferences.
It’s also repairable and teachable. Every part is visible and replaceable, so you learn what fails and how to fix it instead of throwing the whole thing away.
Finally, it’s cost-aware and scalable. Start basic, then upgrade optics, batteries, or controls when you’re ready – no need to buy a new light each time.
What You’ll Learn
By building this DIY flashlight, you’ll:
- Understand the basics of parallel LED wiring.
- Learn how to combine electronics with 3D printing.
- Create a practical tool while gaining hands-on experience.
This project is designed for beginners, but even advanced makers will find it fun to customize and upgrade.
What You’ll Need:
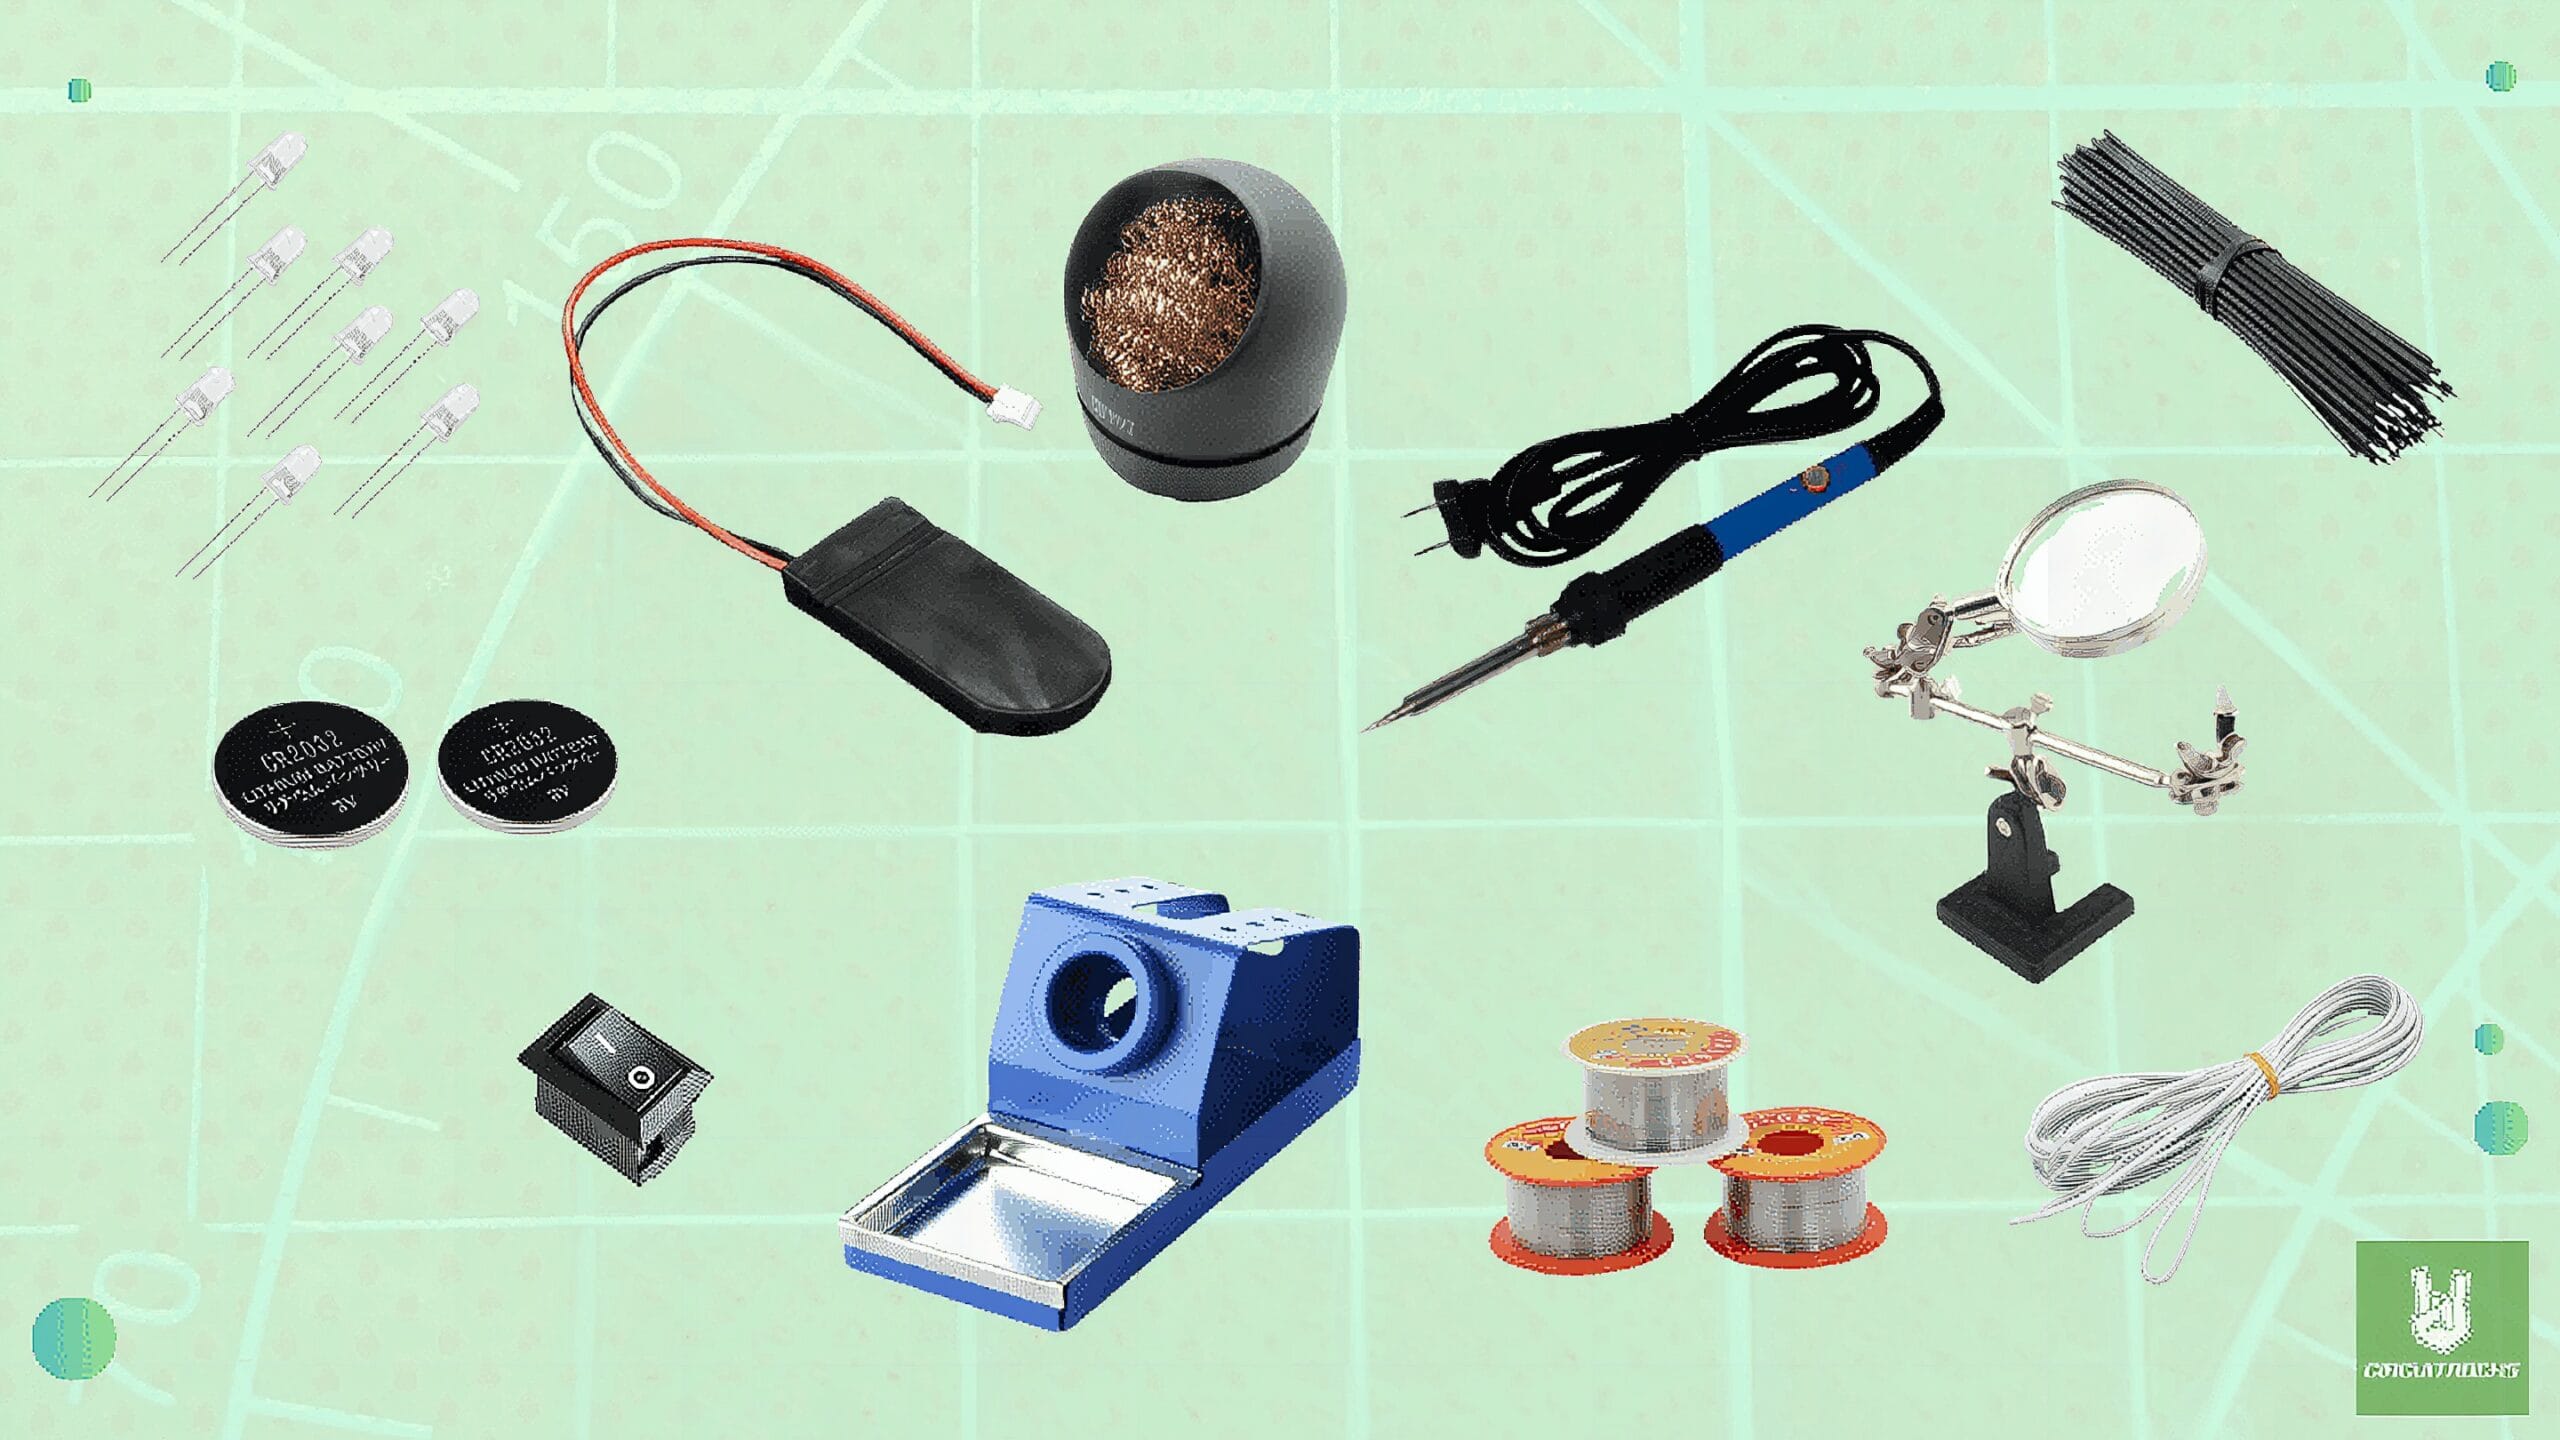
Components
Circuit Diagram:
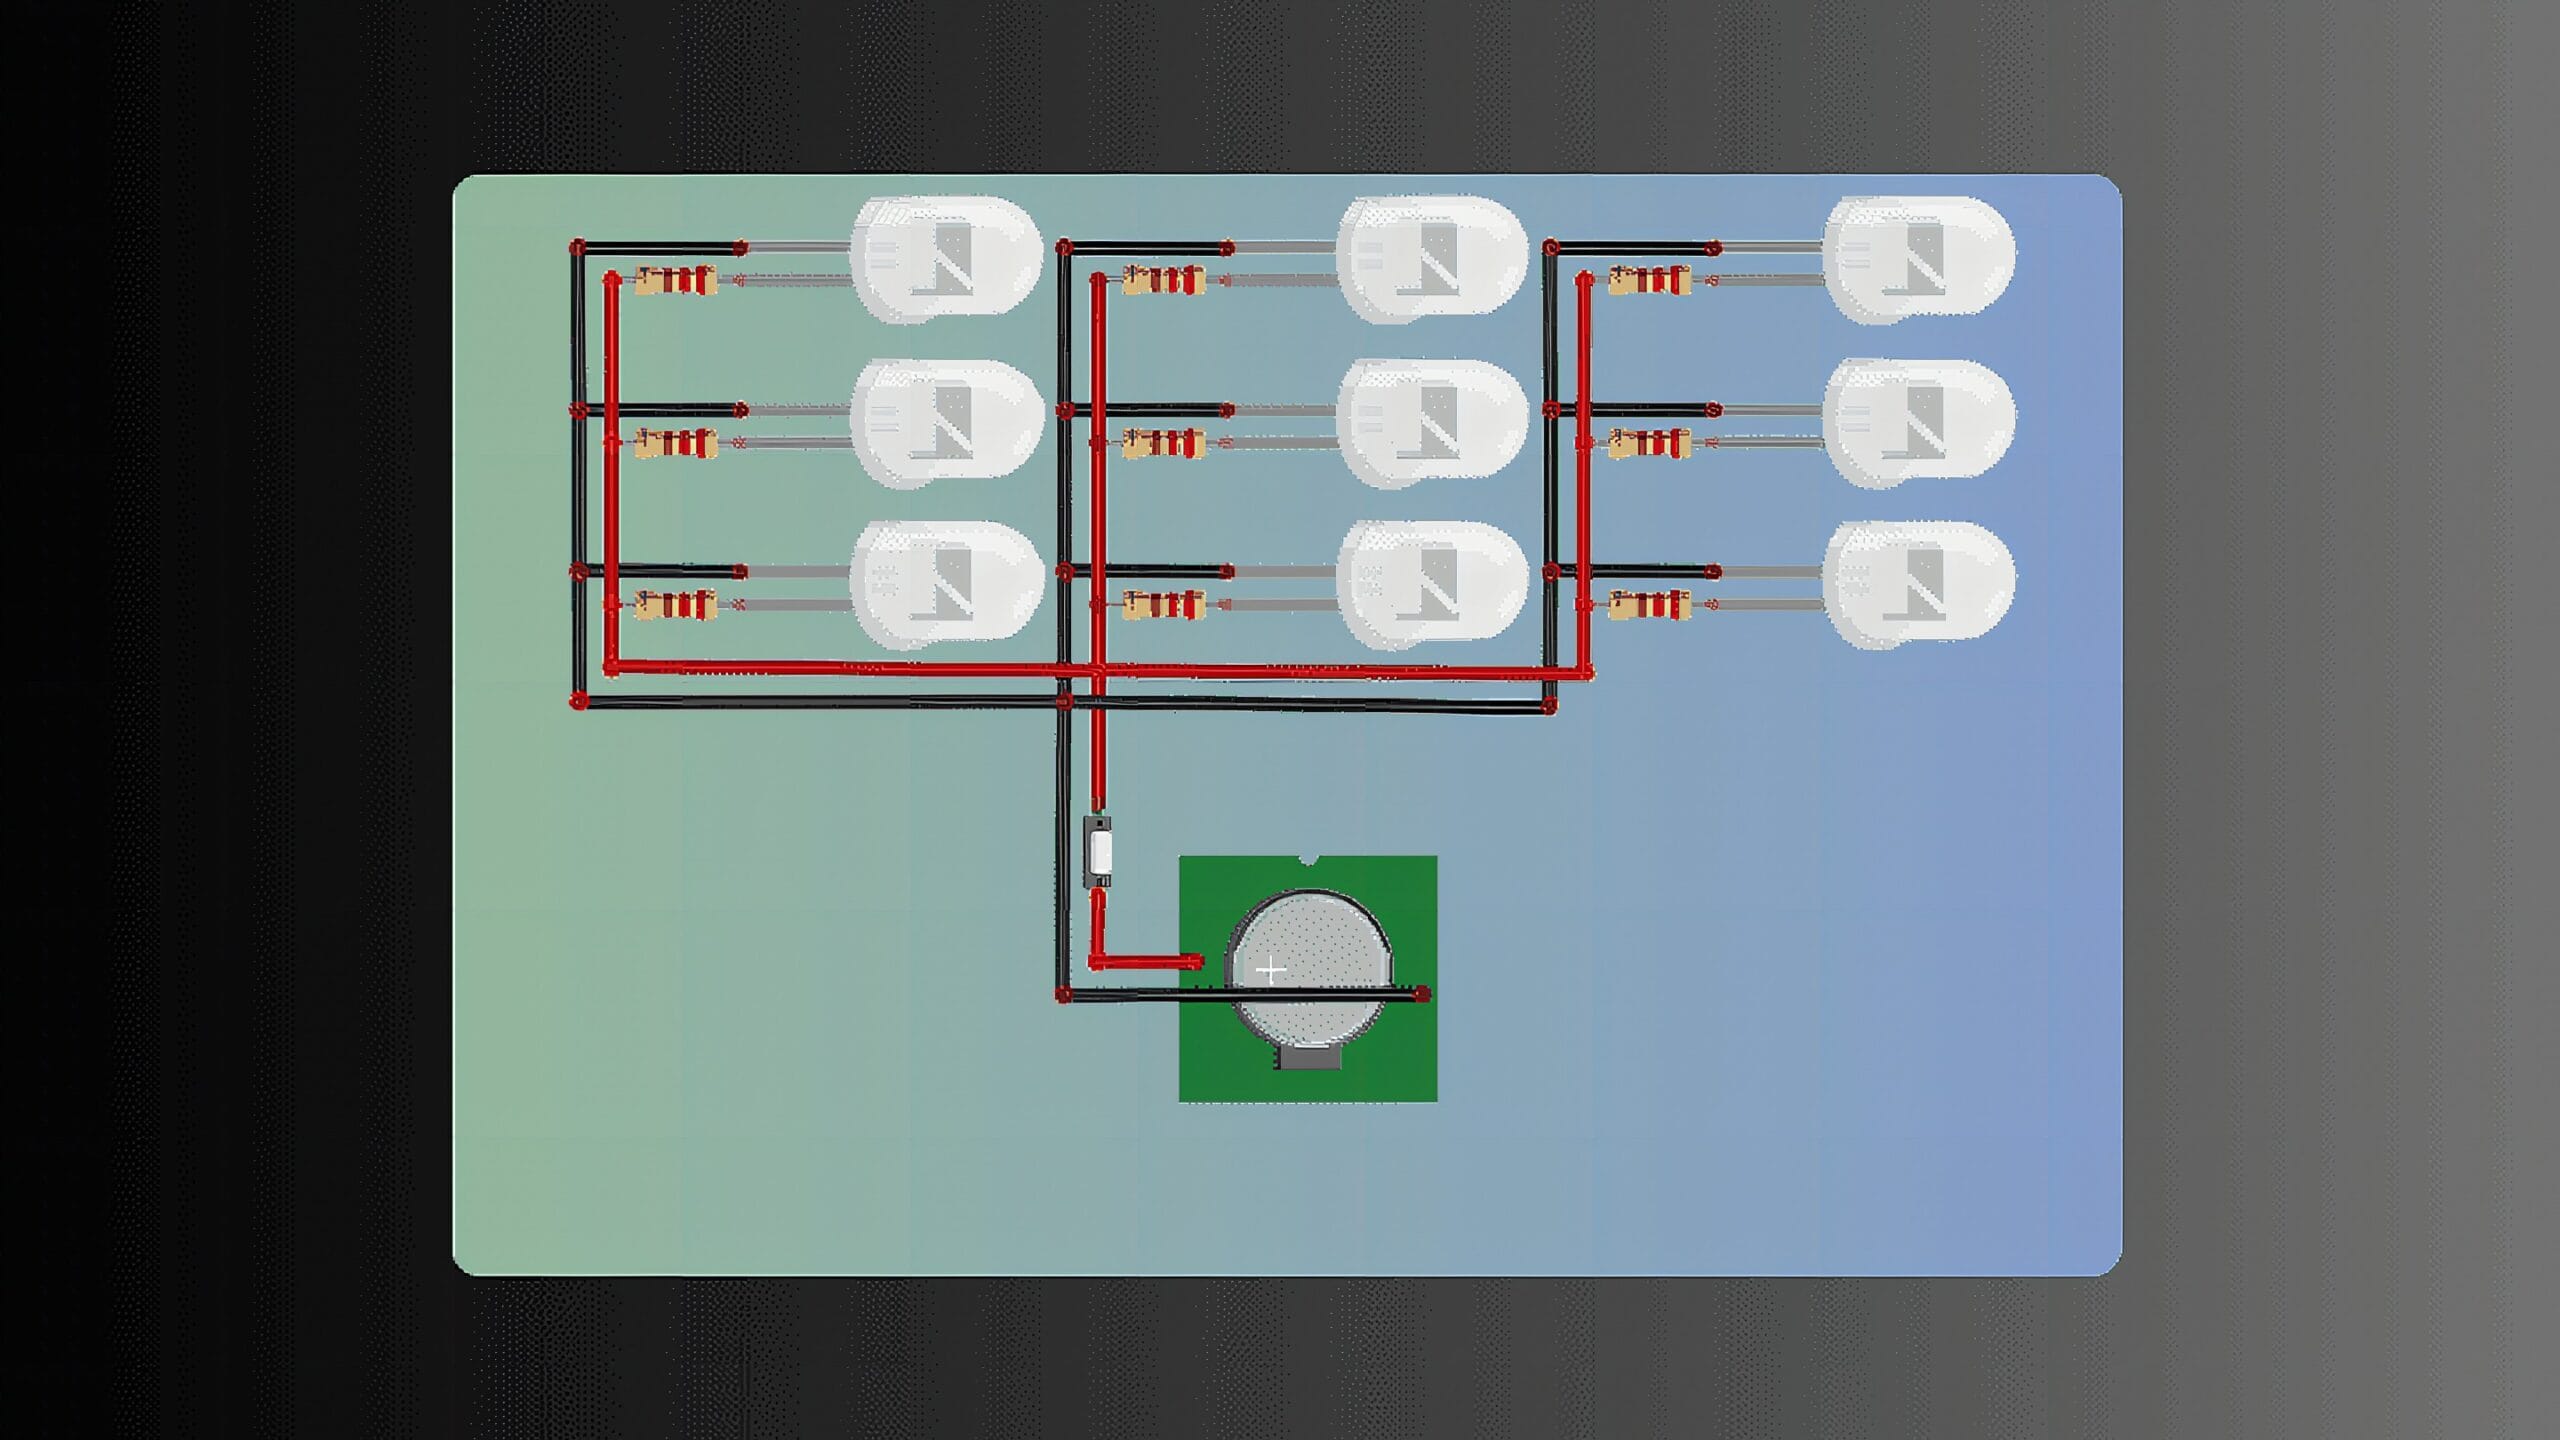
How it Works?
Power from two coin cells in series supplies about 6 V to a simple on/off switch and the LED board. When you press the switch, current flows to the nine LEDs wired in parallel, so each LED sees the same supply voltage and lights simultaneously.
With coin cells, the internal resistance limits current enough for a basic build and short duty cycles. If you switch to stronger sources (AA/AAA packs or a rechargeable Li-ion), add a series resistor (or one per LED) sized for your target current to prevent over-drive and heat.
Because the LEDs are parallel, the flashlight is fault-tolerant: if one LED fails open, the others stay lit. Thermal paths are short, and the printed shell keeps parts in place while allowing airflow around the board.
Applications and Extensions
Once you’ve nailed the basic build, this flashlight can grow with your needs: add a lanyard hole or a magnetized tail for hands-free mounting; click in a snap-fit diffuser for soft, wide floodlight; or swap to a TIR lens/mini reflector for a tighter spot – great for camping, tool bags, and emergency kits. For longer runtimes, switch to rechargeables and size a proper current-limiting network for your LEDs, then introduce a PWM dimmer or multi-mode driver (low/med/high) for smarter power use. If you want light weather protection, redesign the front cap with an O-ring groove and a clear window; if you want flair, build a sibling version with RGB LEDs and a simple switch matrix for color selection. Each upgrade layers onto the same core design, turning a weekend project into a polished everyday tool.
Watch the Full Demo Video
Here’s the 3D LED Flashlight in action.
Frequently Asked Questions
What does this DIY 3D LED Flashlight | Easy Build with White LEDs tutorial cover?
Looking for a compact light you can actually build and maintain yourself? This DIY 3D LED Flashlight delivers a bright, pocket-friendly beam using nine 5 mm white LEDs in a simple, beginner-safe circuit.
What filament works best for the DIY 3D LED Flashlight | Easy Build with White LEDs build?
PLA for cosmetic/indoor parts (cheap, easy to print). PETG for parts that flex or live near heat. ABS only if you have an enclosure — it warps in open air.
What slicer settings work for this build?
0.2mm layer height, 20% gyroid infill, 3 perimeters, supports only where the model needs them. PLA: 200°C nozzle, 60°C bed. 50-60 mm/s on most desktop FDMs.