
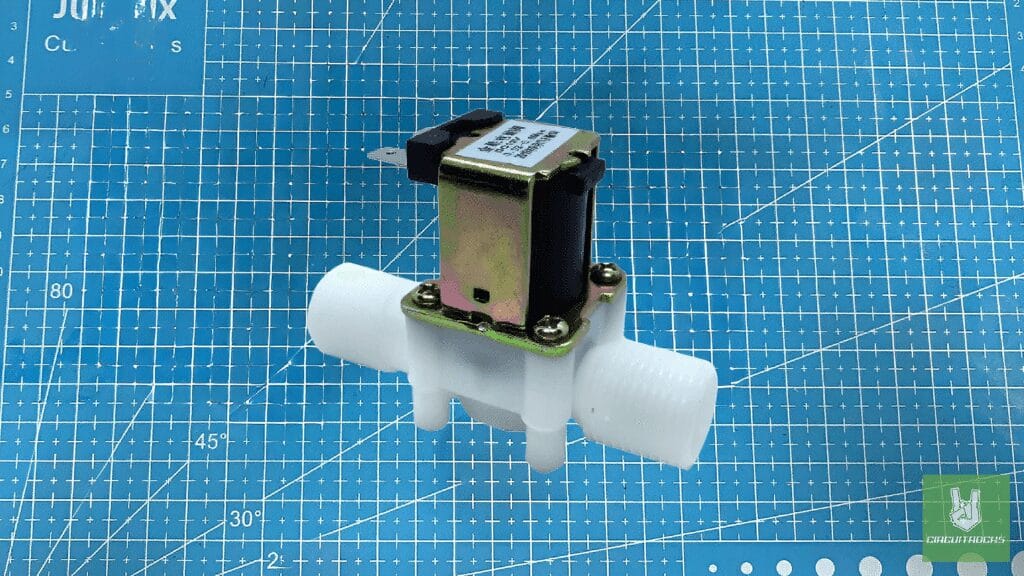
Have you ever wondered how appliances like washing machines or automatic watering systems manage the flow of water with such precision? The secret lies in the solenoid valve. Acting like a switch for water, it uses a 12V coil and a plunger mechanism to instantly open or close the flow path.
Solenoid water valves are the quick, reliable way to start and stop water flow with electricity. Instead of spinning like a pump, they act like an on/off gate that opens or closes the pipe almost instantly. One small electrical signal can control a much larger flow of water.
A typical beginner valve is 12 V DC, normally-closed (NC). “Normally closed” means it stays shut with no power, so the default state is safe – no water passes unless you tell it to. That makes it ideal for projects that need predictable behavior during power loss.
Because control is electrical, you can automate it easily with timers, sensors, or a microcontroller. From garden irrigation to appliance repair and DIY smart home builds, a solenoid valve is often the simplest path from code to real-world water control.
Why Use a Solenoid Water Valve?
Use a solenoid valve when you need fast, repeatable on/off control. It snaps open when powered and snaps closed when power is cut, so timing is precise – great for filling tanks, flushing lines, or metering fixed doses.
Compared to manual valves, it’s remote-controllable and easy to integrate with existing electronics. Compared to pumps, it doesn’t create flow on its own; instead, it controls flow already available from gravity or pressure, which keeps the system simple.
They’re also compact and affordable. A single valve can serve many roles across automation: zone control in irrigation, safety shutoff in leak-detection systems, or just a clean way to turn water on and off from code.
Why Look Inside a Solenoid Valve?
Moreover, taking apart a solenoid valve shows how much engineering is packed into a small device. Each piece plays a vital role in controlling the flow:
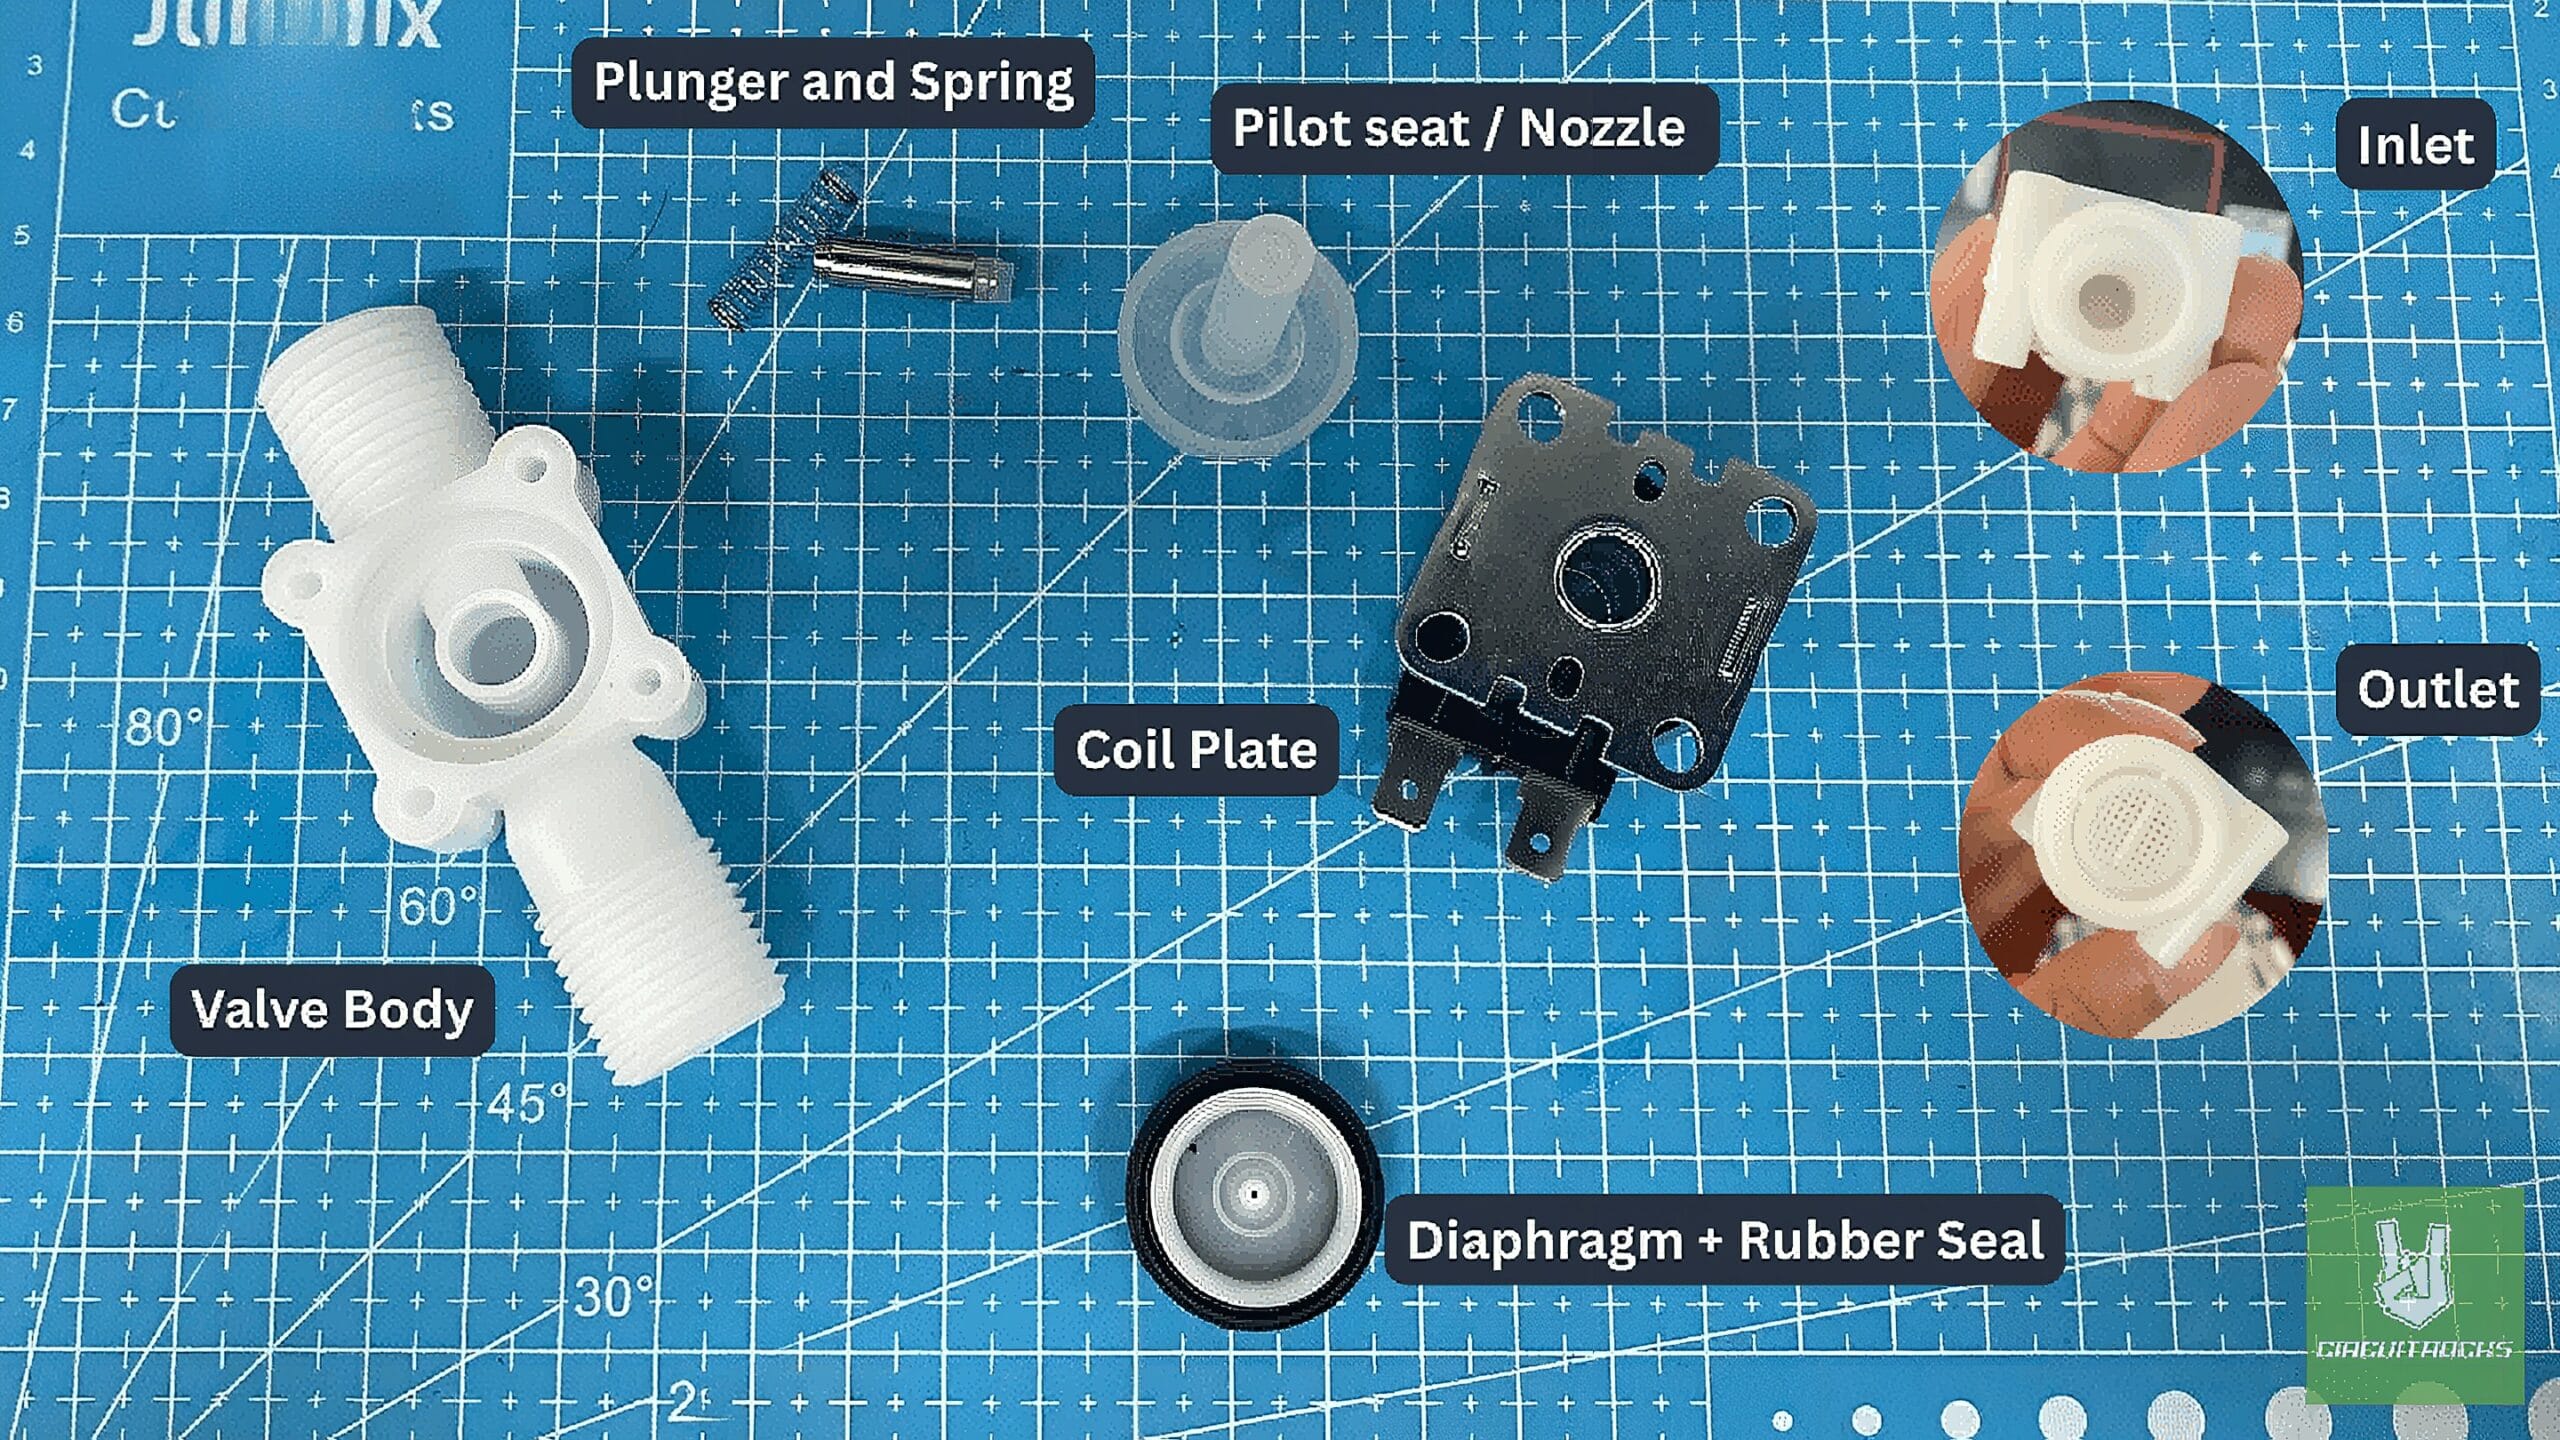
- Valve body (white, two threaded ports): houses the passages; shows flow direction.
- Diaphragm + rubber seal (black disk): seals the main port; lifts to allow flow.
- Pilot seat/nozzle (clear plastic): small orifice the plunger controls.
- Plunger: moves when powered to open the pilot.
- Spring: pushes the plunger closed when power is off.
- Coil Plate: creates the magnetic pull that actuates the plunger.
By examining these parts, you see how electronics and mechanics meet in a compact form. It’s a perfect example of how small-scale engineering supports everyday convenience.
What You’ll Need:
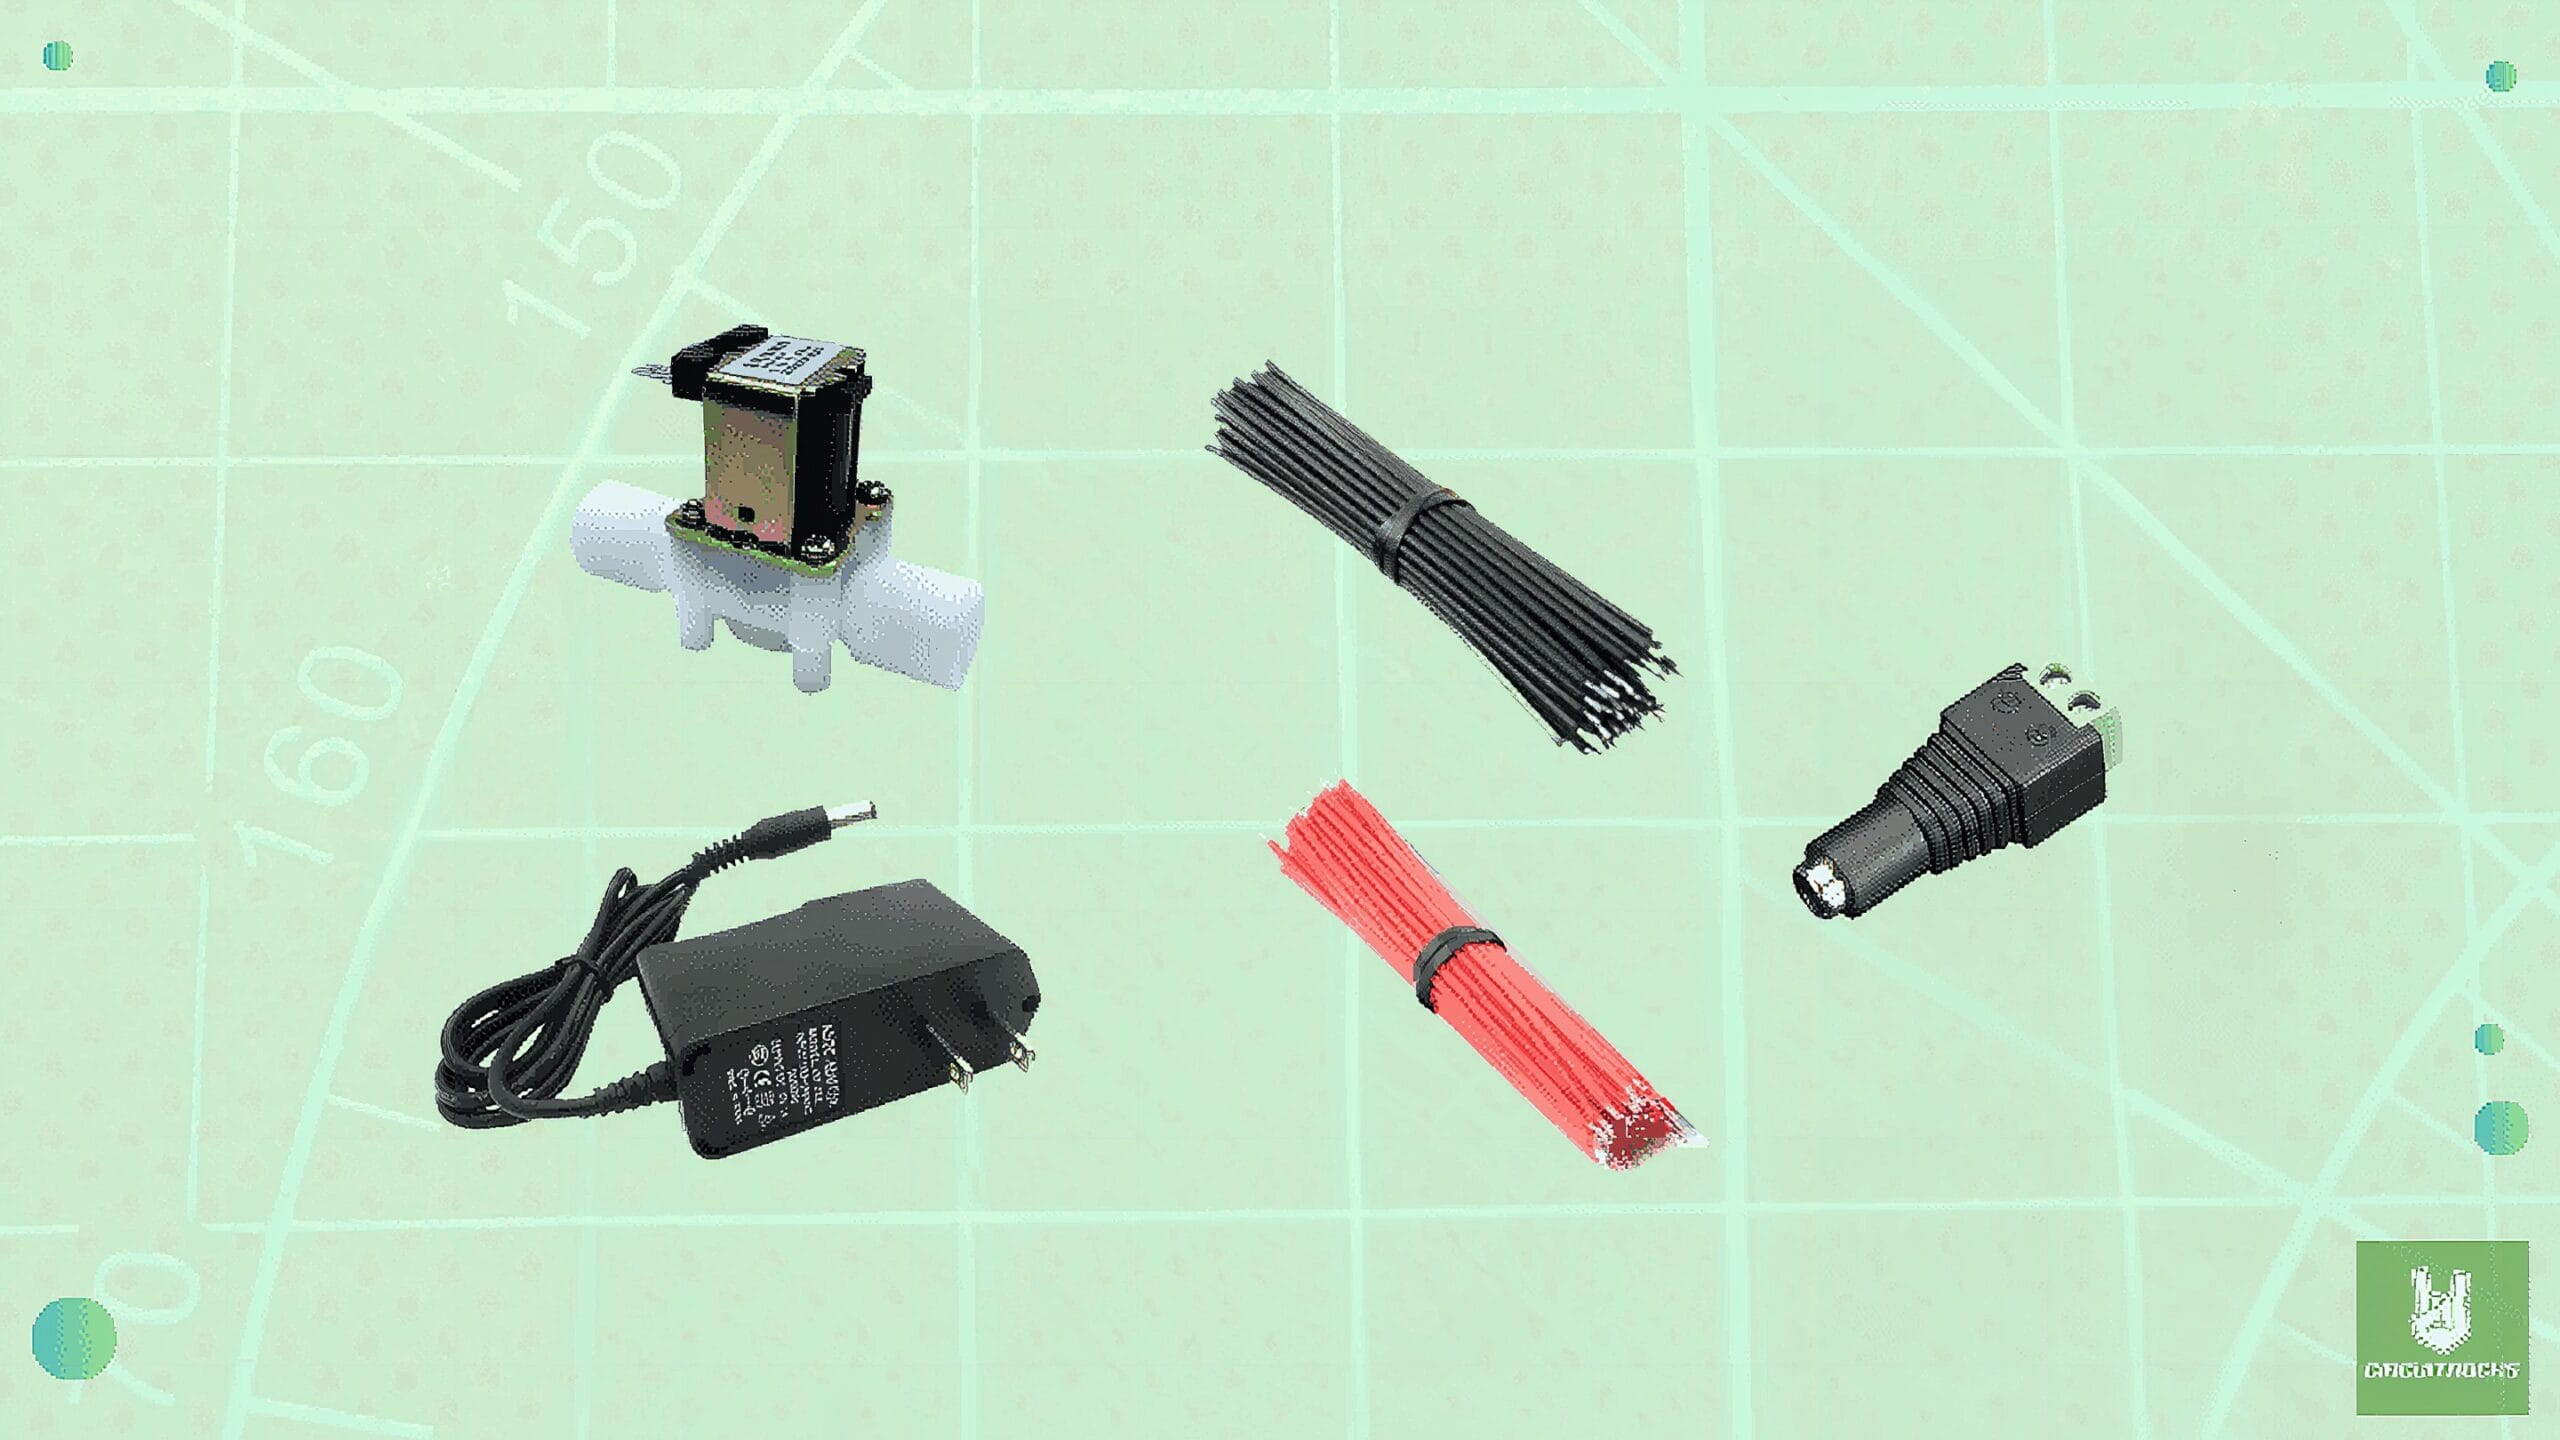
For this setup we used a 12 V normally-closed solenoid valve, a 12 V 1 A DC adapter, a female DC plug terminal to break out the adapter leads, and two tin-plated hookup wires – red for +12 V and black for ground – for clean, low-resistance connections.
Components
How It Works?
Inside the body are a coil, plunger, spring, and diaphragm/seat. With no power, the spring presses the plunger onto the seat, sealing the passage. That’s the NC (closed) state – water cannot pass from inlet to outlet.
Apply 12 V and the coil creates a magnetic field that lifts the plunger. Lifting the plunger releases the diaphragm seal, opening the path so water flows inlet → outlet. Remove power, the field collapses, the spring pushes the plunger down, and the valve closes instantly.
Most hobby valves are pilot-assisted and prefer a minimum inlet pressure and the correct flow direction (follow the arrow on the body). If you need operation with very low pressure or zero differential, look for a direct-acting type instead.
Applications and Extensions
Start simple: automate a plant-watering zone, fill a small reservoir on a timer, or add a leak-response shutoff using a moisture sensor. In each case, the valve just opens or closes – no tricky flow control needed.
Level up with control logic: use a float switch to maintain tank level, a flow sensor to confirm delivery, or multiple valves for zoning. Add delays, lockouts, and error alerts so your system behaves safely under faults.
For robustness, move toward outdoor-ready enclosures, proper cable glands, and strain relief. Add a manual bypass for maintenance, a check valve to prevent backflow, and a sediment filter to protect the diaphragm – small upgrades that greatly extend valve life.
Frequently Asked Questions
What does this Getting Started with Solenoid Valve tutorial cover?
Have you ever wondered how appliances like washing machines or automatic watering systems manage the flow of water with such precision? The secret lies in the solenoid valve.
What's the working voltage of the Getting Started with Solenoid Valve?
Check the Sample Code section for the exact pinout — most maker-grade sensors run on 3.3V or 5V. Wire VCC to the matching rail, GND common with your MCU, data to a digital or analog pin.
Why does the Getting Started with Solenoid Valve read garbage or saturated values?
Three usual causes: wrong voltage rail, missing pull-up resistor on I2C lines (4.7k–10k to VCC), or a floating data pin. Double-check wiring against the diagram, then probe with a multimeter.