
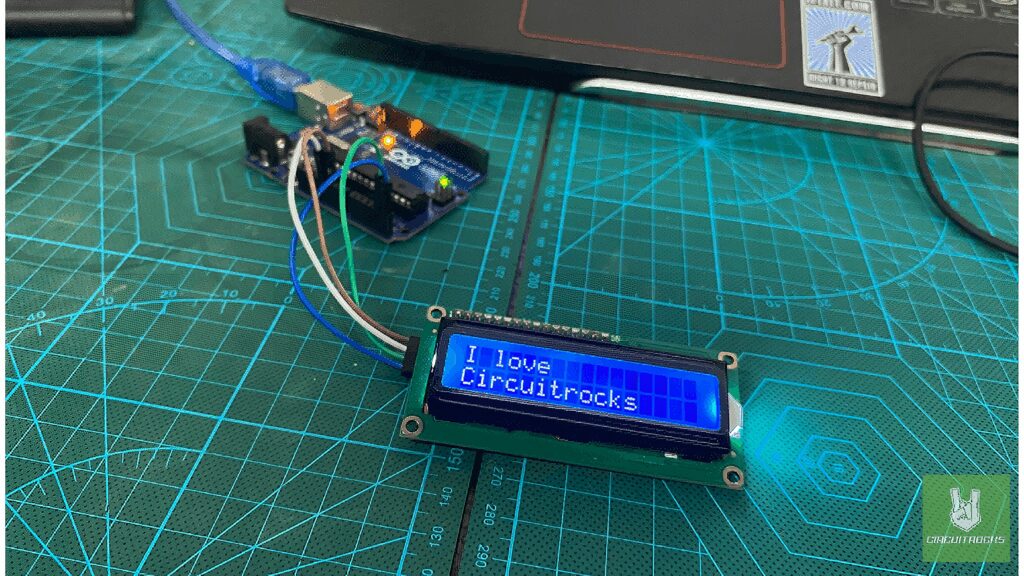
The LCD 1602 is one of the display modules you’ll reach for the most. It’s simple, and it does a lot. Use it to show text, numbers, or status messages, which makes it a good fit for temperature monitors, digital clocks, or interactive builds. The 16×2 layout means 16 characters per row across two rows. Small, but enough for plenty of projects. Get comfortable with this module and your builds get a lot more interactive.
One nice thing about the LCD 1602 is that you can tune it. On the back of the module there’s a small potentiometer that controls the brightness and contrast. Handy when you’re working under different lighting or just want the text easier to read. Pair it with an I2C interface and it gets even simpler to wire up, since I2C frees up GPIO pins on your microcontroller for other parts.
Learn the basics here and you’re set up for bigger projects later. Drop it into a weather station, a digital counter, a home automation setup, whatever, the skills carry over. This tutorial covers wiring the display, formatting text, and controlling brightness. Keep building and you’ll come back to the LCD 1602 a lot. It’s a dependable little display.
Components
Connections:
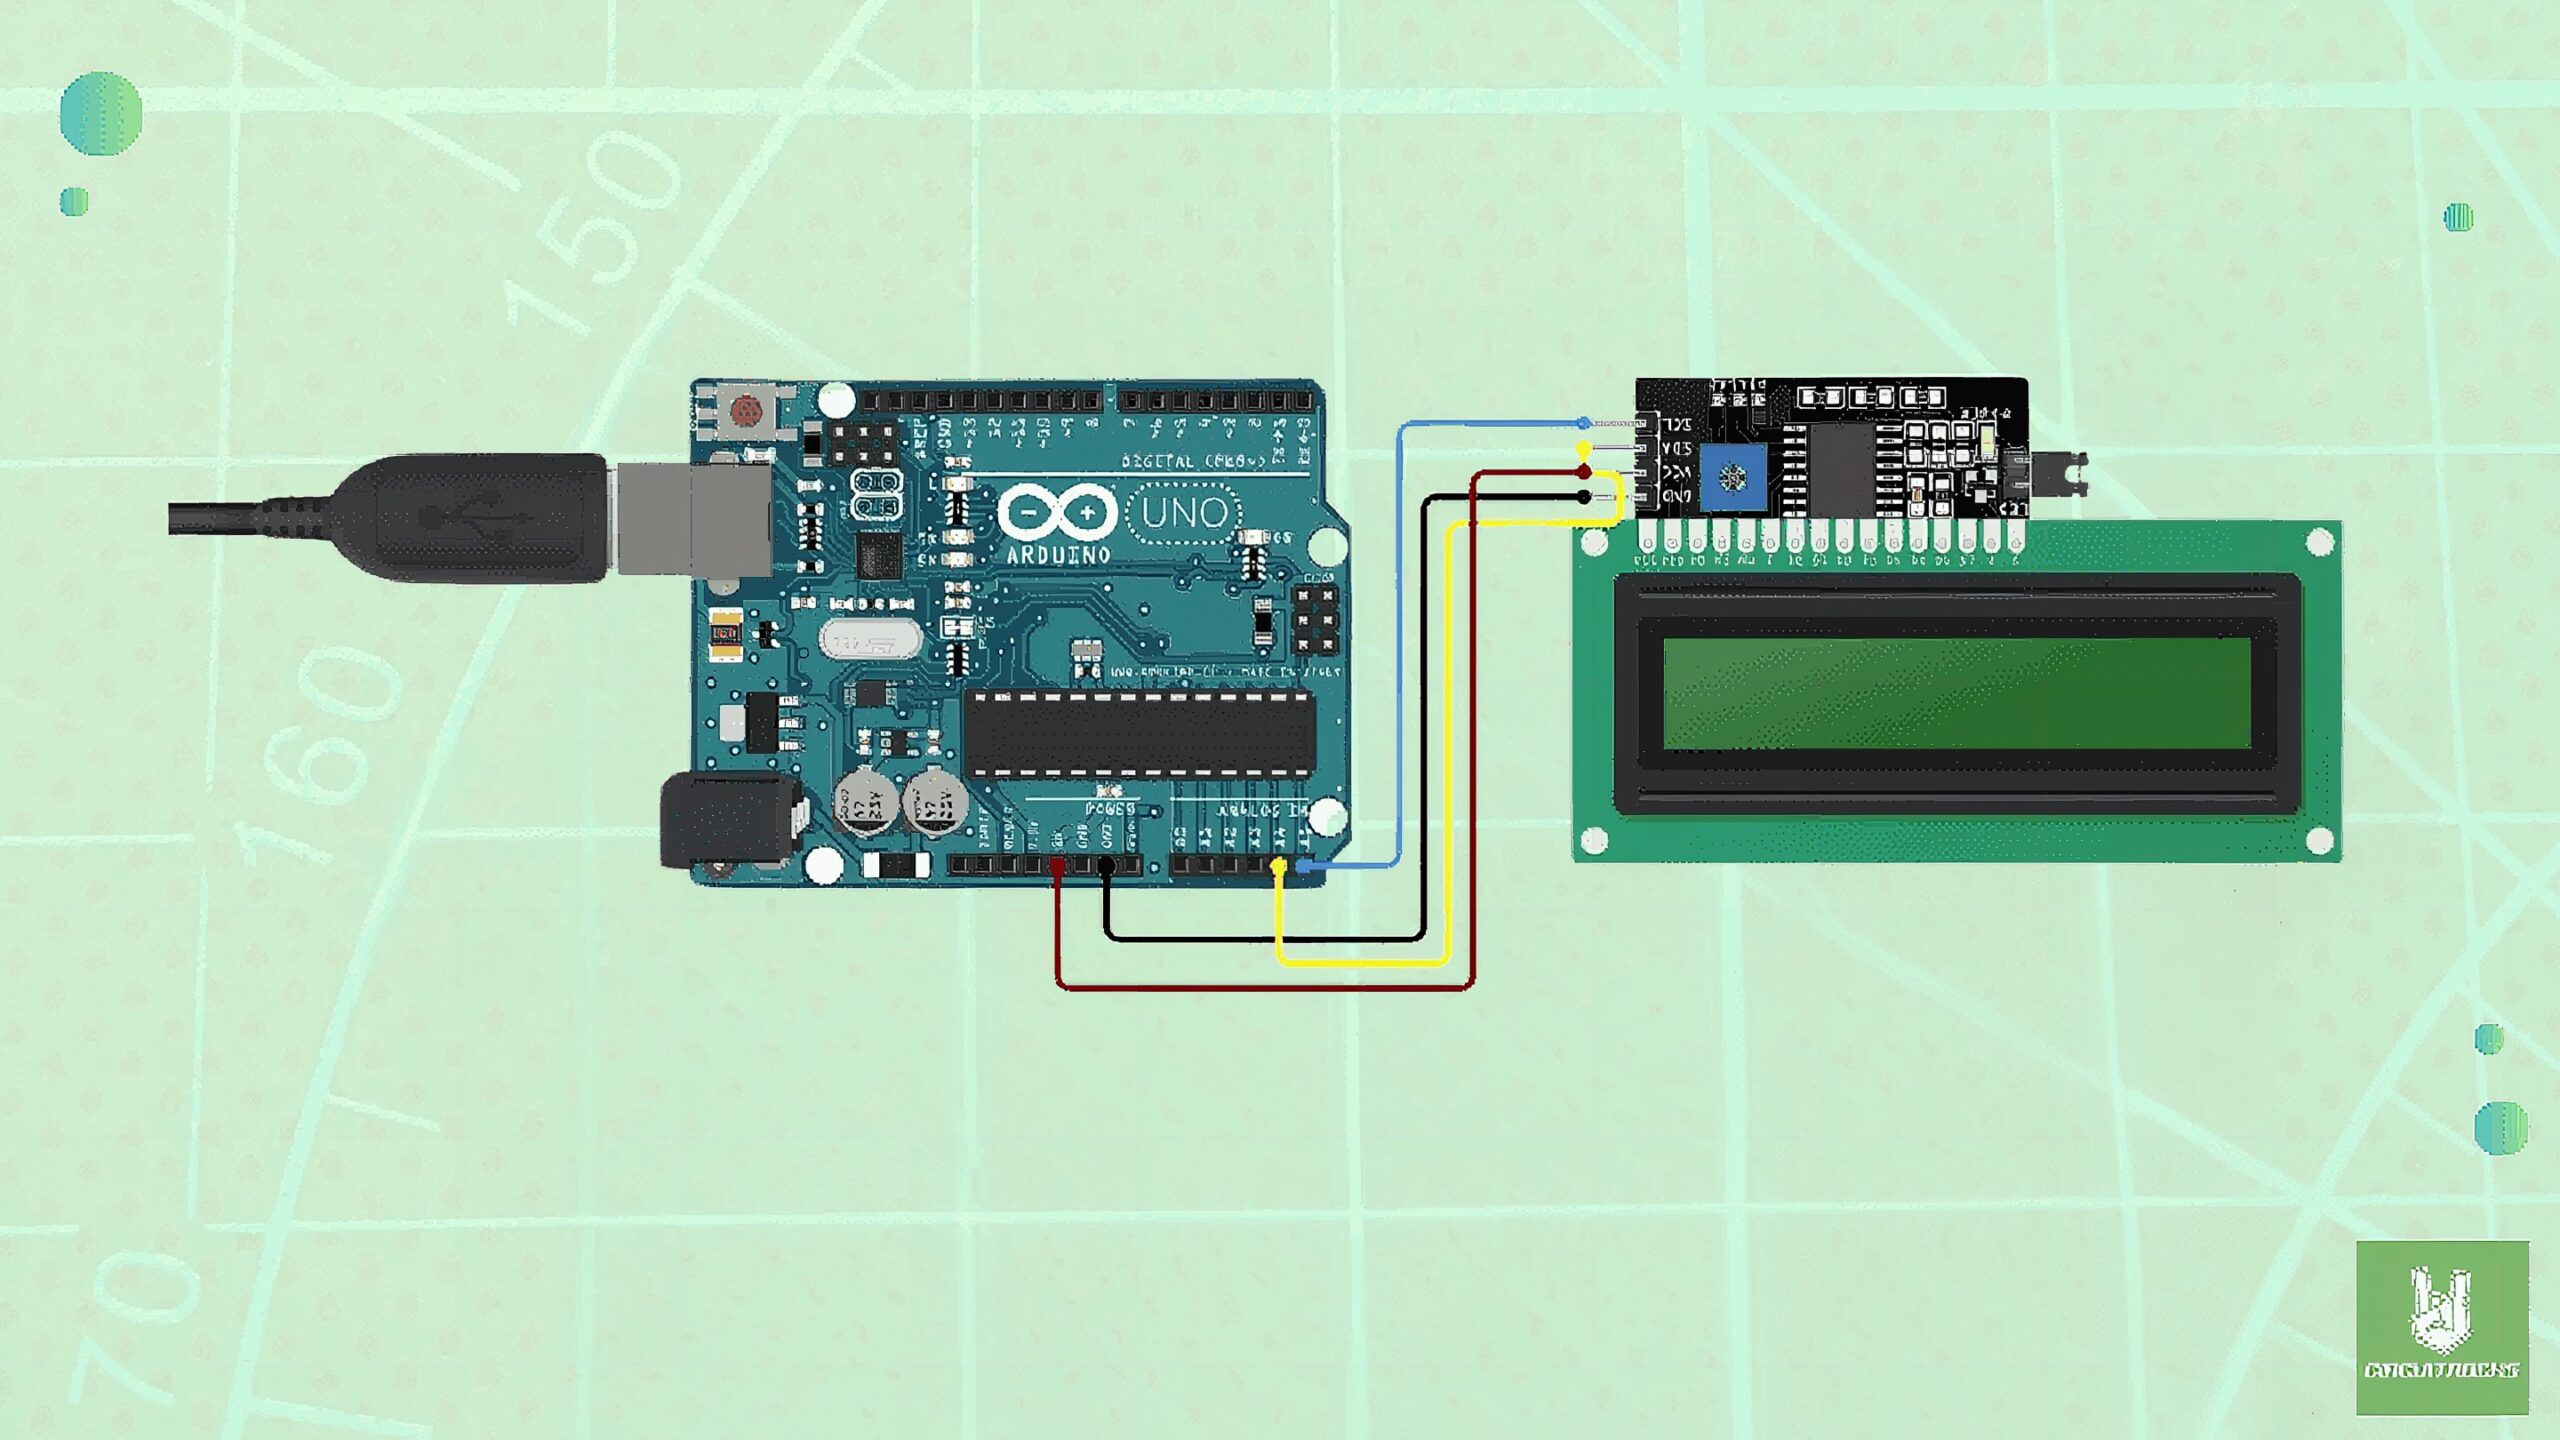
Power the LCD:
- Connect the VCC pin of the LCD module to the 5V pin on the Arduino Uno.
- Connect the GND pin of the LCD module to the GND pin on the Arduino Uno.
I2C Communication:
- Connect the SDA pin of the LCD module to the A4 pin on the Arduino Uno (I2C data line).
- Connect the SCL pin of the LCD module to the A5 pin on the Arduino Uno (I2C clock line).
Notes:
Go to Sketch > Include Library >Download LiquidCrystal 12c by Frank de Brabander
Code:
This sketch shows how to drive an LCD 1602 over I2C to print a short message. It starts by pulling in the two libraries it needs, Wire.h and LiquidCrystal_I2C.h, which handle the I2C communication and the LCD itself. The LCD is set up at I2C address 0x27, with 16 columns and 2 rows.
Inside setup(), the code fires up the LCD and switches on the backlight so you can read it. It clears the screen to wipe anything that was there, then prints “I love” on the first row. Next it moves the cursor to the start of the second row and prints “Circuitrocks”. That splits the message across two lines so it fits the screen.
#include <Wire.h>
#include <LiquidCrystal_I2C.h> // LCD configuration
LiquidCrystal_I2C lcd(0x27, 16, 2); // Set the I2C address for the LCD (0x3F or 0x27) void setup() { // Initialize LCD lcd.init(); // Initialize the LCD lcd.backlight(); // Turn on the backlight // Display "I love Circuitrocks" on two lines of the LCD lcd.clear(); // Clear any previous content lcd.setCursor(0, 0); // Set the cursor to the first column of the first row lcd.print("I love"); // Print the first part of the text on the first row lcd.setCursor(0, 1); // Set the cursor to the first column of the second row lcd.print("Circuitrocks"); // Print the second part of the text on the second row
} void loop() { // Nothing to do in the loop as we're displaying static text
}
QUICK LINK
Frequently Asked Questions
What does this Getting Started with LCD 1602: A Beginner's Guide tutorial cover?
The LCD 1602 is one of the most commonly used display modules in electronics projects.
What's the working voltage of the Getting Started with LCD 1602: A Beginner's Guide?
Check the Sample Code section for the exact pinout — most maker-grade sensors run on 3.3V or 5V. Wire VCC to the matching rail, GND common with your MCU, data to a digital or analog pin.
Why does the Getting Started with LCD 1602: A Beginner's Guide read garbage or saturated values?
Three usual causes: wrong voltage rail, missing pull-up resistor on I2C lines (4.7k–10k to VCC), or a floating data pin. Double-check wiring against the diagram, then probe with a multimeter.