
The 0.96-inch OLED is a great little display to start with. It shows text, graphics, and small animations on a tiny screen, which makes it handy for all kinds of Arduino projects. This guide covers the basics: how to wire it up, install the libraries you need, and write code to put your own messages or designs on screen.
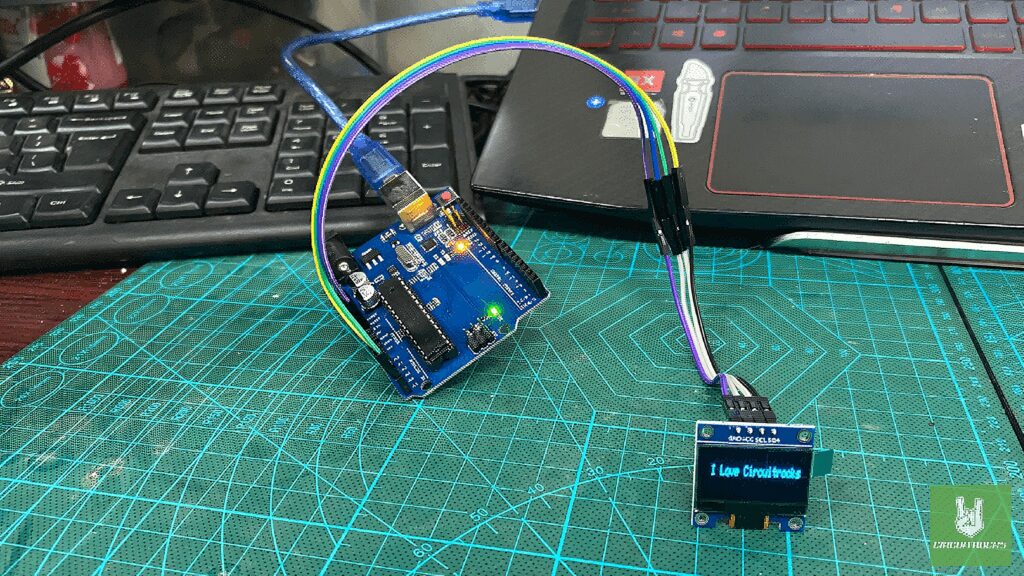
You’ll need an OLED 0.96 display, an Arduino board, and a few jumper wires. The display talks over I2C, so you only need four wires: VCC, GND, SDA (data), and SCL (clock). Once it’s wired, you’ll install the Adafruit SSD1306 and GFX libraries in the Arduino IDE. Those handle the graphics and text functions for the display.
Then comes the code. This tutorial walks through printing simple text, drawing shapes, and putting together small animations. By the end you’ll have enough to build on, whether that’s a clock, a sensor readout, or just a screen that says something fun.
Components
Connection:
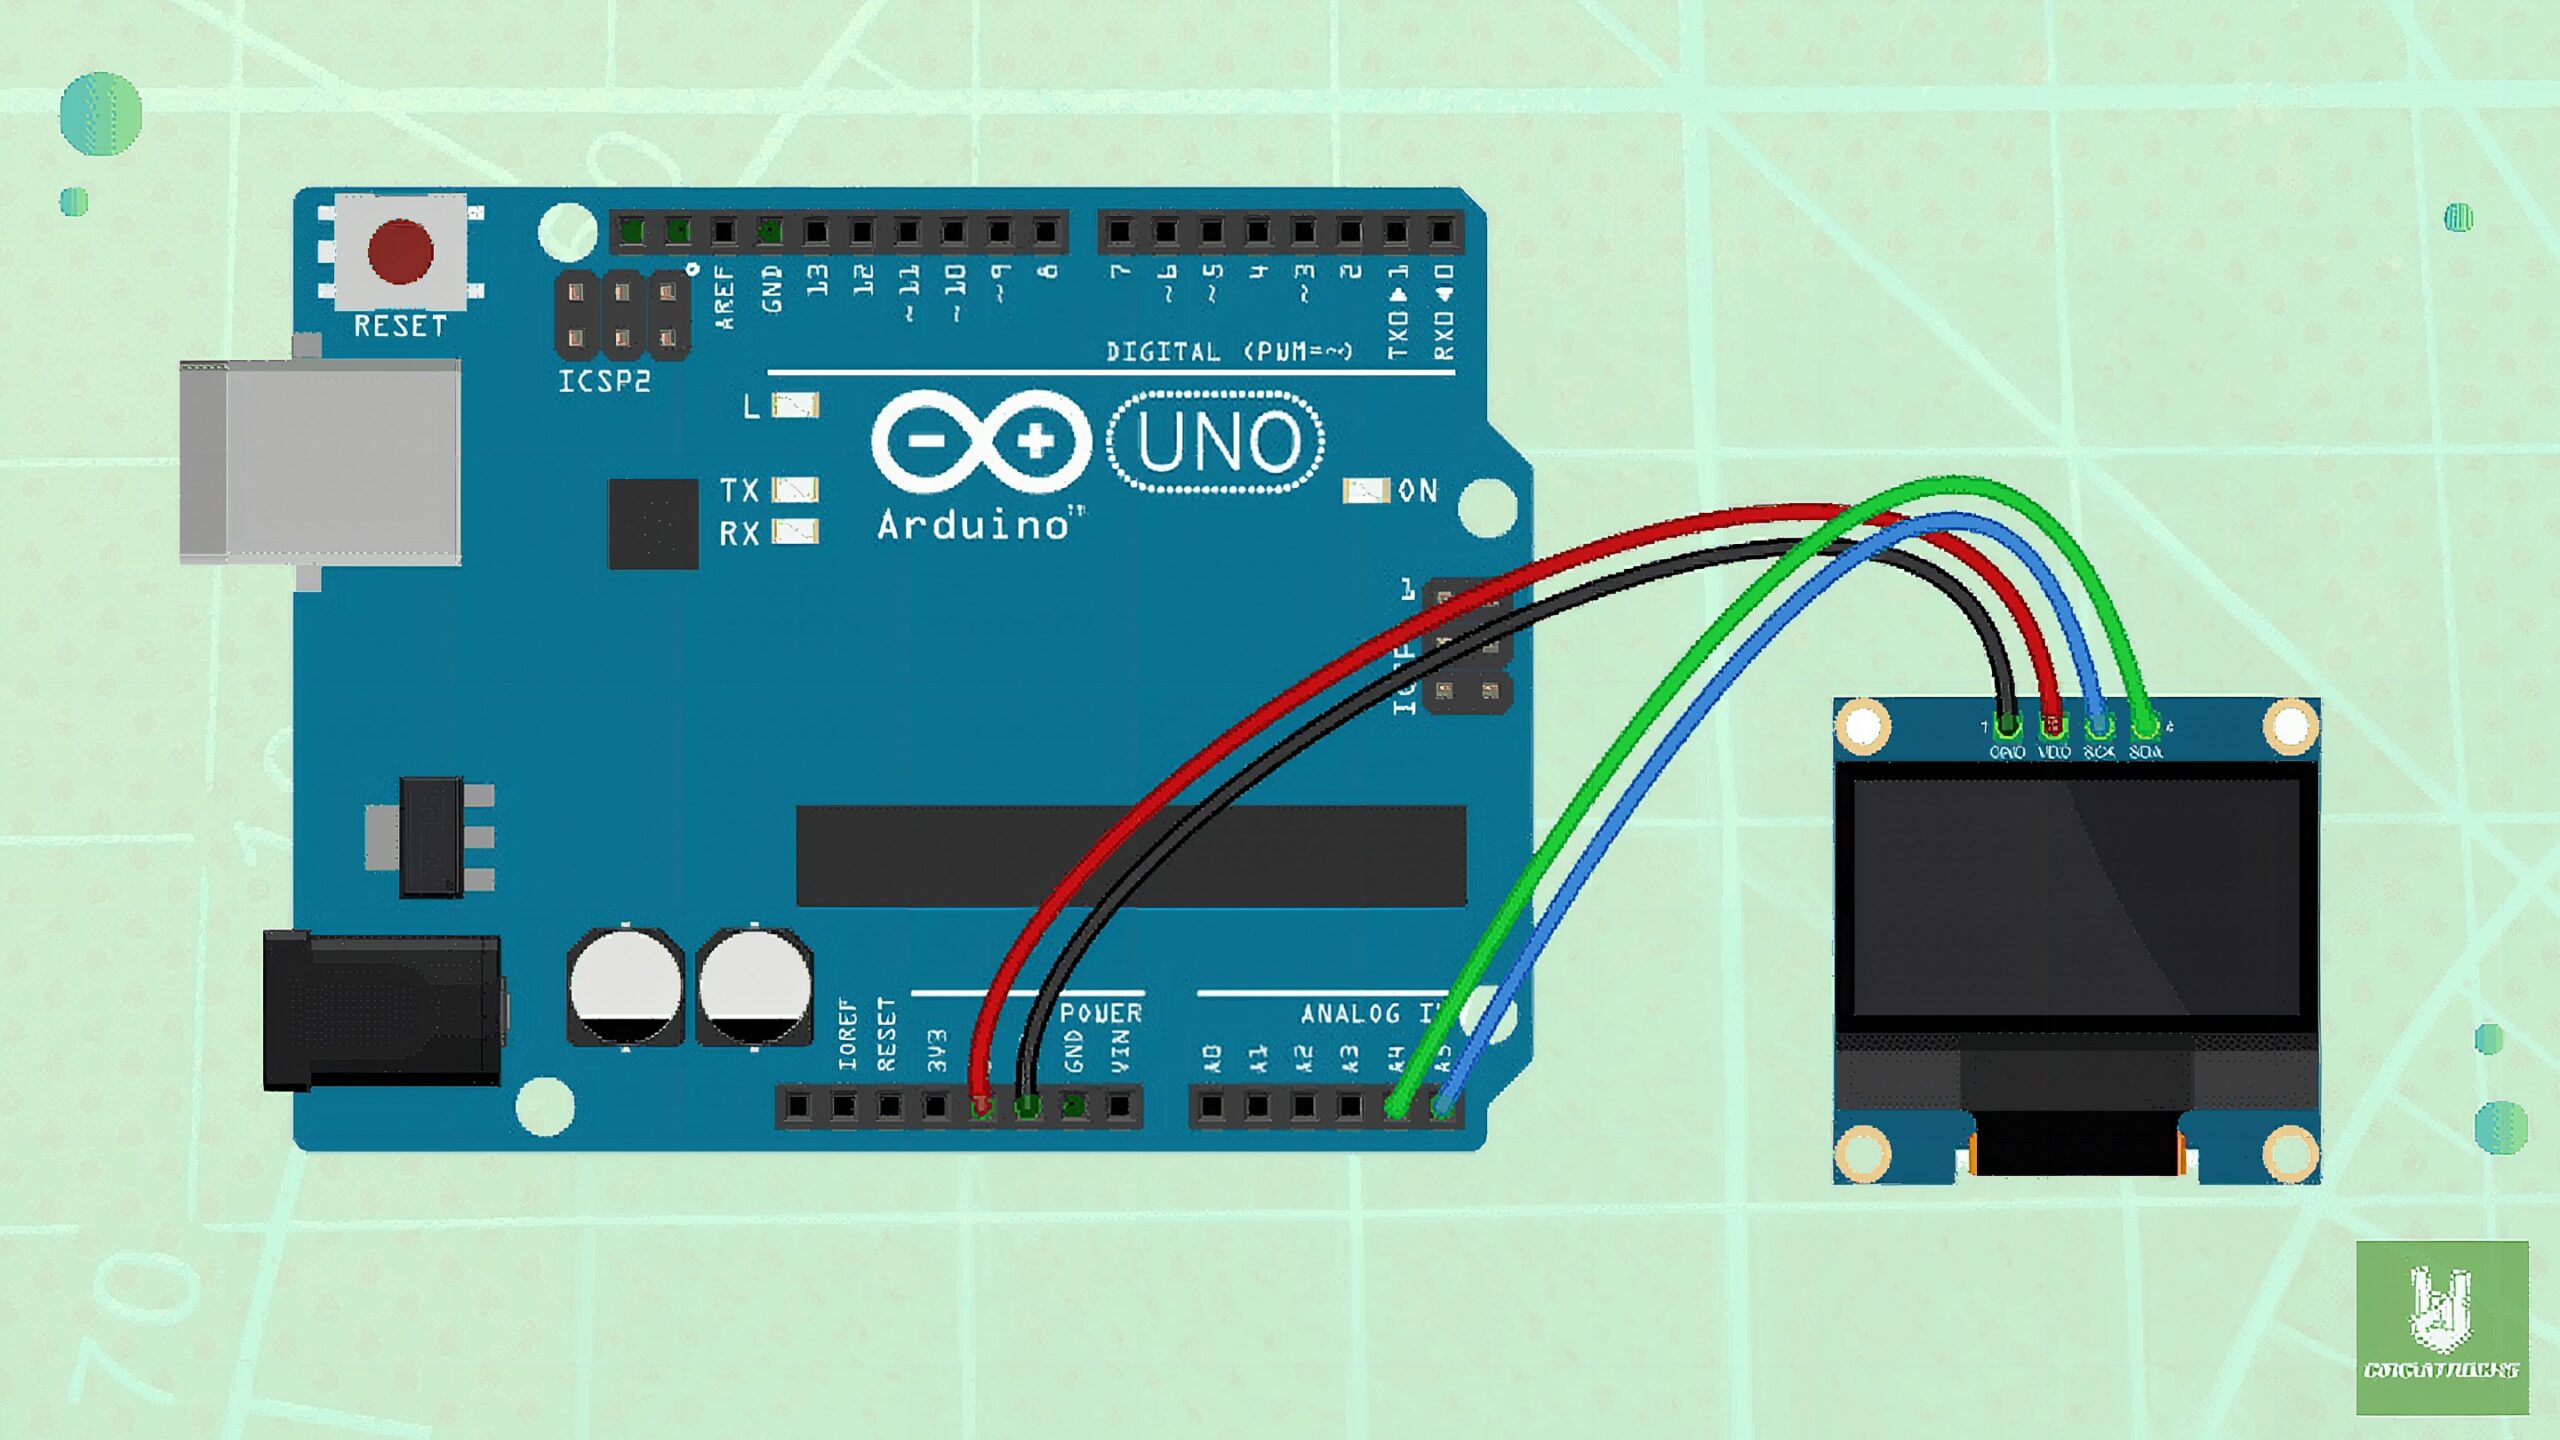
- VCC – Goes to the 5V pin on the Arduino to power the display.
- GND – Goes to the GND pin on the Arduino.
- SDA – Goes to A4 on an Uno.
- SCL – Goes to A5 on an Uno.
Notes:
Install these two libraries first:
- Adafruit SSD1306 – This one is for OLED displays that use the SSD1306 driver chip.
- Adafruit GFX Library – This handles the core graphics (drawing shapes and text) that the SSD1306 library depends on.
Code:
This code prints a simple message, “I Love Circuitrocks,” on a 128×32 OLED connected to an Arduino.
#include <SPI.h>
#include <Wire.h>
#include <Adafruit_GFX.h>
#include <Adafruit_SSD1306.h> #define SCREEN_WIDTH 128 // OLED display width, in pixels
#define SCREEN_HEIGHT 32 // OLED display height, in pixels #define OLED_RESET -1 // Reset pin # (or -1 if sharing Arduino reset pin)
#define SCREEN_ADDRESS 0x3C ///< See datasheet for Address; 0x3D for 128x64, 0x3C for 128x32
Adafruit_SSD1306 display(SCREEN_WIDTH, SCREEN_HEIGHT, &Wire, OLED_RESET); void setup() { Serial.begin(9600); // Initialize OLED display if(!display.begin(SSD1306_SWITCHCAPVCC, SCREEN_ADDRESS)) { Serial.println(F("SSD1306 allocation failed")); for(;;); // Stop if display initialization fails } display.clearDisplay(); // Set text size and color display.setTextSize(1); // Smaller text size display.setTextColor(SSD1306_WHITE); display.setCursor(10, 10); // Adjust cursor position for center alignment // Display message display.println("I Love Circuitrocks"); // Show the buffer on the display display.display();
} void loop() { // Nothing needed here as we're just displaying static text
}
QUICK LINK
Frequently Asked Questions
What does this Getting Started with OLED 0.96: A Beginner's Guide tutorial cover?
The 0.
What Arduino library does the Getting Started with OLED 0.96: A Beginner's Guide tutorial use?
The sketch uses standard Wire.h (I2C) or SPI.h plus a part-specific library installable via Arduino IDE → Sketch → Include Library → Manage Libraries. See the Sample Code section.
Why does the Getting Started with OLED 0.96: A Beginner's Guide act differently on USB power vs battery?
Battery voltage sags under load. Add a 100uF cap across the rails, use a 5V/2A regulator-backed pack, and never power motors from the Arduino's onboard regulator.