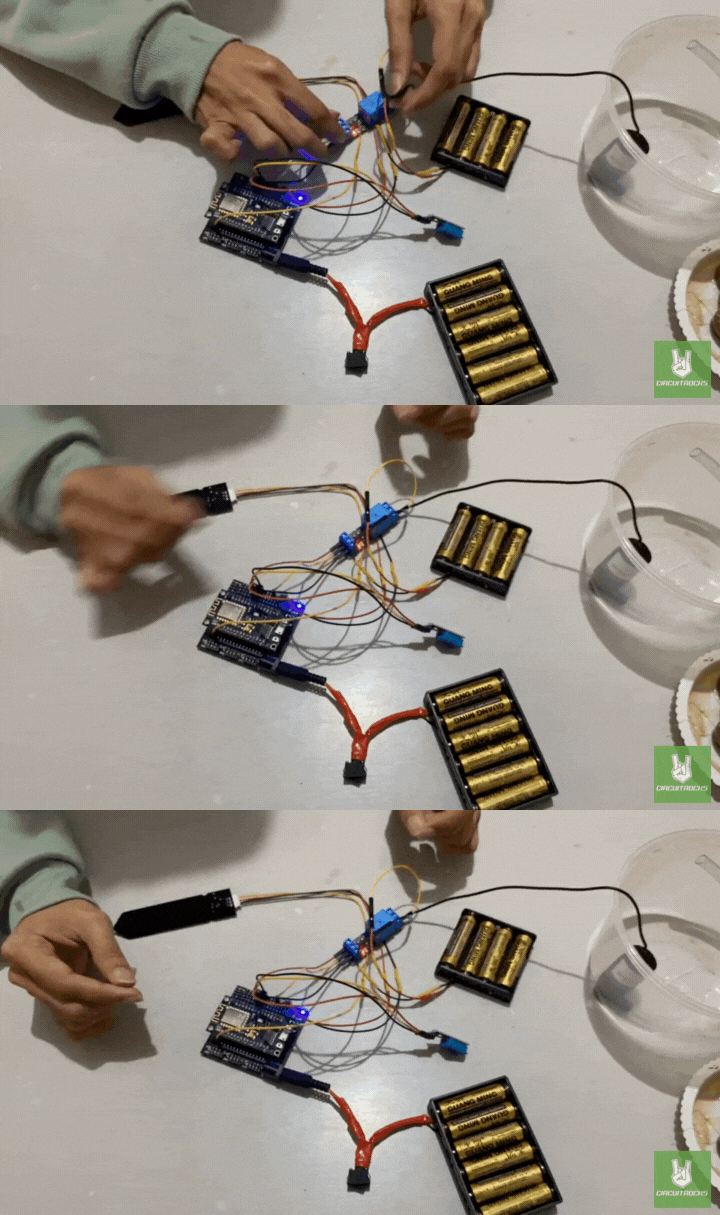
Creating a smart watering system allows you to keep plants healthy with little effort. This setup uses a soil moisture sensor to detect dryness, automatically activating a pump to water the plants only when needed. This keeps soil moisture consistent, preventing both under- and over-watering—perfect for managing multiple plants without daily care.
The core components are the moisture sensor and relay module. When soil dries out, the sensor triggers the relay to activate the pump, supplying water until the desired moisture level is reached. The system then shuts off, conserving water. A humidity sensor monitors ambient conditions, allowing the system to adjust based on changes in the environment, like dry indoor air or high outdoor humidity.
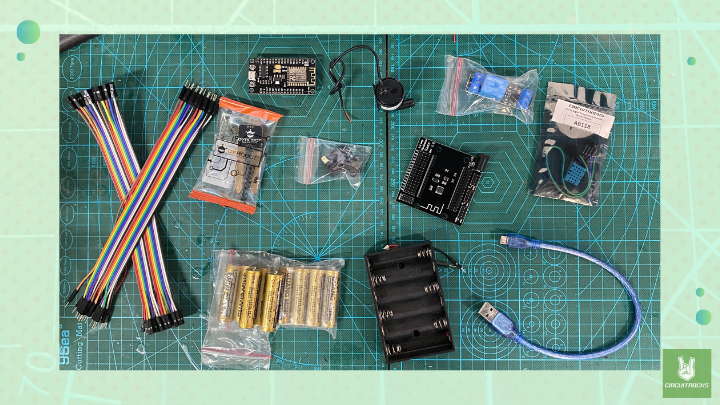
To set it up, you’ll need an ESP8266 microcontroller mounted on a compatible shield, a relay module, and a small pump powered by a battery setup. With a simple wiring diagram, you’ll create a self-regulating irrigation system that can also include a Rocker Switch for manual control. This easy setup is beginner-friendly and a great way to learn about automation, helping your plants thrive with minimal effort.
Components:

- Soil Moisture Sensor
- DHT11 Humidity
- Black Mini Pump
- ESP8226 v3
- Shield ESP8226 v3
- Relay Module 5V 10A
- Switch Rocker 2-Pin
- Battery AA
- Battery Holder 9v
- Jumper Wires
- USB Cable Micro
Connections:
- Soil Moisture Sensor: Connect the sensors on the ESP8266. This reads the soil moisture level.
- DHT11 Humidity Sensor: Connect the data pin on the ESP8266, which allows it to read the ambient humidity.
- Relay Module: Connect the relay’s input pin to digital pin on the ESP8266. The relay acts as a switch for the pump, triggered by the ESP8266 when the soil is dry.
- Pump: Wire the pump’s positive and negative terminals to the relay’s output terminals. The relay will control the power flow to the pump based on the ESP8266’s command.
- Power Supply: Use an AA Battery and 9V Battery Holder or another appropriate power source for the shield ESP8226 v3.
- Rocker Switch: Optionally, connect a 2-Pin Rocker Switch between the power source and the system to allow manual control, turning the system on or off as needed.


