

In this tutorial, you will learn how to use the Raspberry Pi camera module. You will learn how to take pictures and videos using raspistill and raspivid commands via the command-line interface. You will also learn how to utilize the python library picamera so that you can take photos and videos, change the camera settings, and even apply camera effects.
By the end of this tutorial, you should be comfortable enough with the Raspberry Pi camera to generate project ideas with it yourself.
Things Required:
- Raspberry Pi
- Raspberry Pi Camera
Raspberry Pi Camera Module

The Raspberry Pi Camera is an official product of the Raspberry Pi Foundation that allows its users to take photos and videos with the Raspberry Pi. Currently, it has two versions. The first version is released back in 2013 with a 5-megapixel OmniVision OV5647 sensor while the v2 is released in 2016 with an 8-megapixel Sony IMX219 sensor. Needless to say, if you’re planning to buy one today, get v2. It has a better image quality, larger supported resolution, and even better low-light performance. However, if you already have the first version, you can still follow along as the code work the same for both versions.
How to Use the Raspberry Pi Camera
To use the camera, you can either use the command-line or Python. In this tutorial, we will use both to learn how to use the Raspberry Pi Camera module in the most fulfilling way.
With the command-line, you can take photos and videos using only two commands, perfect if you just want to take a simple picture. On the other hand, Python allows you to interface with the camera using dozens of libraries. Some libraries even utilize the camera for more advanced applications like AI-based computer vision.
Now that we’re familiar with the camera let us proceed with installing it to the Raspberry Pi.
Installing the Module
1. First and foremost, make sure the board has no power. Pull up the edges of the CSI port’s plastic clip.

2. Next, insert the flex cable to the port. Make sure the silver lines on the cable is aligned to the same lines on the port. Additionally, some cable has blue tape on the other side. Make sure that the side faces the opposite side of the CSI port.
3. Gently push the clip back to lock the cable.

Next, we setup the camera so that the Raspberry Pi OS can read it.
Setting Up the Raspberry Pi
1. Turn on your Raspberry Pi.
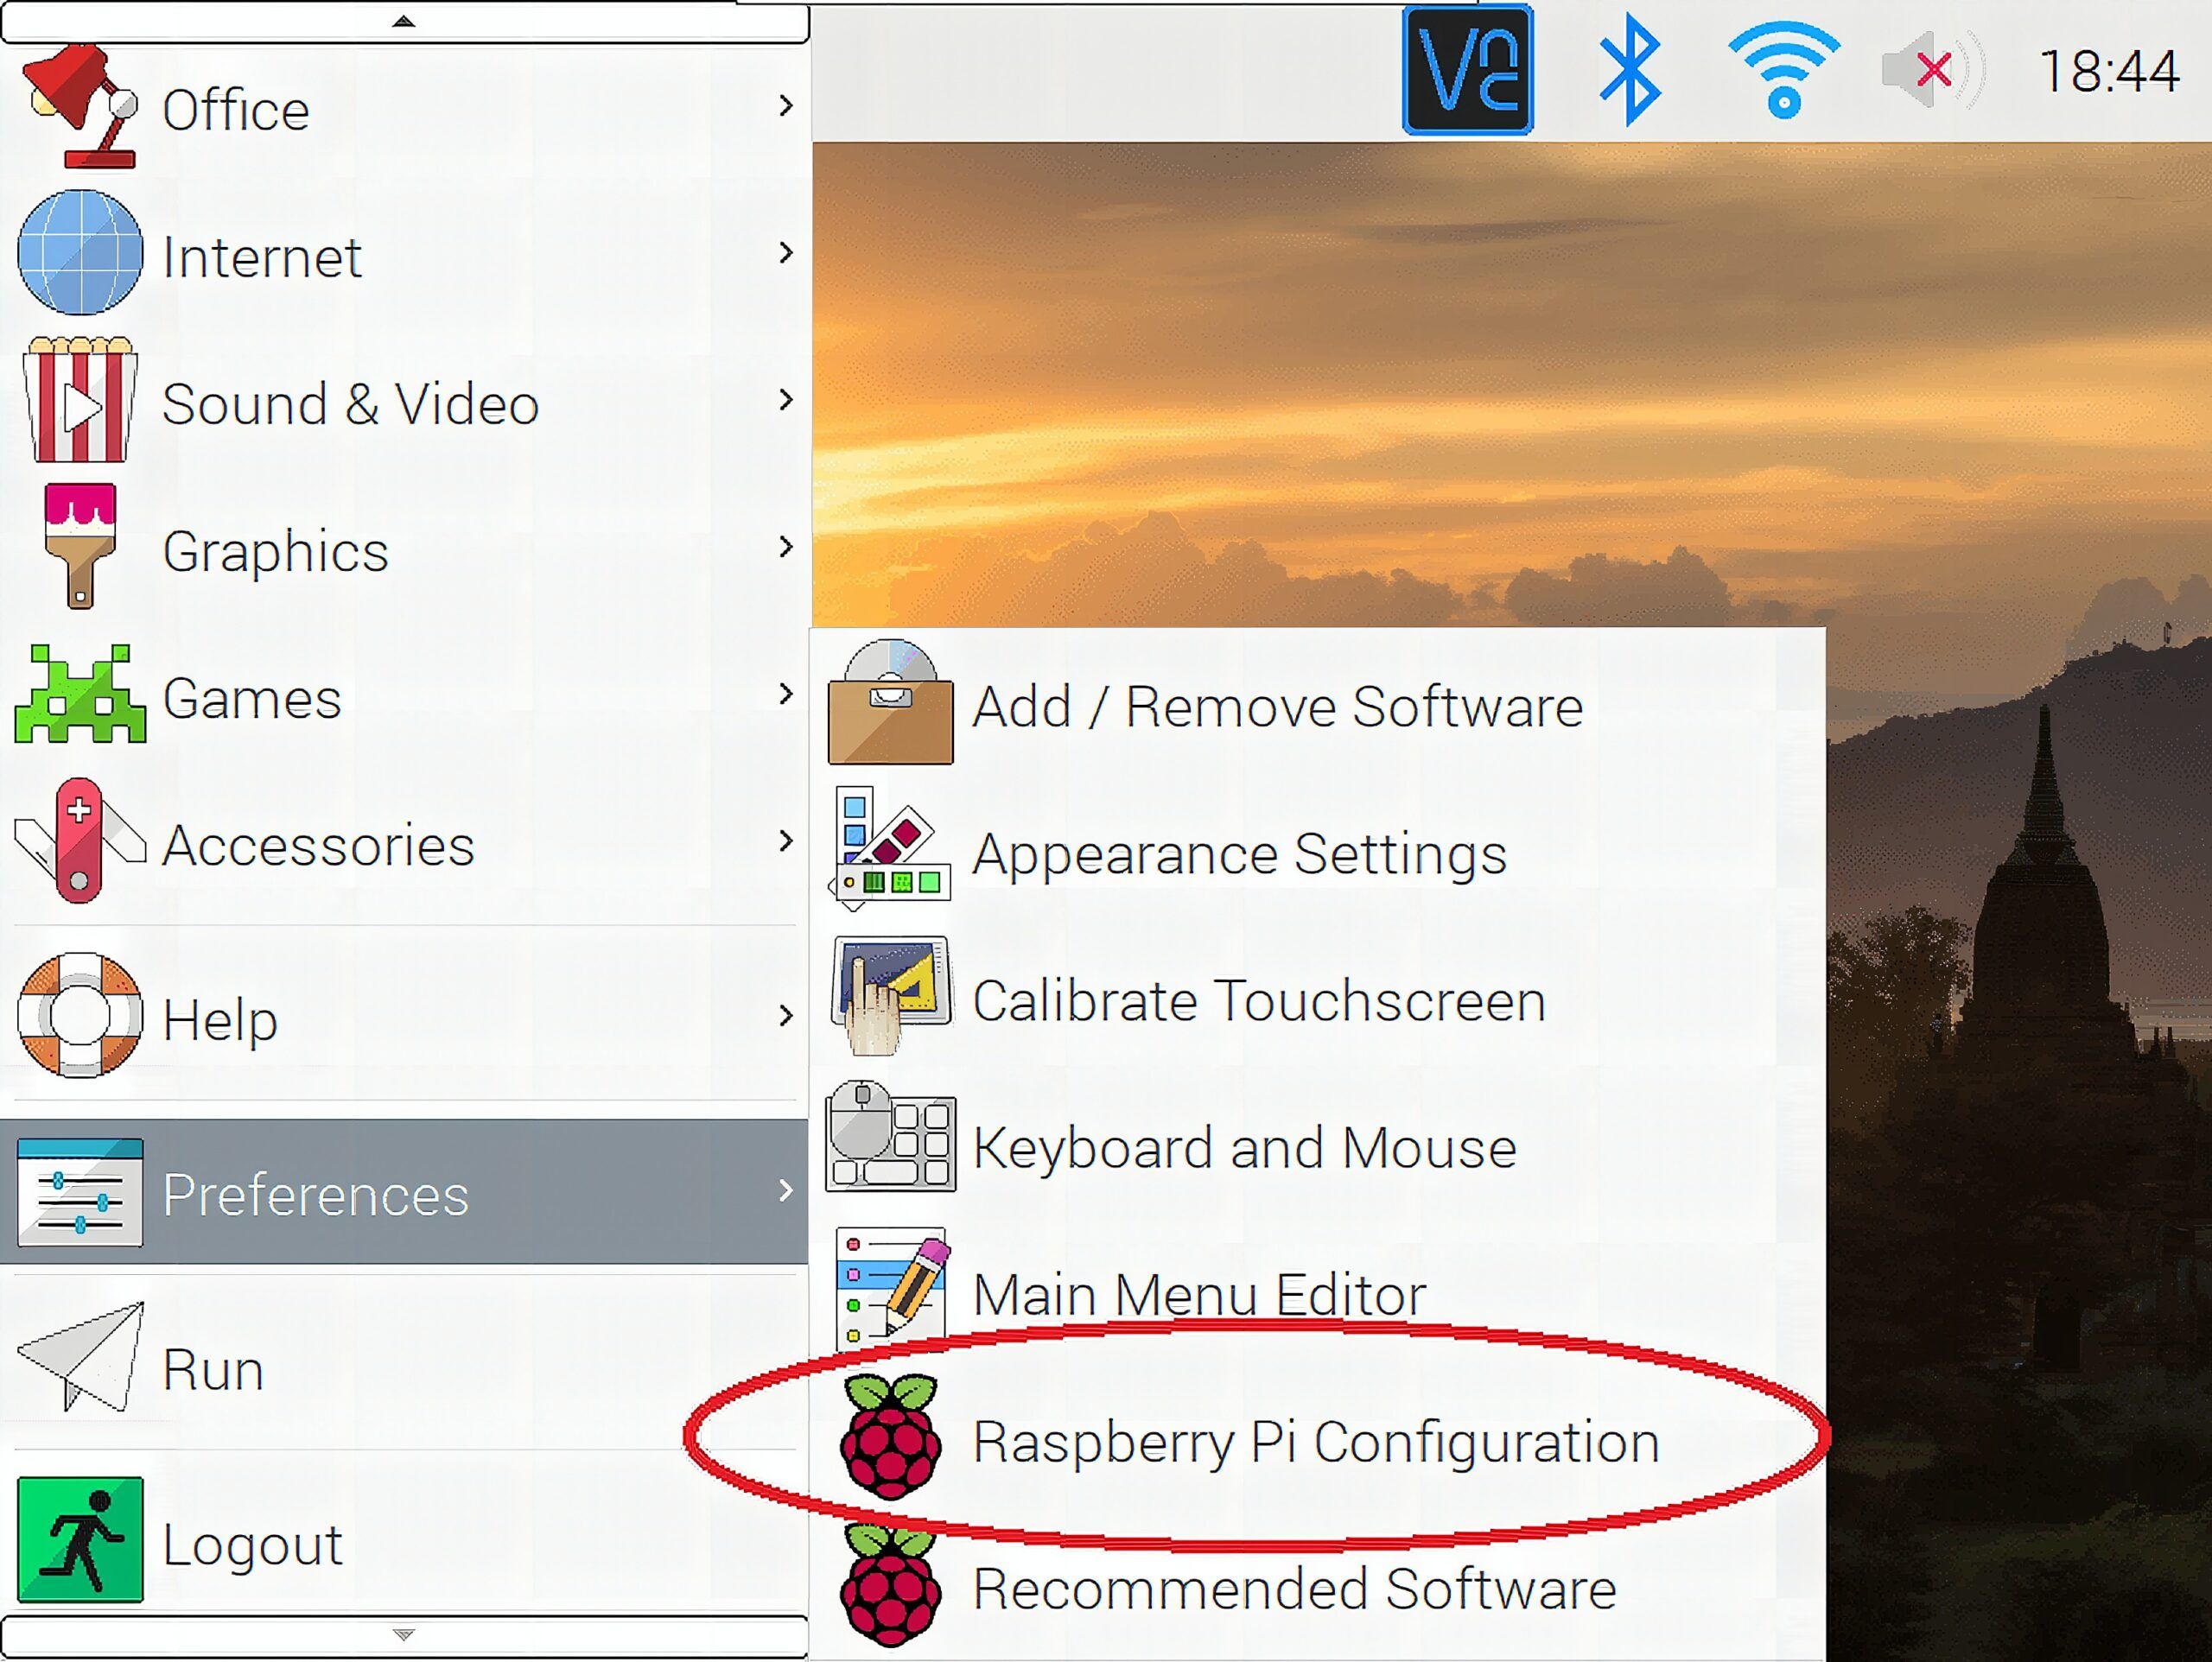
2. Open the Raspberry Pi Configuration tool using either the main menu or command line. In the main menu, you can find it under Preferences.
Otherwise, enter this command on the command line.
sudo raspi-config3. Next, select Interfaces. The camera is disabled by default. Enable it then save the changes to raspiconfig.
4. Finally, restart your Raspberry Pi.
Using the Command Line
The easiest way to use your camera is by the terminal. Just pull the terminal up from the menu bar and enter the following commands.
Taking a photo
raspistill -o home/pi/image.jpgThe raspistill command captures the photo after a 5-second preview (enough time to prepare your hair and flash your pearly whites). You must include the path and the target filename of your photo with the command, or else it does not work.
Recording a video
raspivid -o home/pi/video.h264On the other hand, the raspvid command records a 5-second clip and saves it to your target directory. You also need to include the path or else it does not work. Furthermore, you can change the resolution of your image and video by adding -w and -h switches. For instance:
raspistill -o home/pi/image.jpg -w 1024 -h 768raspivid -o home/pi/video.h264 -w 1024 -h 768Using Python
Another way to control the camera is by using Python. Go on and open your favorite Python editor. Make sure to import the necessary library to make the camera work. In this case, we will use the picamera module. Next, initialize the camera using the PiCamera() function. Your program should look like this:
from picamera import PiCamera
camera = PiCamera()
For the camera to start sending data to your Raspberry Pi, add camera.start_preview(). If your preview is reversed, rotate by 180 degrees using camera.rotation = 180. The value for camera.rotatation is changeable, so if you need to orient your preview to an unusual degree, you technically can, but I advise not to since it will mess up your image.
Taking a photo
Note that if you’re coding Python using the terminal’s interactive shell. The screen will get replaced by your camera’s output. To exit, press CTRL + Z. Finally, to take a picture, simply use camera.capture('path/path/desiredfilename.jpg').
camera.start_preview()
time.sleep(5)
camera.capture('/home/pi/Desktop/image.jpg')
camera.stop_preview()
You can import the time module to replicate what we did using the terminal. Add a 5-second delay so that you have time to prepare. Always include camera.stop_preview() after you are done with the camera.
Taking a video
The way you take a picture and record a video using PiCamera is very similar. You need not to remove the start and stop preview functions. You just replace camera.capture by camera.start_recording('path/path/desiredfilename.h264‘) and camera.stop_recording().
camera.start_preview()
camera.start_recording('path/path/desiredfilename.h264')
time.sleep(5)
camera.stop_recording()
camera.stop_preview()
Use the delay to indicate the duration of your video recording.
To learn more about Raspberry Pi, click the link to the following articles:
- The Raspberry Pi Starter: Part 1 and Part 2.
- How to control the Raspberry Pi remotely
Frequently Asked Questions
What does this How to Use the Raspberry Pi Camera Module tutorial cover?
In this tutorial, you will learn how to use the Raspberry Pi camera module.
Which Raspberry Pi model fits the How to Use the Raspberry Pi Camera Module project?
Pi 4 (4GB) or Pi 5 for desktop apps and AI workloads. Pi Zero 2 W is enough for headless / sensor builds. Pi 3 B+ works but is slower for camera or ML.
How do I auto-start the How to Use the Raspberry Pi Camera Module script on boot?
Use systemd. Create /etc/systemd/system/myproject.service with ExecStart=/usr/bin/python3 /home/pi/script.py and Restart=always. sudo systemctl enable myproject.