
If you’re looking for a lightweight IoT communication protocol, and a server that is completely free that supports it, then sit tight! In this tutorial, we are going to create an MQTT broker using Adafruit IO and NodeMCU.
Introduction
In the previous article Creating an Adafruit IO dashboard using ESP8266, we’ve sent HTTP requests from the NodeMCU to the Adafruit IO server to populate our dashboard.
As much as I enjoy using HTTP to send data to the internet, it is actually inappropriate for IoT. HTTP, also known as Hypertext Transfer Protocol, is a communication protocol built to transmit webpage data. And webpages contain not just text, but complex data like images and videos. It needs a more complicated scheme for encryption, authentication, and access control which makes the HTTP packet needlessly large. Moreover, HTTP requires one connection per data transfer. If you recall our previous article Using AT commands on the ESP8266, we open a port each time we send a temperature value from our DHT sensor. Furthermore, in order for the data to actually appear on the webpage, we needed to use AT+CIPCLOSE.
HTTP is probably best in transferring large amounts of data for websites, but for IoT devices, which normally just send number values, HTTP is overkill.
Hence the necessity of a new protocol.
MQTT
MQTT, also known as Message Queuing Telemetry Transport, is a protocol that uses a publish and subscribe paradigm. It is simple, lightweight, and it gives you the luxury to stay connected to your devices the entire time.
Moreover, MQTT works on top of any wireless technology. You can use it with TCP/IP, Zigbee, Bluetooth, and many more. You name it.
Before we proceed, you need to learn these terms first:
- Broker – The server that distributes the data to the interested clients.
- Client – A device that sends or receives information via the broker.
- Topic – A feed of data that a broker manages. Clients can publish, subscribe, or do both to a topic.
- Publish – A client sends information to a topic.
- Subscribe – A client tells the broker which topics it is interested in.
- QoS – QoS stands for Quality of Service. It represents the level of connection between a client and a broker.
- 0, also known as at most once, is the lowest QOS. The broker does not acknowledge the delivery and the client does not retransmit.
- 1, also known as at least once, the client continuously transmits the data until an acknowledgment from the broker is received.
- 2, also known as exactly once, is the highest QOS. It is the safest but also the slowest level. It uses a 4-way handshake method.
How MQTT Works
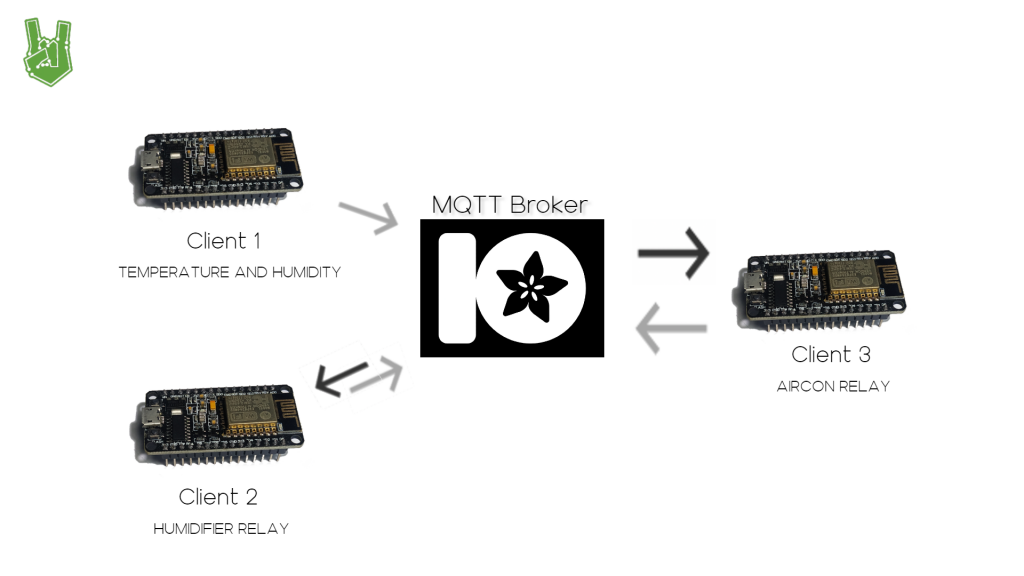
To demonstrate, suppose we have 3 clients and Adafruit IO as a broker. Client 1 is connected to a temperature and humidity sensor, Client 2 is connected to a Humidifier, and Client 3 is connected to an Air Conditioner.
In this case, the topics are Room Temperature and Humidity and Aircon Relay. Client 1 publishes data into Room Temperature and Humidity. Since Client 2 and Client 3 are subscribed to the topic, the broker distributes the data to them. Client 2 opens the humidifier when the topic tells that the air is dry while Client 3 opens the Air Conditioner when the topic tells that it is warm. Moreover, Client 3 is subscribed to the topic of Aircon Relay as well. When the topic tells that the aircon is on, Client 2 opens the humidifier.
A broker just acts as a tollway for data. It doesn’t send commands to the clients. It only directs the data the client is interested in. Meanwhile, clients aren’t really connected to anything other than the broker. Clients can go to deep sleep or completely shut down to conserve power without affecting the connection of the MQTT system.
Now that we understand the theory, let’s proceed by setting up an MQTT broker on Adafruit IO.
Setting up MQTT on Adafruit IO
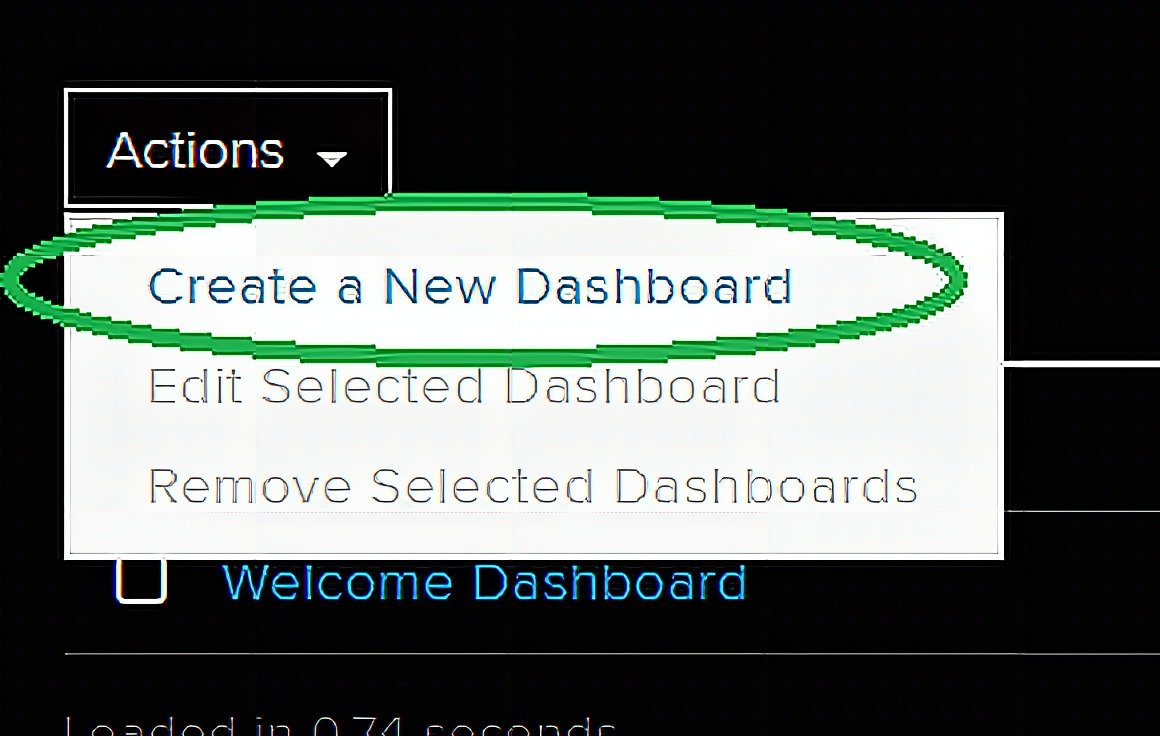
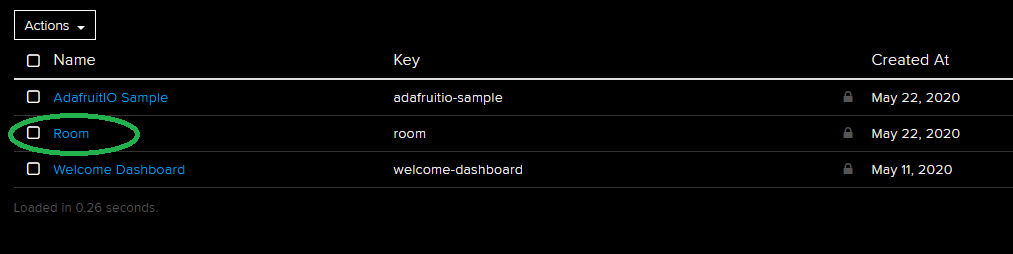
First, go to https://io.adafruit.com/ and create an account. Once logged in, go to the home page. Under Actions, select Create a New Dashboard.
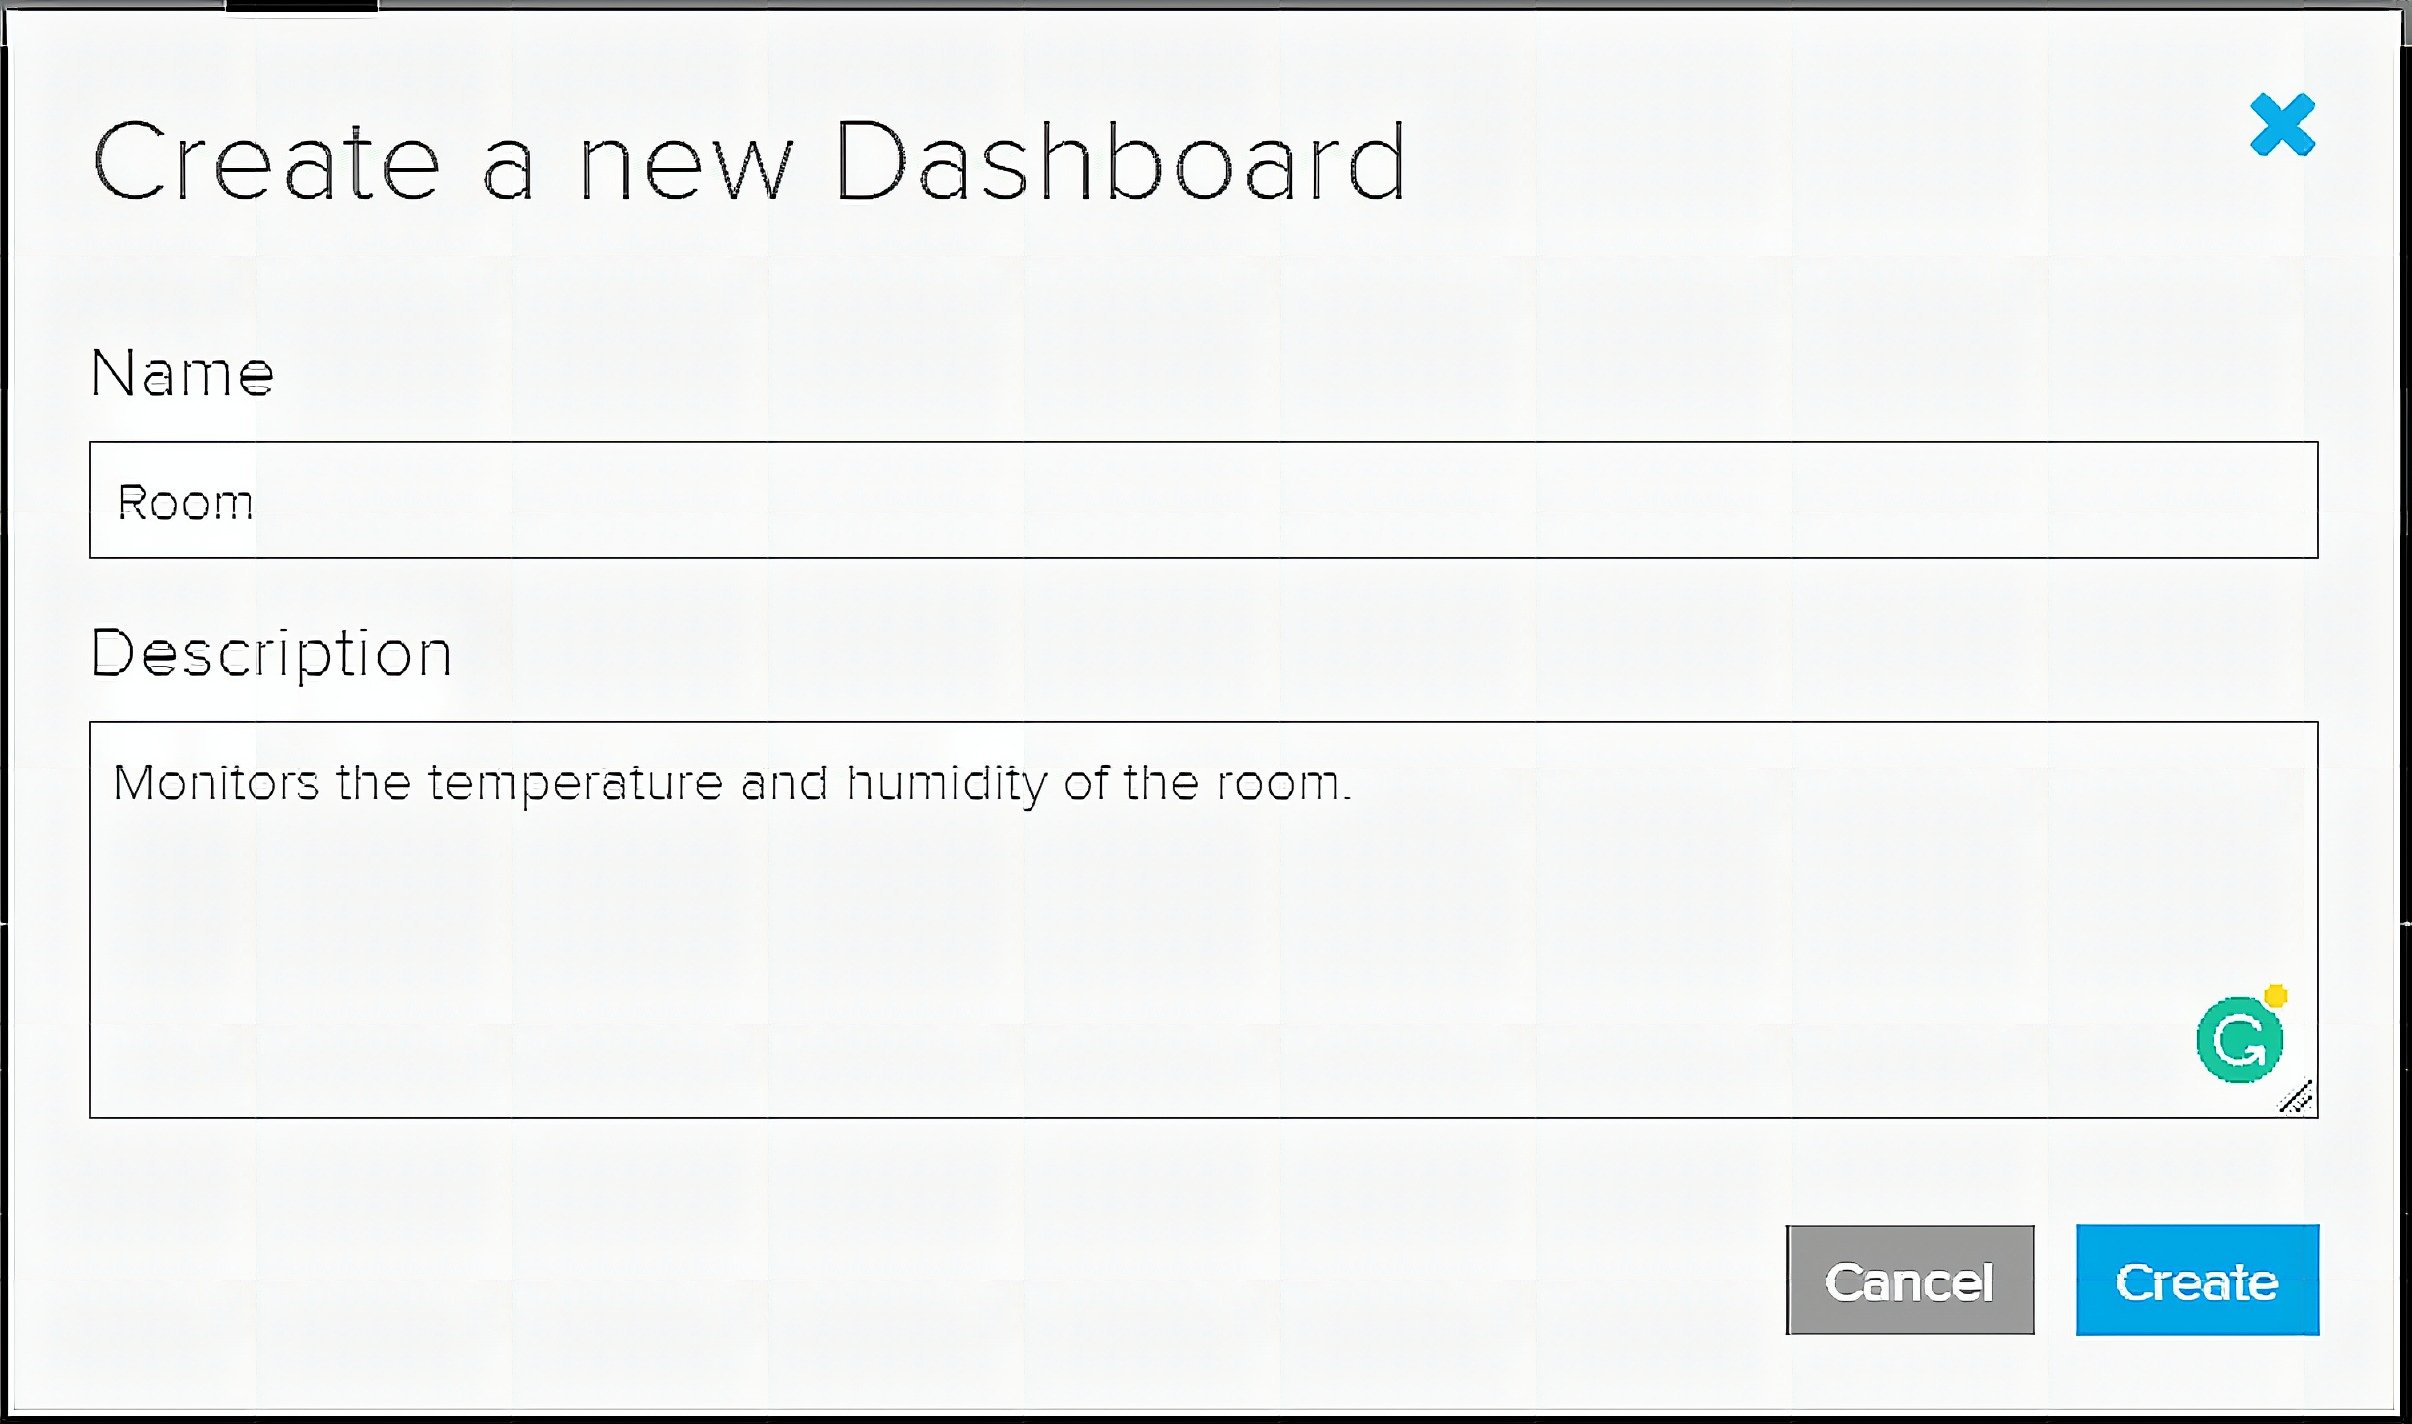
Then, click create after giving the dashboard a name and a short description.
Next, go to your new Dashboard.
As you can see, the dashboard is still empty. You should populate it first by creating a new block. In order to do that, press the blue plus button on the right side of the dashboard.
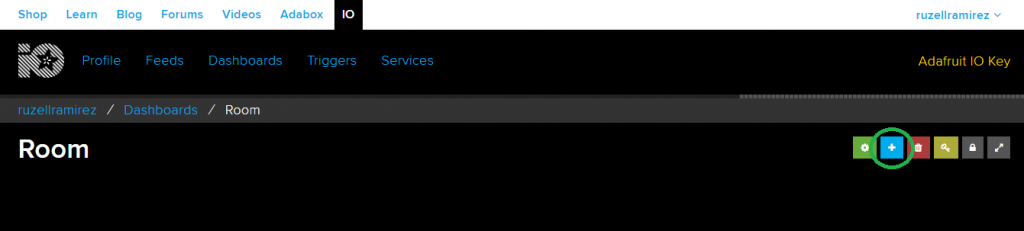
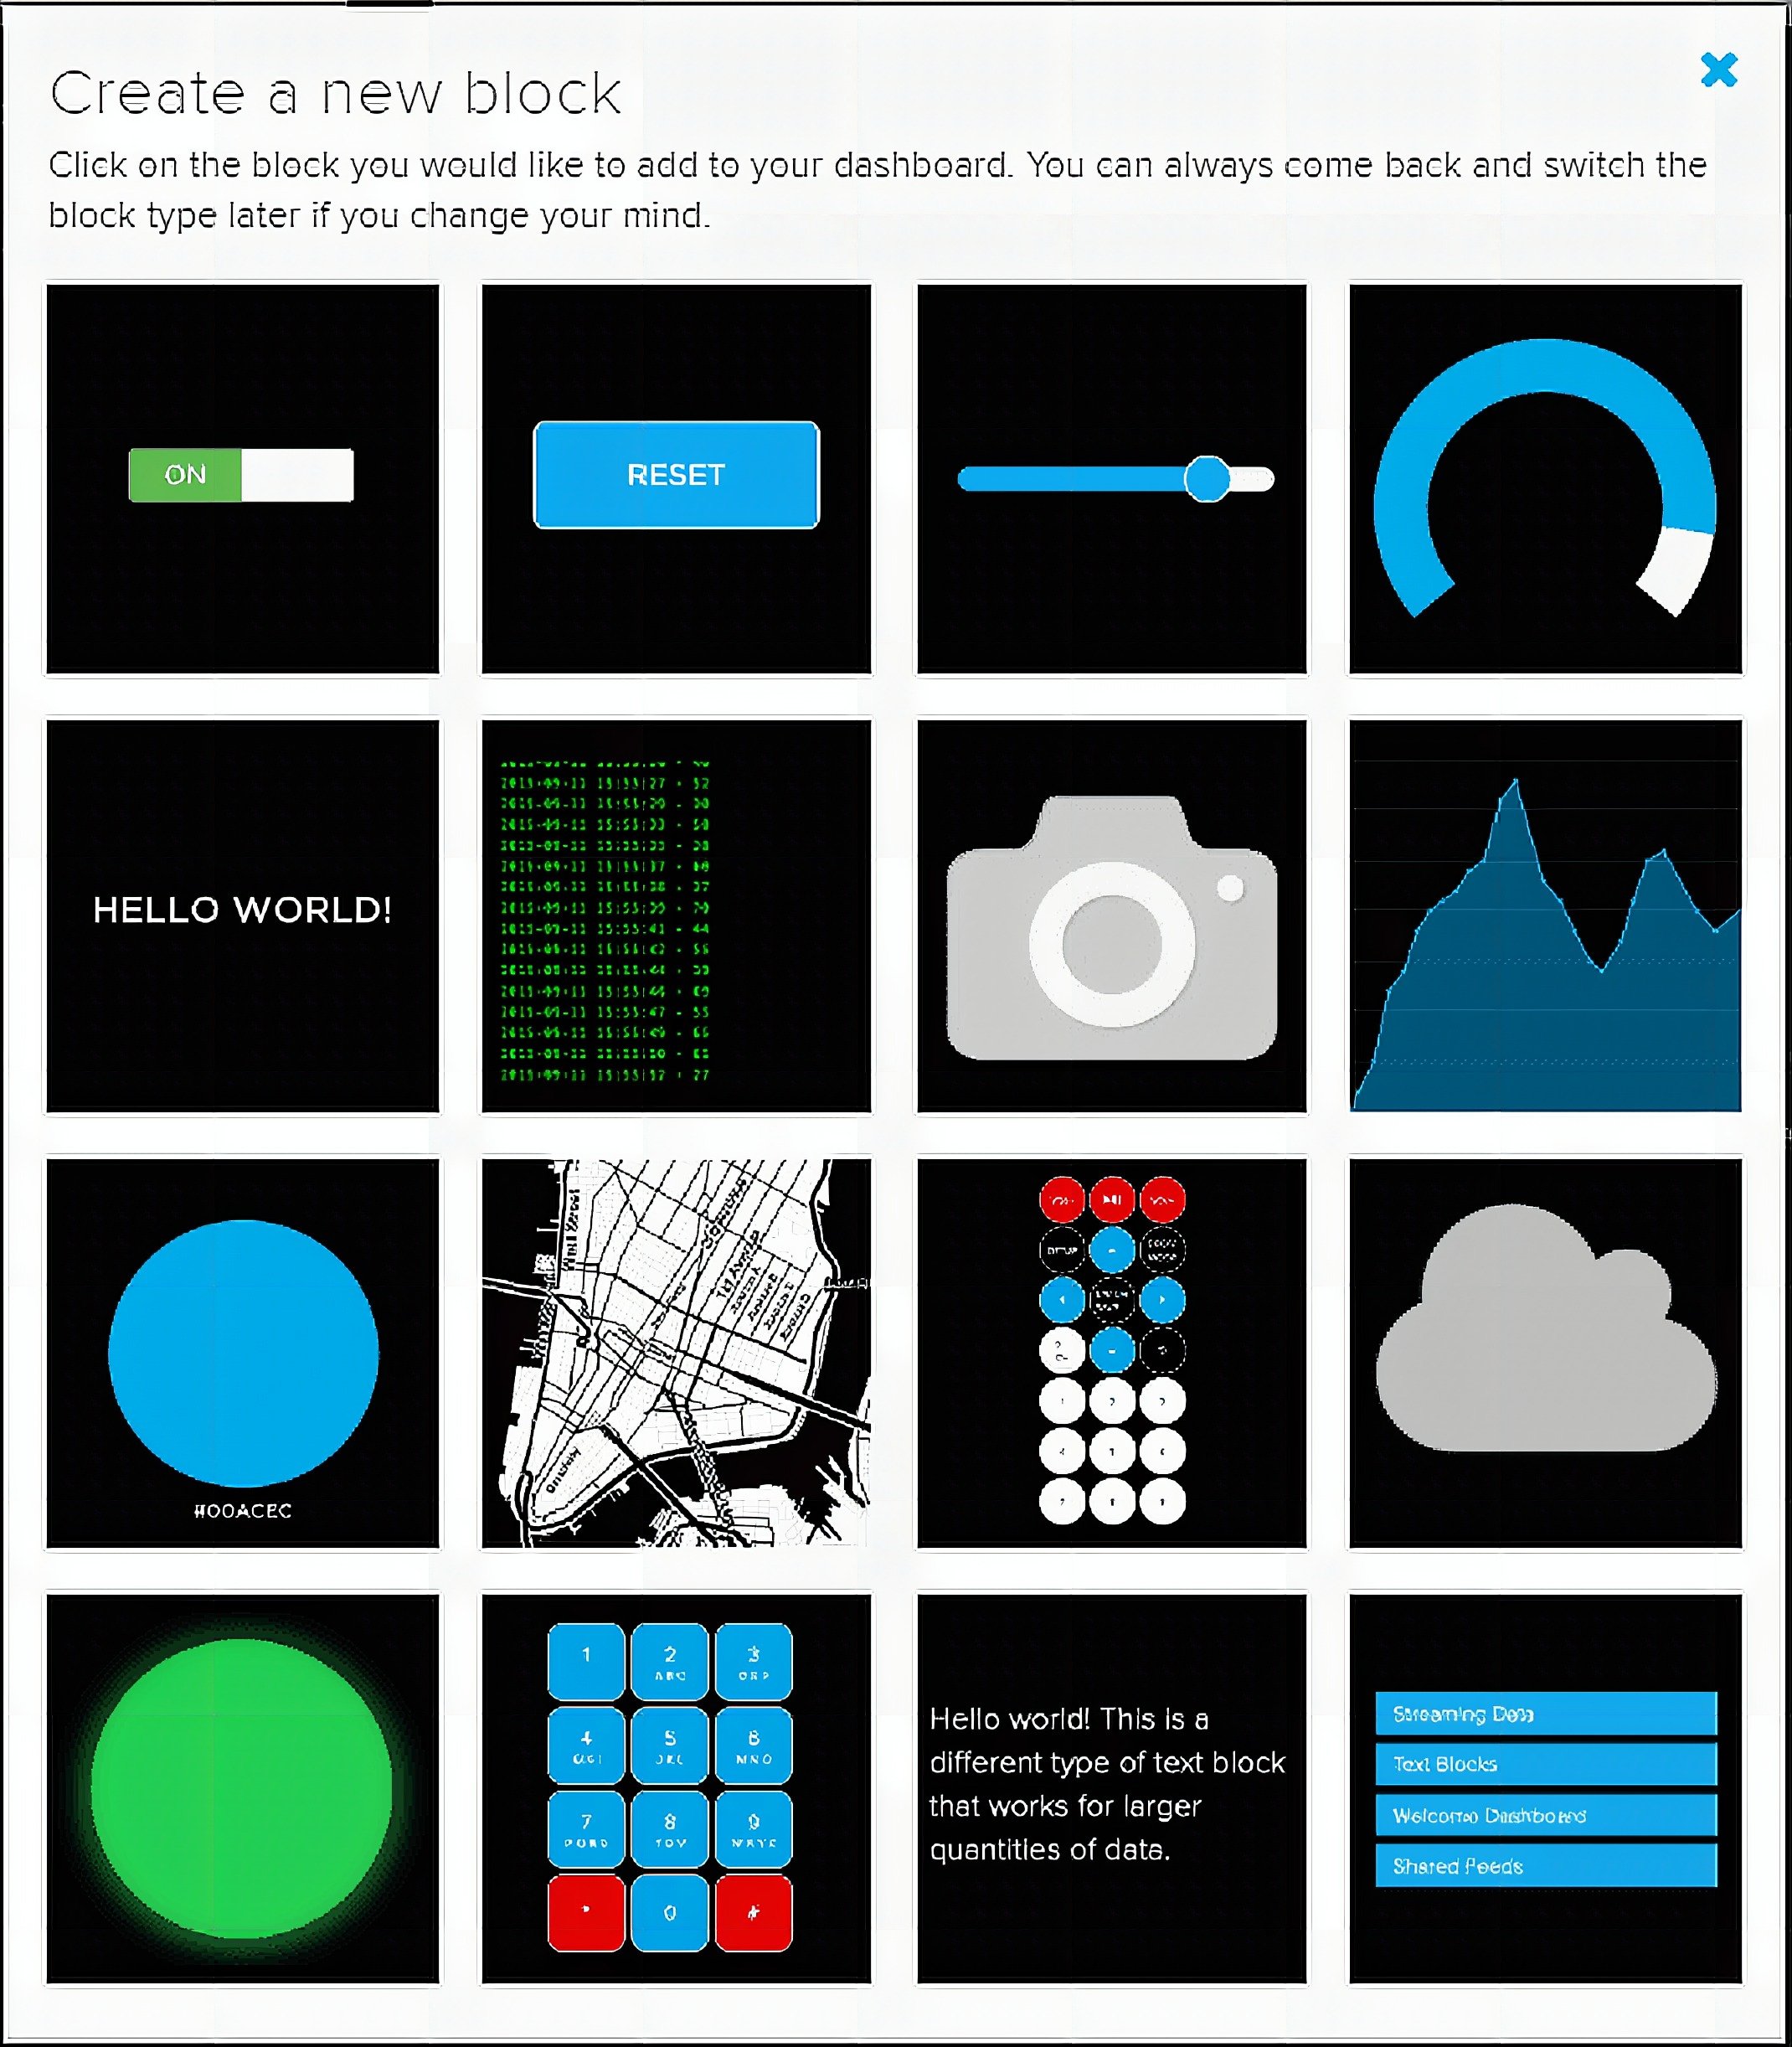
Blocks are switches, buttons, levers, gauges, and more visualization techniques that represent and react to your data. For our sample project, we need 2 gauges to display the room’s temperature and humidity and a switch to toggle an LED.
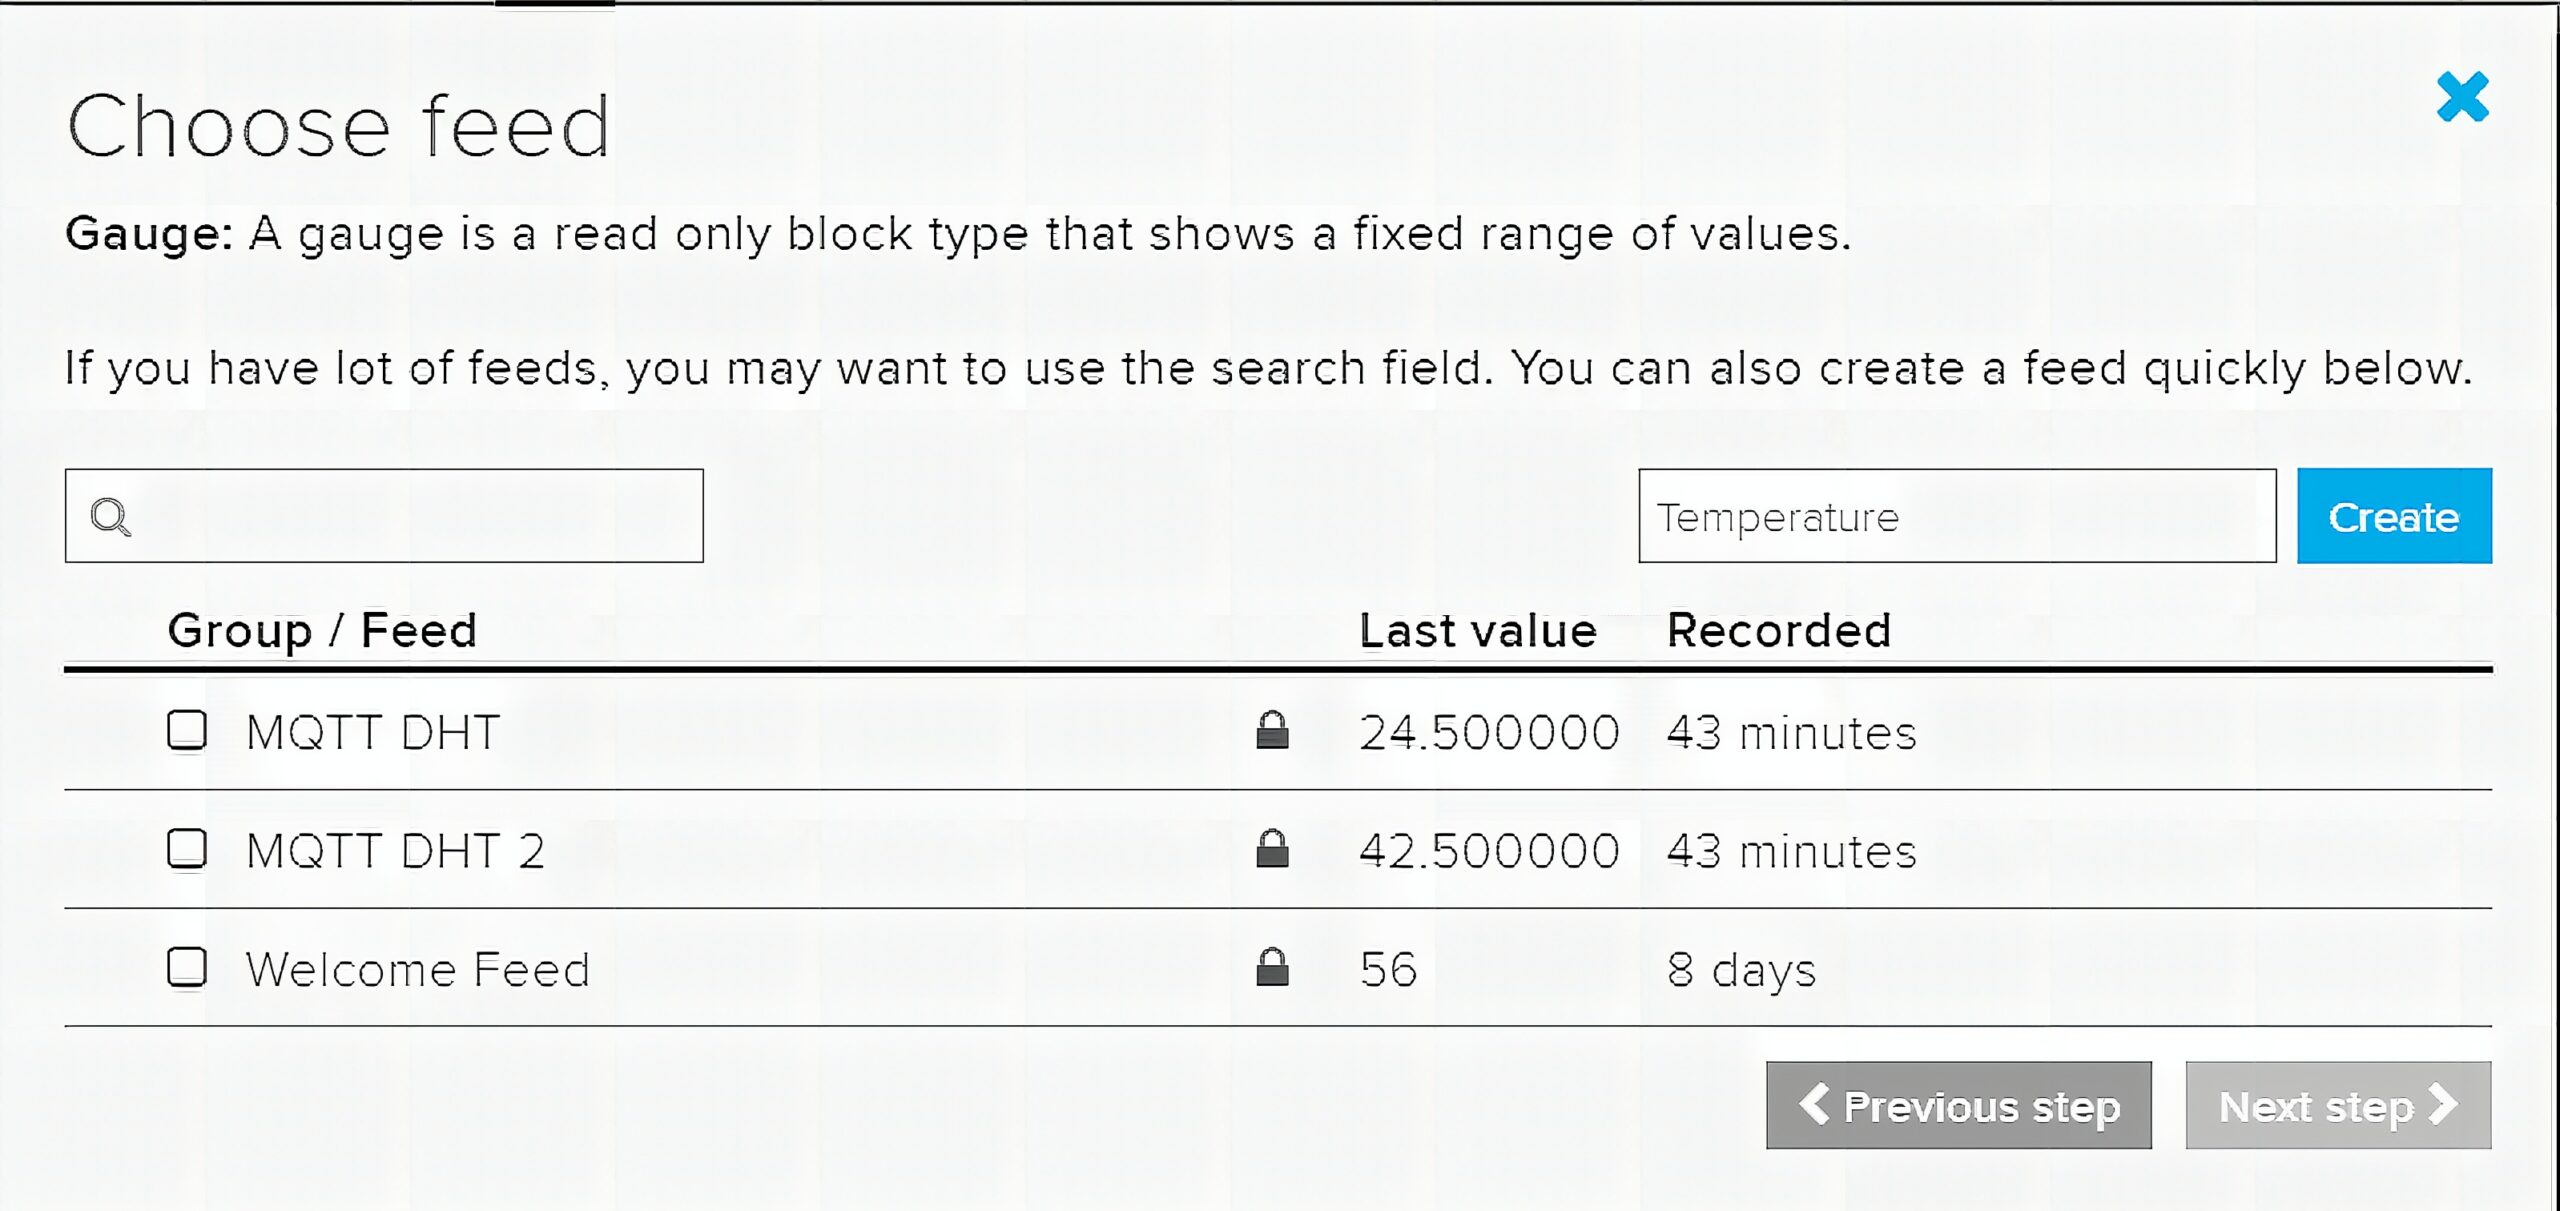
After selecting a block, Adafruit IO prompts you to choose a feed. Feeds can also be called MQTT topics. We need 3 feeds to hold the temperature and humidity values of the DHT sensor, and the status of the LED. Create a feed using the create button on the right.
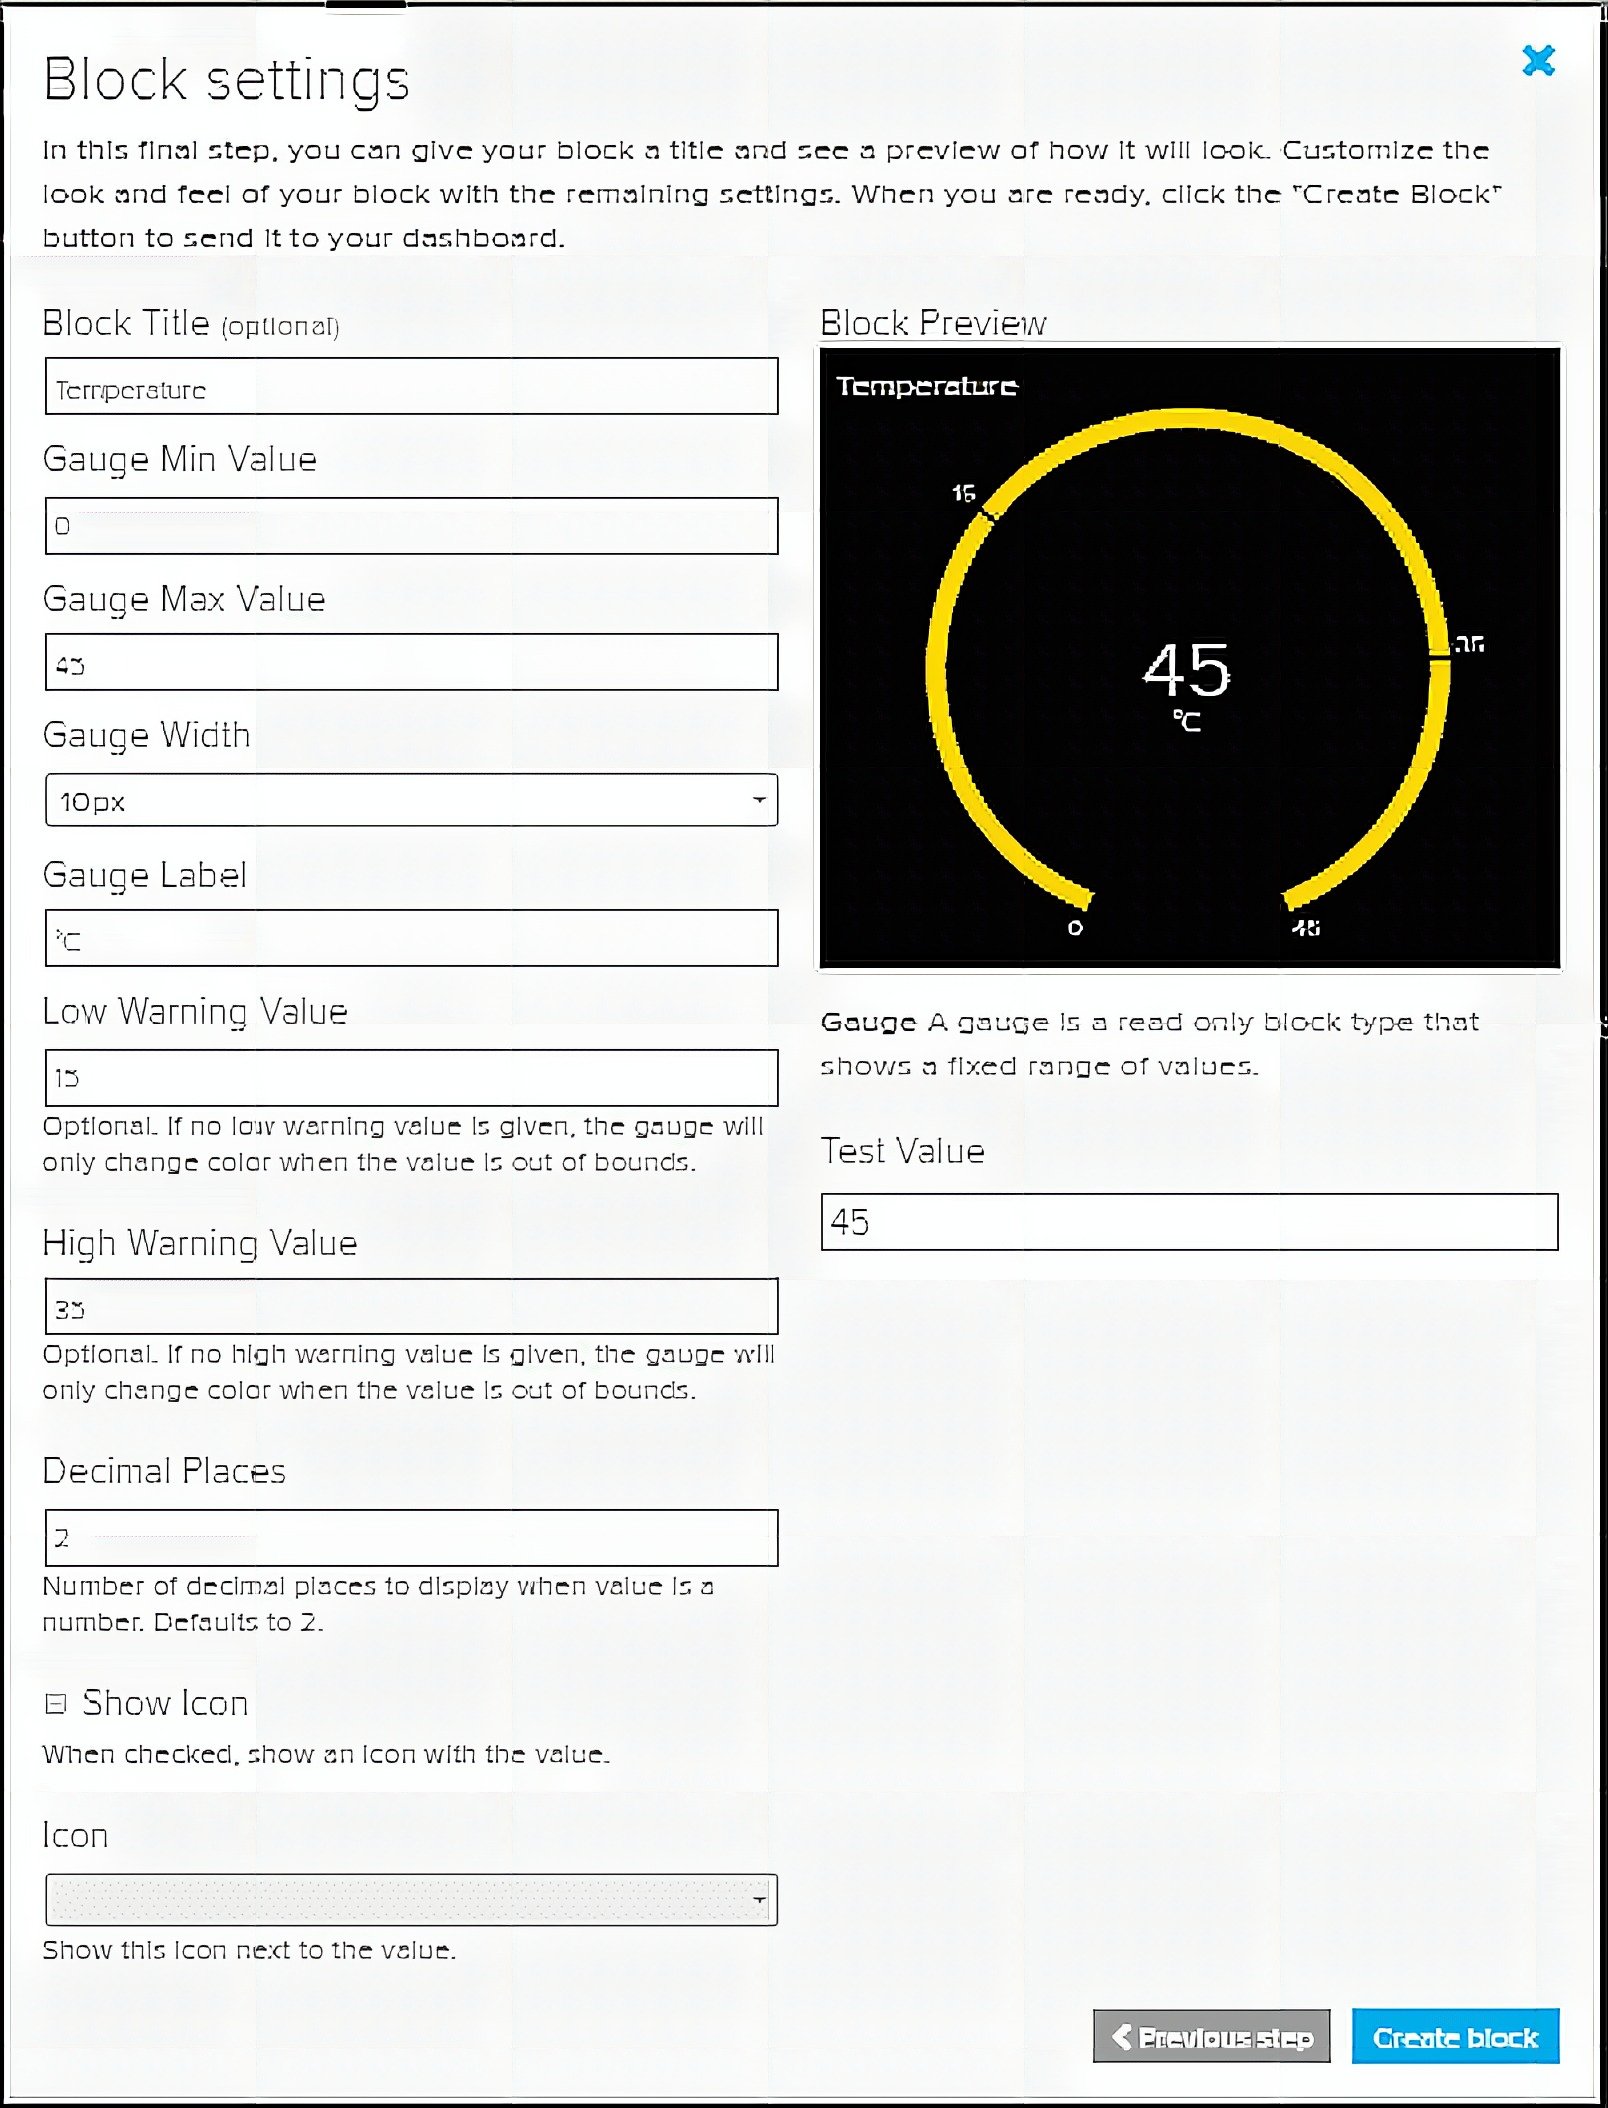
Next, configure the block settings as shown below.
Do the same with Humidity and the LED switch so that you can monitor simultaneously.
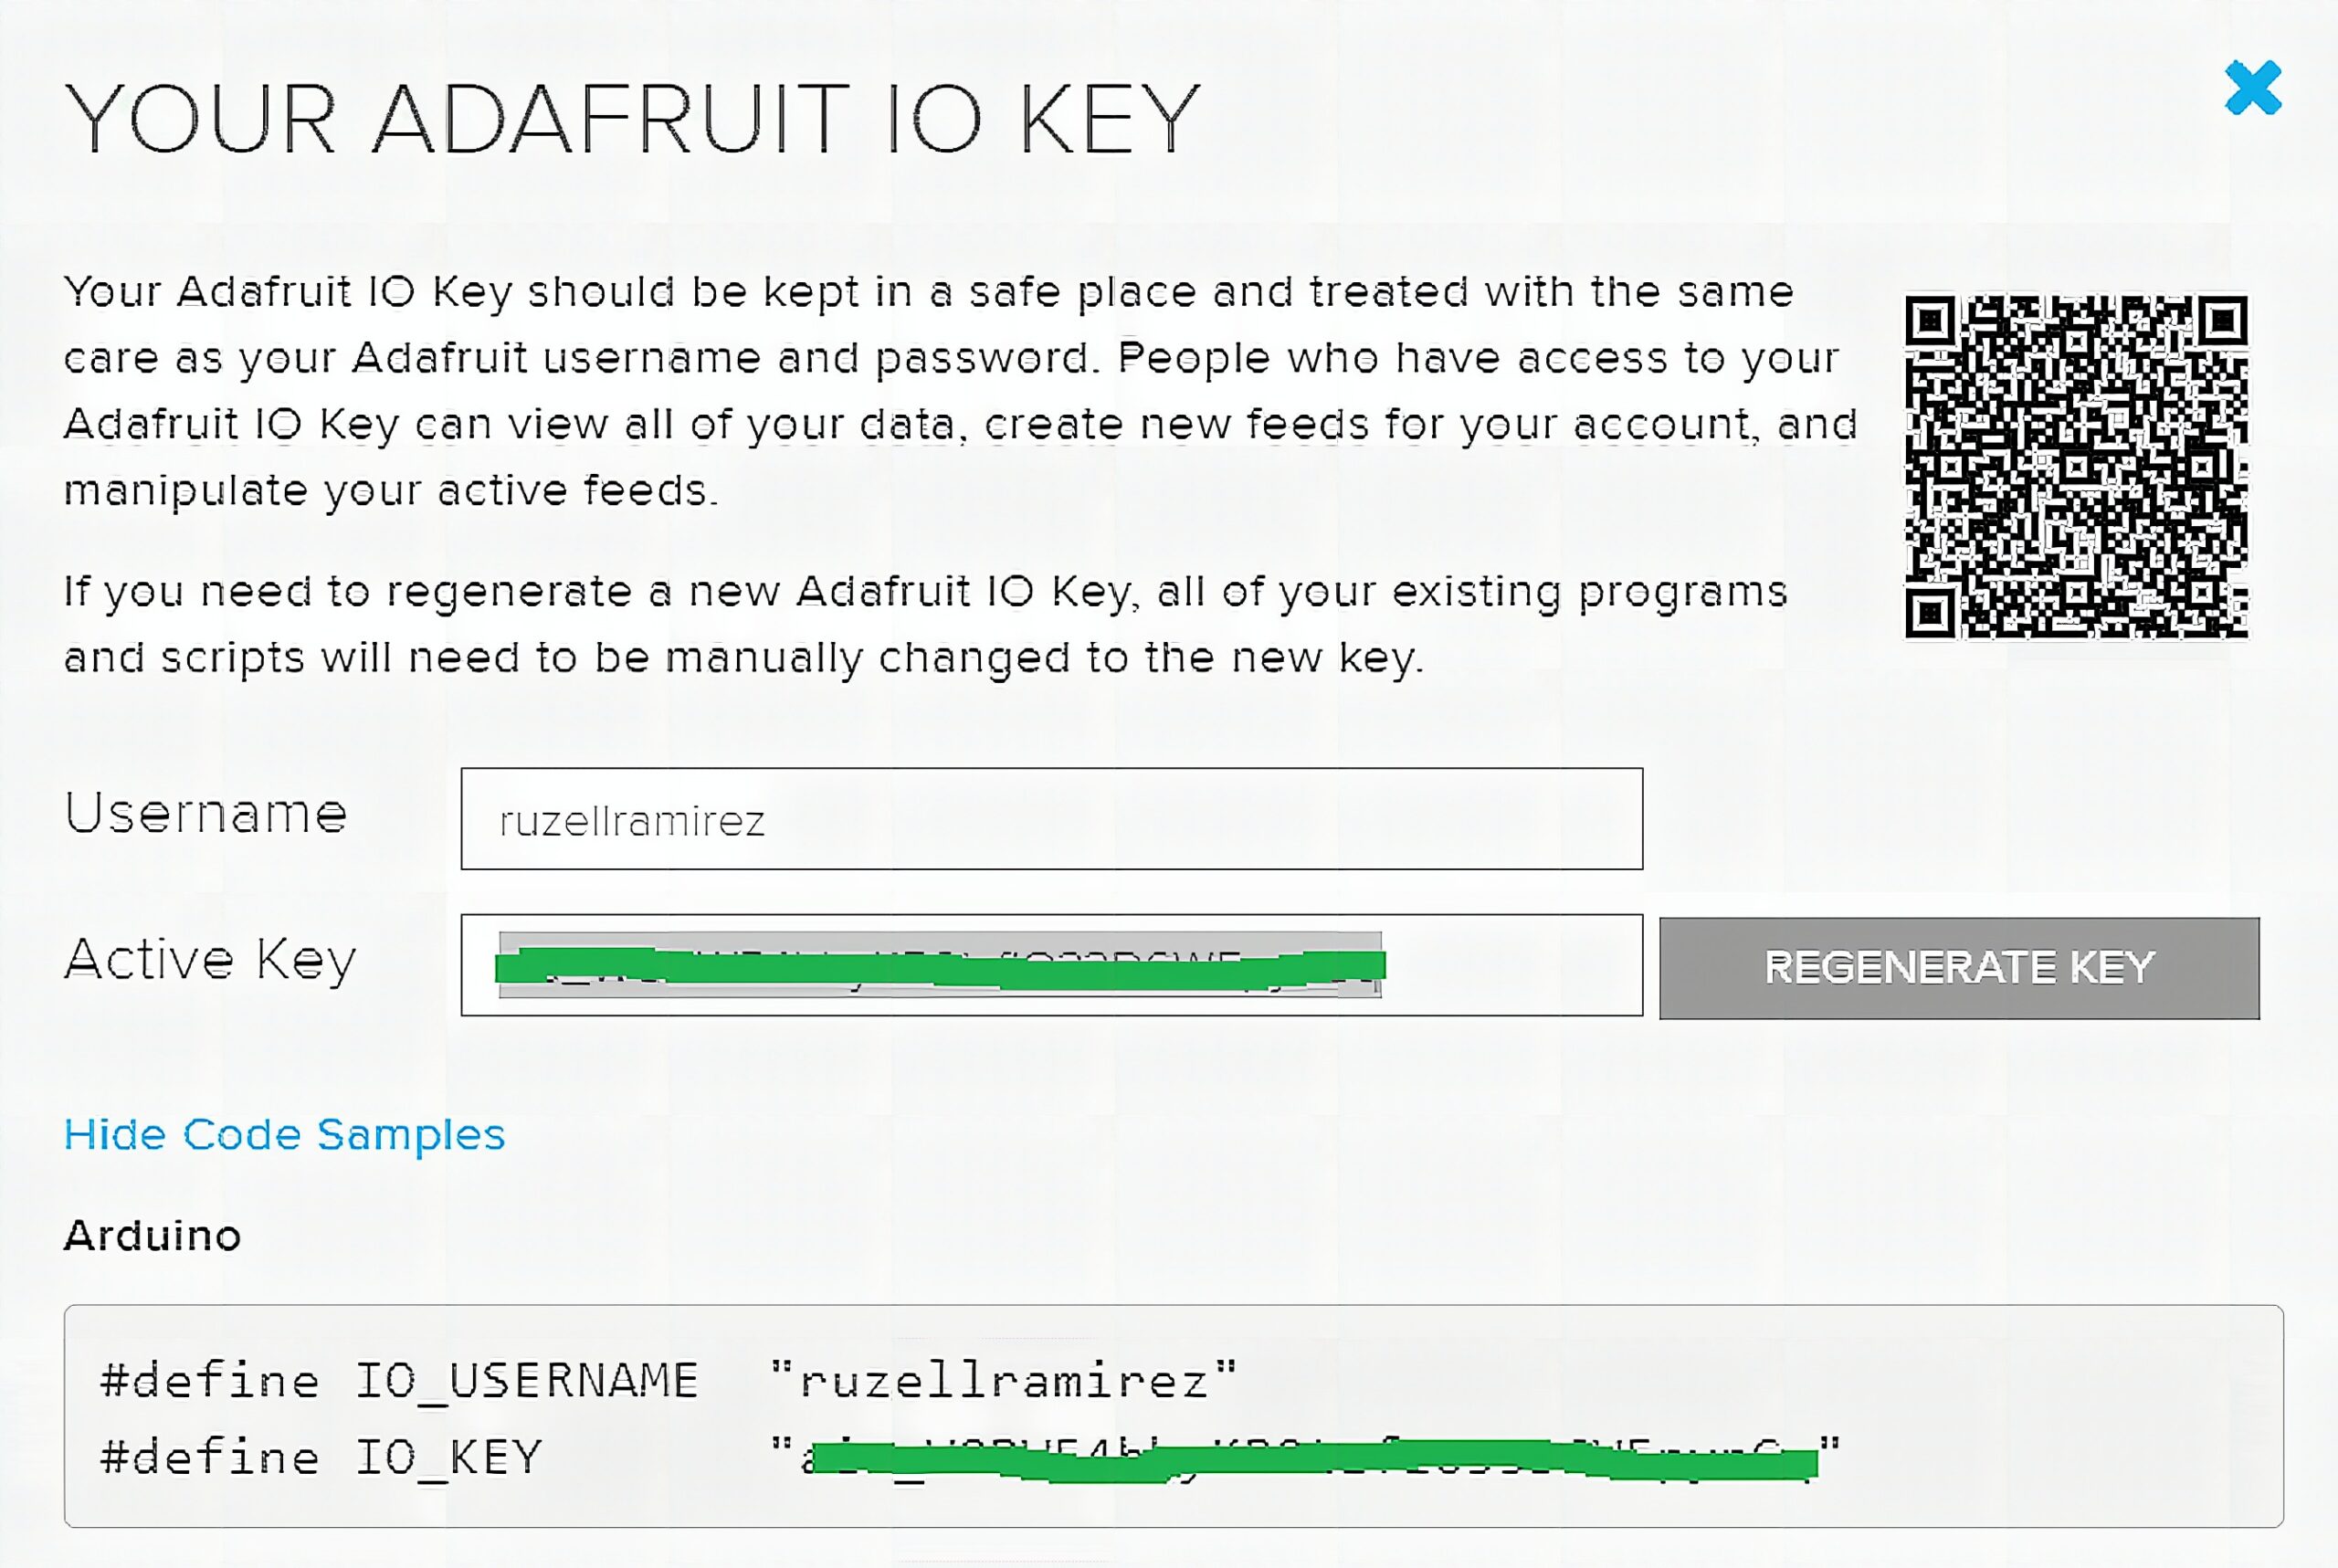
To fill the blocks with data, you need your personal username and key. To obtain both information, go back to the homepage and press Adafruit IO key. A window will appear that displays your username and key. Grab a pen and paper and write them down.
Preparing the Hardware
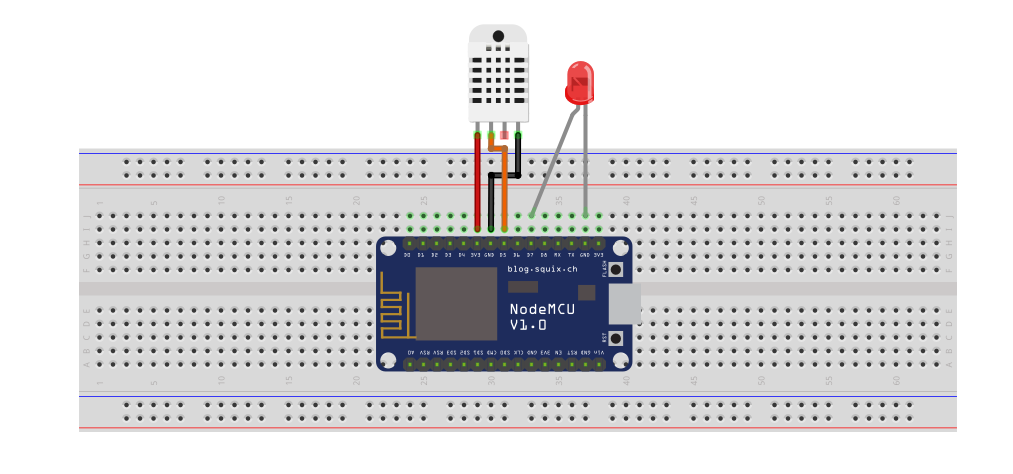
Connect the NodeMCU, DHT22 sensor, and LED as shown below.
Code
#include <ESP8266WiFi.h>
#include "Adafruit_MQTT.h"
#include "Adafruit_MQTT_Client.h"
#include <DHT.h> #define DHTPin D5
#define DHTType DHT22
DHT dht(DHTPin, DHTType);
float t,h; #define WLAN_SSID "YOUR_WIFI_NAME"
#define WLAN_PASS "YOUR_WIFI_PASSWORD" #define AIO_SERVER "io.adafruit.com"
#define AIO_SERVERPORT 1883 #define AIO_USERNAME "YOUR_ADAFRUIT_IO_USERNAME"
#define AIO_KEY "YOUR_ADAFRUIT_IO_KEY" WiFiClient client;
Adafruit_MQTT_Client mqtt(&client, AIO_SERVER, AIO_SERVERPORT, AIO_USERNAME, AIO_KEY); Adafruit_MQTT_Publish Temperature = Adafruit_MQTT_Publish(&mqtt, AIO_USERNAME "/feeds/Temperature");
Adafruit_MQTT_Publish Humidity = Adafruit_MQTT_Publish(&mqtt, AIO_USERNAME "/feeds/Humidity");
Adafruit_MQTT_Subscribe LED = Adafruit_MQTT_Subscribe(&mqtt, AIO_USERNAME "/feeds/LED"); void MQTT_connect(); void setup() { Serial.begin(115200); delay(10); pinMode(D7, OUTPUT); dht.begin(); delay(10); Serial.println(); Serial.println(); Serial.print("Connecting to "); Serial.println(WLAN_SSID); WiFi.begin(WLAN_SSID, WLAN_PASS); while (WiFi.status()!= WL_CONNECTED) { delay(500); Serial.print("."); } Serial.println(); Serial.println("WiFi connected"); Serial.println("IP address: "); Serial.println(WiFi.localIP()); mqtt.subscribe(&LED);
} void loop() { MQTT_connect(); Adafruit_MQTT_Subscribe *subscription; while ((subscription = mqtt.readSubscription(5000))) { if (subscription == &LED) { Serial.print(F("Got: ")); String ledstatus = (char *)LED.lastread; if (ledstatus == "ON") { digitalWrite(D7, HIGH); Serial.println(ledstatus); } else if (ledstatus == "OFF") { digitalWrite(D7, LOW); Serial.println(ledstatus); } } } t = dht.readTemperature(); h = dht.readHumidity(); if (! Temperature.publish(t)) { Serial.println(F("Temperature Failed")); } else { Serial.println(F("Temperature OK!")); } if (! Humidity.publish(h)) { Serial.println(F("Humidity Failed")); } else { Serial.println(F("Humidity OK!")); }
} void MQTT_connect() { int8_t ret; if (mqtt.connected()) { return; } Serial.print("Connecting to MQTT... "); uint8_t retries = 3; while ((ret = mqtt.connect())!= 0) { // connect will return 0 for connected Serial.println(mqtt.connectErrorString(ret)); Serial.println("Retrying MQTT connection in 5 seconds..."); mqtt.disconnect(); delay(5000); // wait 5 seconds retries--; if (retries == 0) { // basically die and wait for WDT to reset me while (1); } } Serial.println("MQTT Connected!");
}
Code Explanation
First, install the required libraries. To use AdafruitIO MQTT API, you need Adafruit_MQTT.h and Adafruit_MQTT_Client.h. Both are available in the Arduino Library Manager.
#include <ESP8266WiFi.h>
#include "Adafruit_MQTT.h"
#include "Adafruit_MQTT_Client.h"
#include <DHT.h>
Setup the DHT sensor.
#define DHTPin D5
#define DHTType DHT22
DHT dht(DHTPin, DHTType);
float t,h;
Enter your WiFi network credentials to connect to the internet.
#define WLAN_SSID "Wifi name"
#define WLAN_PASS "WiFi Password"
Establish your Adafruit IO connection by entering the server URL, port, username, and key.
#define AIO_SERVER "io.adafruit.com"
#define AIO_SERVERPORT 1883 #define AIO_USERNAME "YOUR_ADAFRUIT_IO_USERNAME"
#define AIO_KEY "YOUR_ADAFRUIT_IO_KEY"
Setup the MQTT client.
WiFiClient client;
Adafruit_MQTT_Client mqtt(&client, AIO_SERVER, AIO_SERVERPORT, AIO_USERNAME, AIO_KEY);
Connect your data to the feeds in Adafruit IO. You can also use these functions to create a new feed in Adafruit IO. Use Adafruit_MQTT_Publish to write data into your dashboard, while Adafruit_MQTT_Subscribe to listen to a feed on your dashboard.
Adafruit_MQTT_Publish Temperature = Adafruit_MQTT_Publish(&mqtt, AIO_USERNAME "/feeds/Temperature");
Adafruit_MQTT_Publish Humidity = Adafruit_MQTT_Publish(&mqtt, AIO_USERNAME "/feeds/Humidity");
Adafruit_MQTT_Subscribe LED = Adafruit_MQTT_Subscribe(&mqtt, AIO_USERNAME "/feeds/LED");
This is a helper function that takes care of connecting and reconnecting to the MQTT server.
void MQTT_connect();In the setup section, we open a serial monitor at the baud rate of the ESP8266. We use this to keep an eye on our client, mainly for troubleshooting.
Just like before, we also connect to the internet using WiFi.begin. Once connected, the serial monitor should display the designated IP address for your ESP8266 module.
We also start listening to the LED feed with mqtt.subscribe(&LED).
void setup() { Serial.begin(115200); delay(10); pinMode(D7, OUTPUT); dht.begin(); delay(10); Serial.println(); Serial.println(); Serial.print("Connecting to "); Serial.println(WLAN_SSID); WiFi.begin(WLAN_SSID, WLAN_PASS); while (WiFi.status()!= WL_CONNECTED) { delay(500); Serial.print("."); } Serial.println(); Serial.println("WiFi connected"); Serial.println("IP address: "); Serial.println(WiFi.localIP()); mqtt.subscribe(&LED);
}
In the loop section, we use an if statement to toggle a red LED when it reads the message ON from our MQTT broker.
In addition to this, we also publish the readings from our DHT sensor using Temperature.publish(t) and Humidity.publish(t). This is the equivalent of the save() function from our tutorial using HTTP to connect to Adafruit IO.
void loop() { MQTT_connect(); Adafruit_MQTT_Subscribe *subscription; while ((subscription = mqtt.readSubscription(5000))) { if (subscription == &LED) { Serial.print(F("Got: ")); String ledstatus = (char *)LED.lastread; if (ledstatus == "ON") { digitalWrite(D7, HIGH); Serial.println(ledstatus); } else if (ledstatus == "OFF") { digitalWrite(D7, LOW); Serial.println(ledstatus); } } } t = dht.readTemperature(); h = dht.readHumidity(); if (! Temperature.publish(t)) { Serial.println(F("Temperature Failed")); } else { Serial.println(F("Temperature OK!")); } if (! Humidity.publish(h)) { Serial.println(F("Humidity Failed")); } else { Serial.println(F("Humidity OK!")); }
}
Demonstration
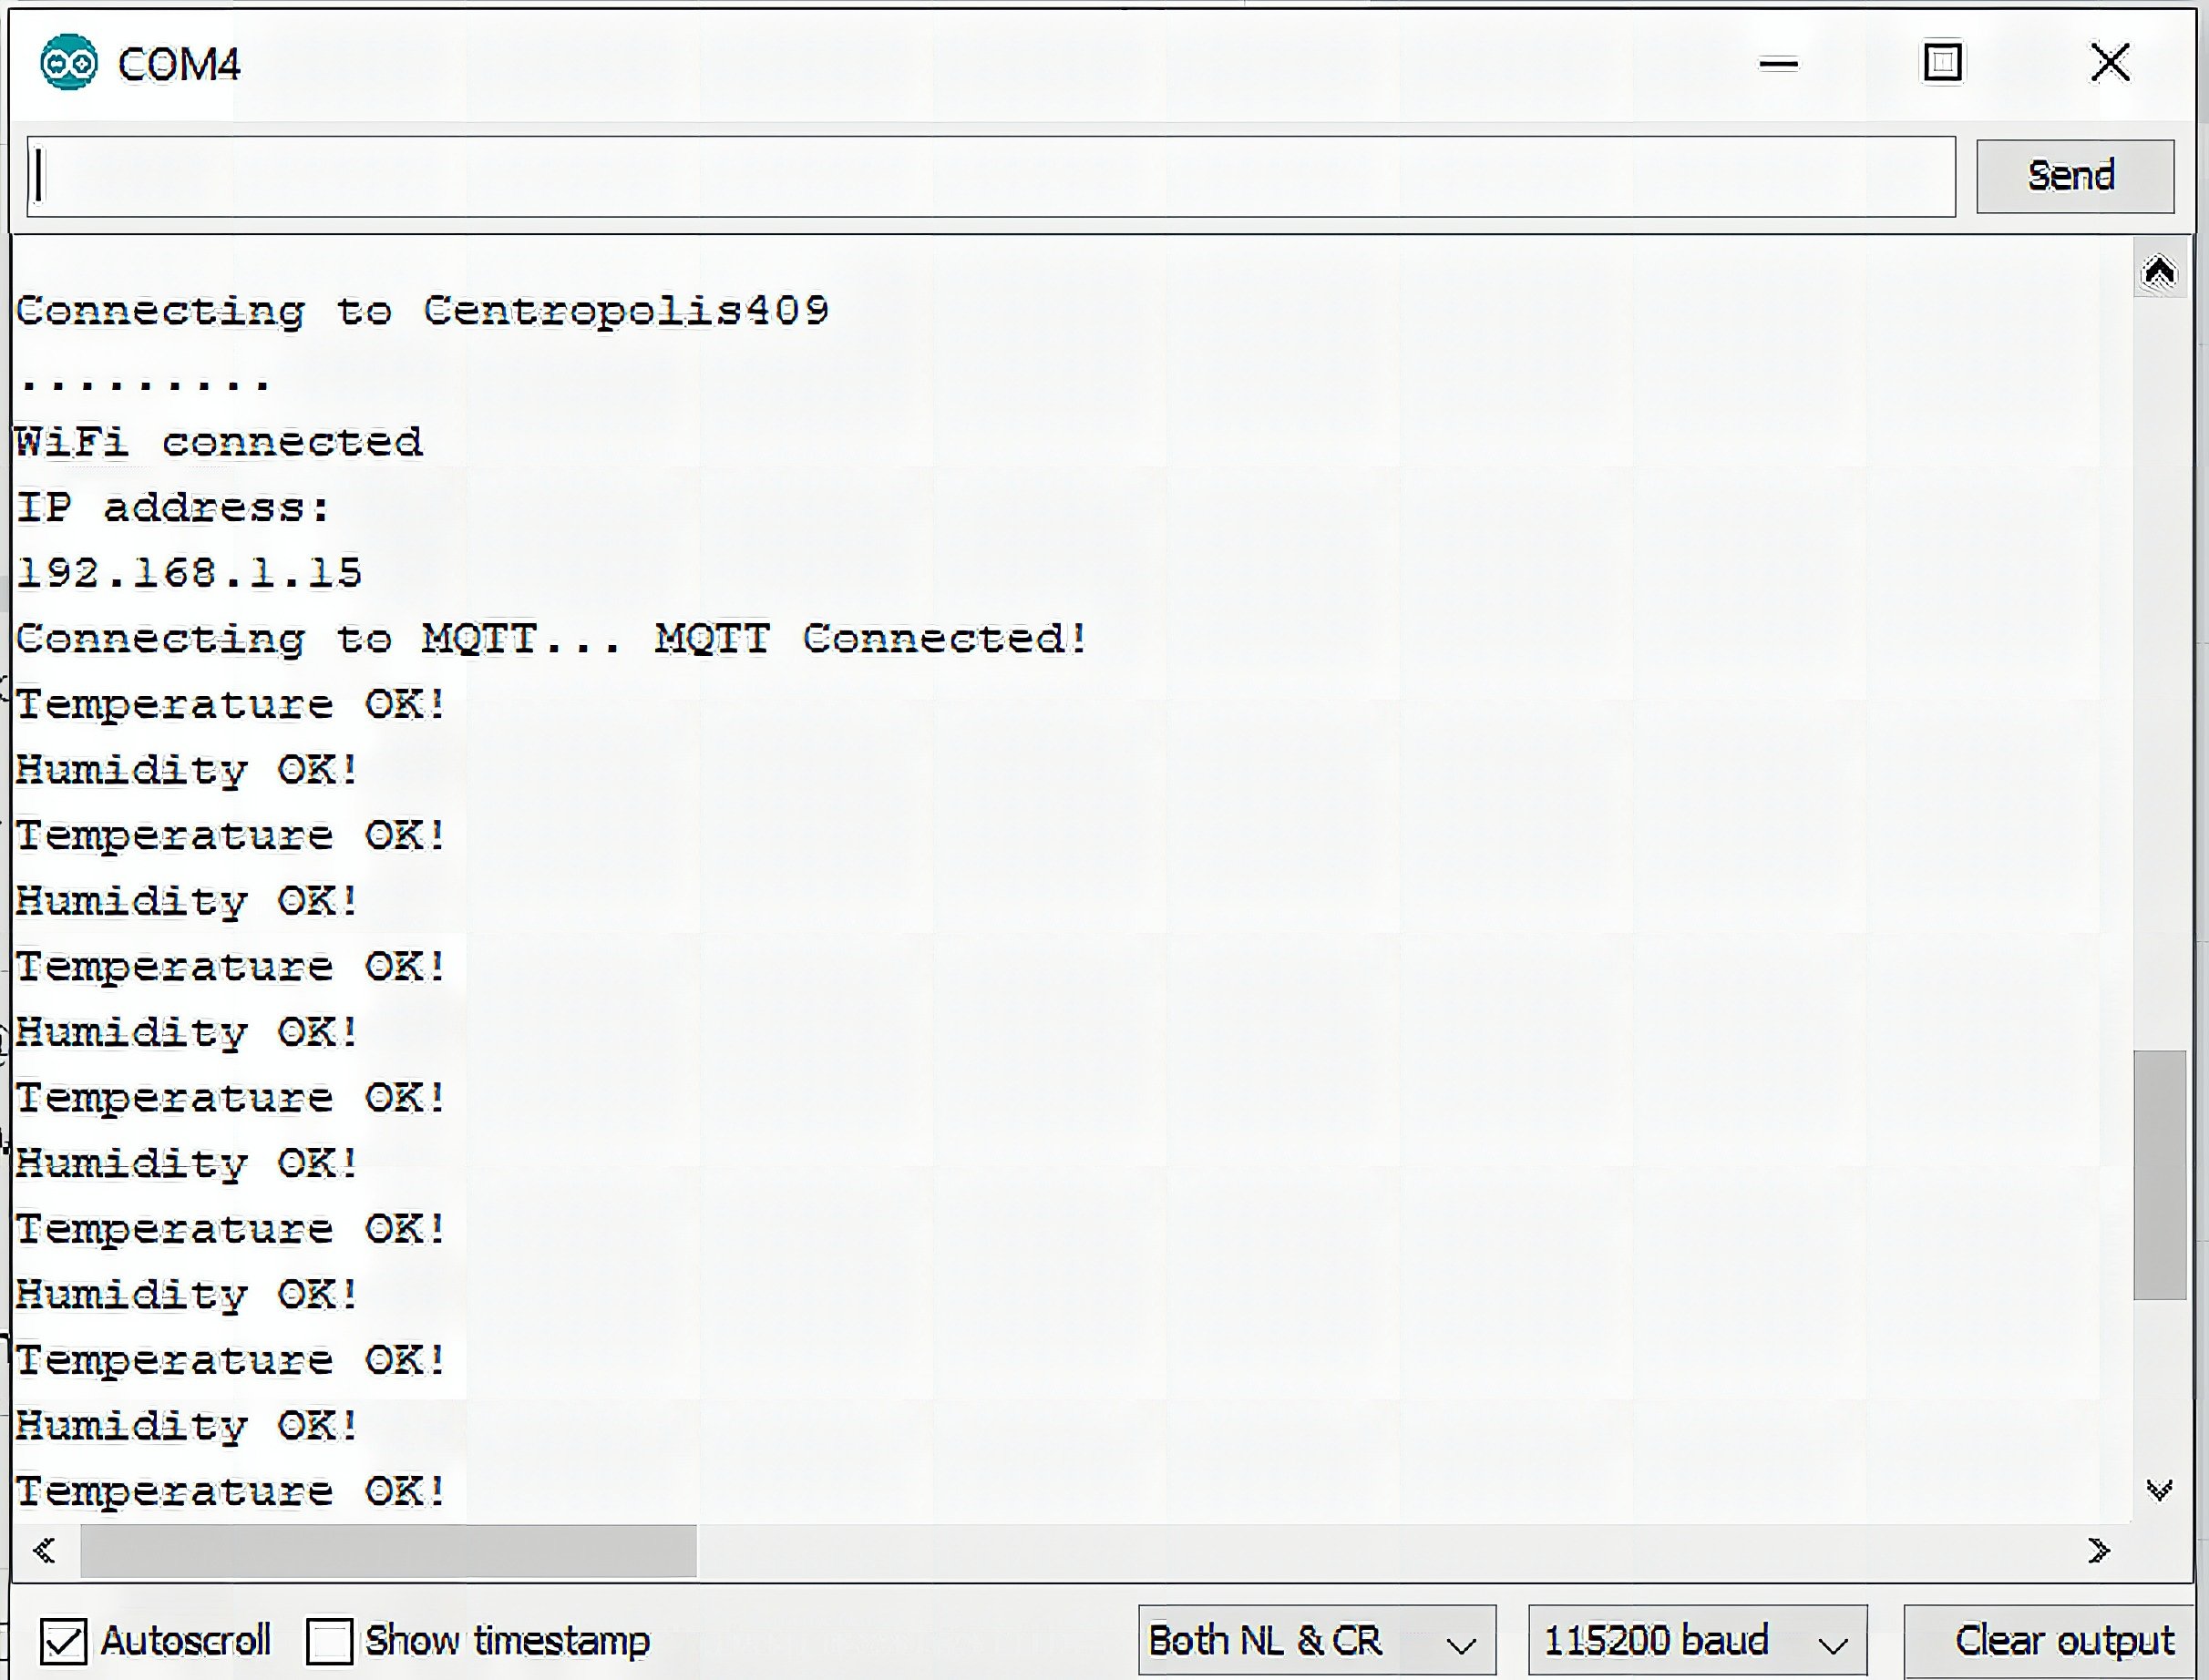
Upload the sketch to NodeMCU, then open the serial monitor. You will see message alerts when the client publishes data on the topic.
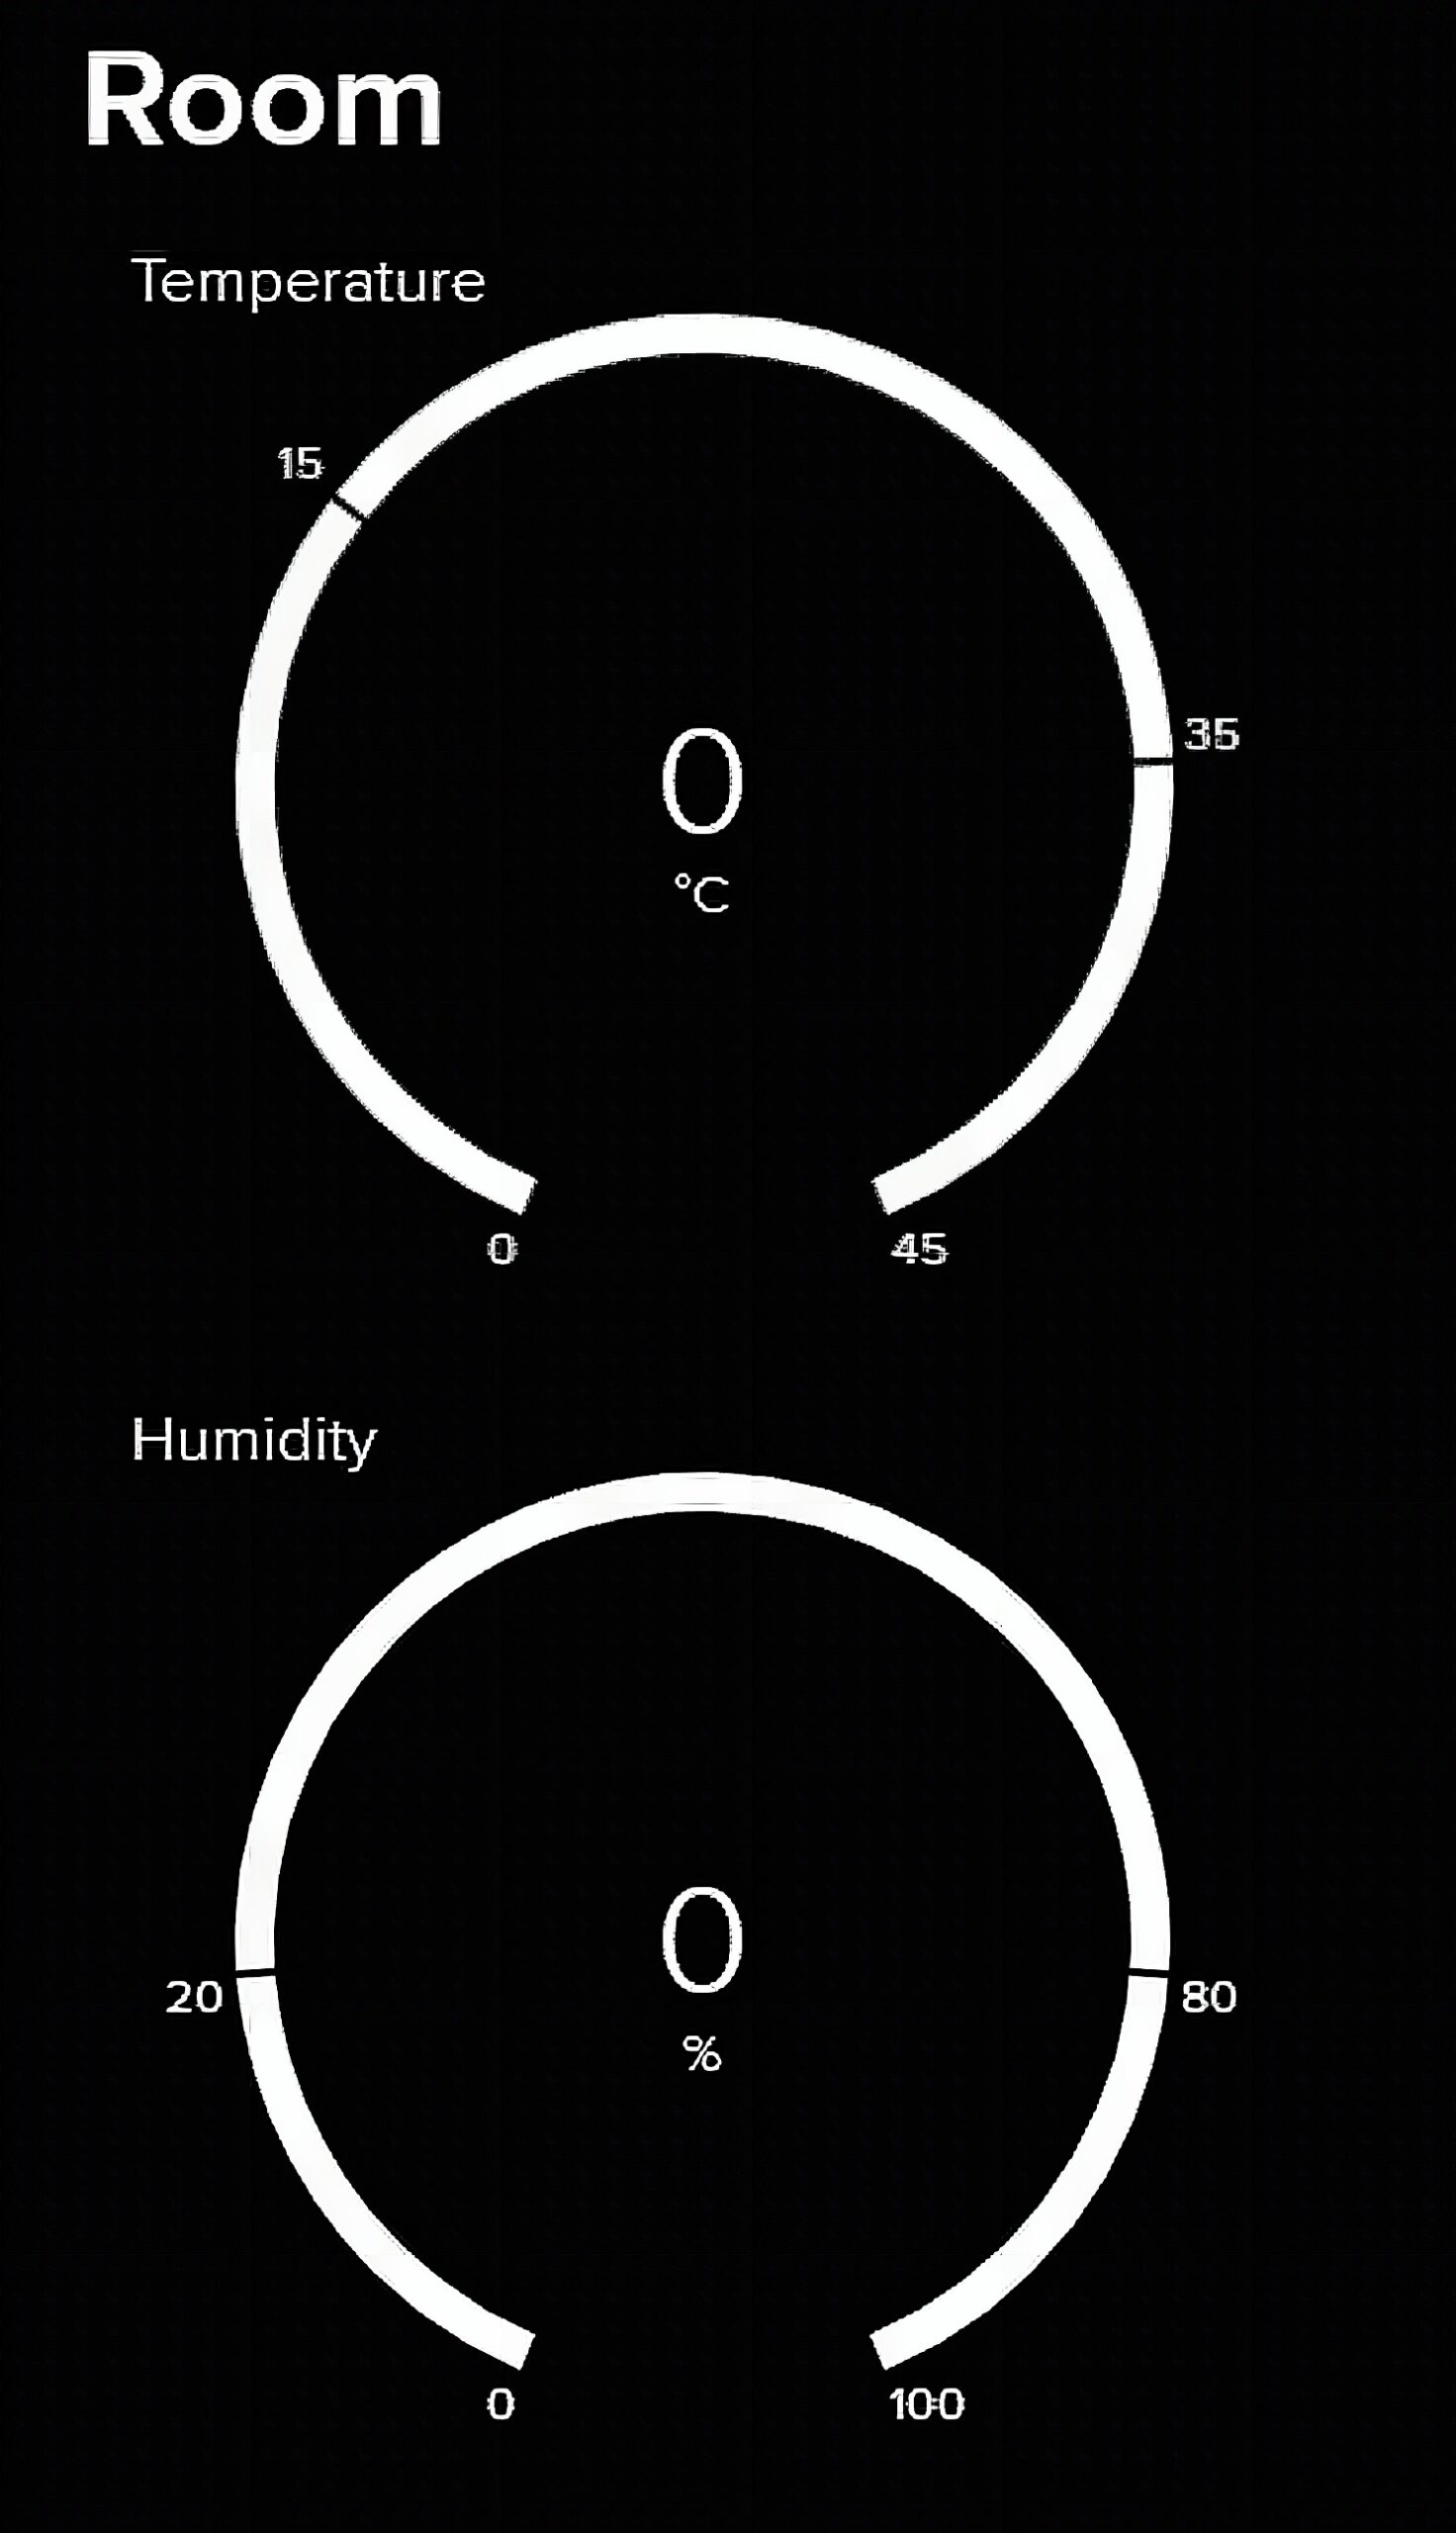
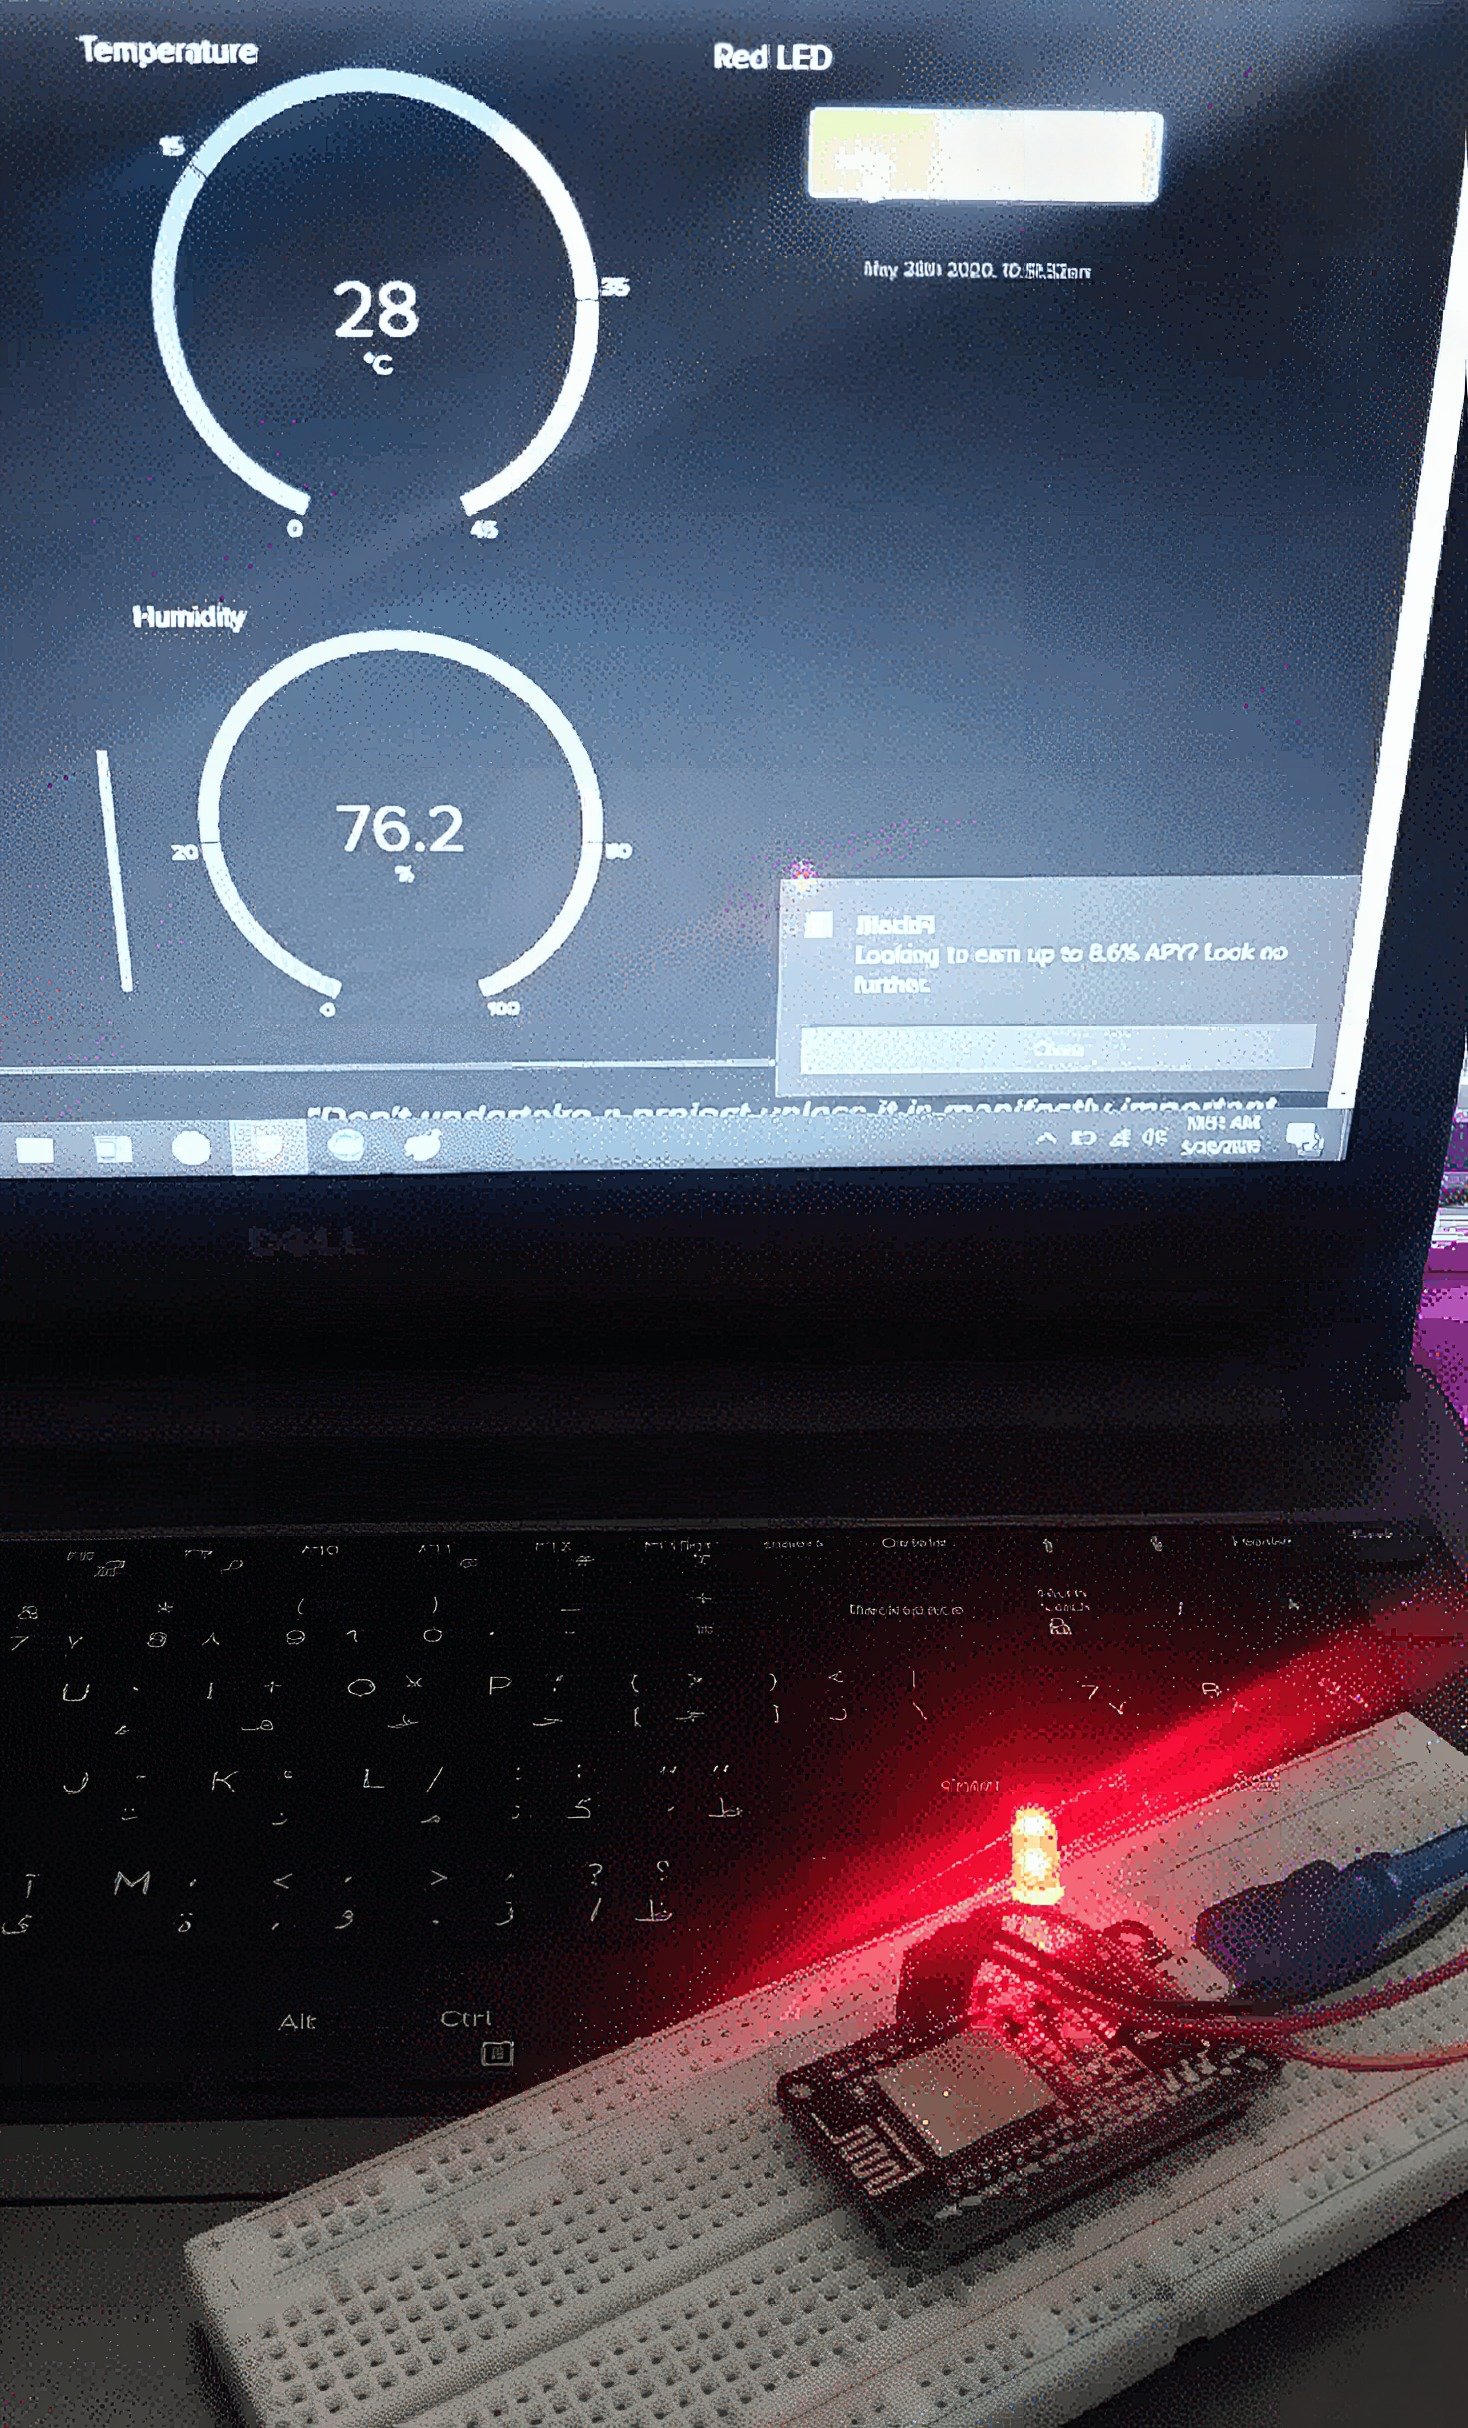
Your dashboard should look like this.

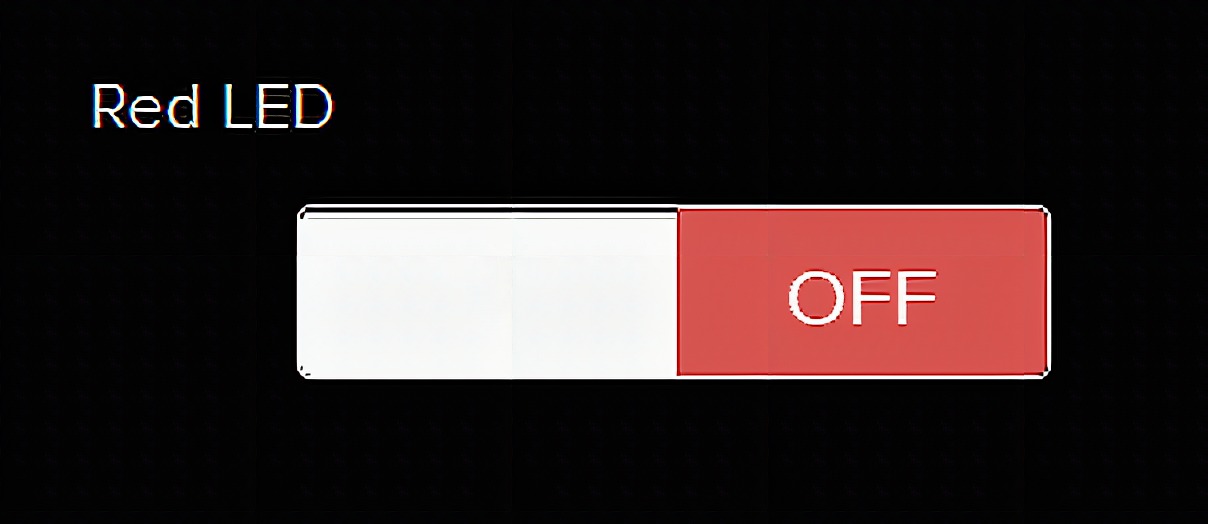
When the switch is toggled, the red LED turns on almost instantly.
Frequently Asked Questions
[faq] [faq_q]What is MQTT?[/faq_q] [faq_a]A lightweight publish/subscribe messaging protocol built for IoT. Devices publish data to topics, other devices subscribe to topics. A central broker routes messages. Low bandwidth, low power, works over flaky networks.[/faq_a][faq_q]What is Adafruit IO?[/faq_q] [faq_a]A free hosted MQTT broker plus a dashboard service from Adafruit. You publish data to your account feeds, then build dashboards to visualize them. Free tier handles up to 30 data points per minute.[/faq_a][faq_q]Do I need to pay for Adafruit IO?[/faq_q] [faq_a]No. The free tier covers most hobby projects. The paid tier adds more data throughput, more feeds, and SMS triggers. The article uses the free tier.[/faq_a][faq_q]Can I use a different MQTT broker?[/faq_q] [faq_a]Yes. The same ESP8266 code works against any MQTT broker (Mosquitto, HiveMQ, EMQX). You just change the broker URL and credentials. Adafruit IO is convenient because of the built-in dashboard.[/faq_a][faq_q]How secure is MQTT over the public internet?[/faq_q] [faq_a]With TLS enabled, MQTT is as secure as HTTPS. Adafruit IO uses port 8883 for TLS-encrypted MQTT. The article shows how to set this up on the ESP8266.[/faq_a][/faq]Frequently Asked Questions
What does this MQTT using AdafruitIO and ESP8266 tutorial cover?
If you’re looking for a lightweight IoT communication protocol, and a server that is completely free that supports it, then sit tight! In this tutorial, we are going to create an MQTT broker using Adafruit IO and NodeMCU.
Why won't my ESP8266 connect to home Wi-Fi?
ESP8266 only supports 2.4GHz. If your router is on 5GHz only, switch the SSID to a 2.4GHz band. Also check WPA2 (not WPA3) and that the SSID is broadcasting.
Should I use ESP8266 or ESP32 for the MQTT using AdafruitIO and ESP8266 build?
ESP8266 (NodeMCU/Wemos D1) is cheaper and fine for one Wi-Fi sensor + one I/O. ESP32 gives BLE, more GPIO, dual core, touch pins — pick it for richer projects.