
Simple keypad with an Arduino is a great way to learn about digital inputs and user interfaces. The 4×4 keypad has 16 buttons arranged in a grid, which you can use for entering numbers, letters, or commands. This is useful for making projects like password systems, menu navigation, or simple data entry. By connecting the keypad to an Arduino, you can easily read and process the button presses.
To set up it, you connect the 8 pins of the keypad to the Arduino’s digital input pins. Using the Keypad library for Arduino makes it easy to manage the keypad and detect which button is pressed. Allowing you to create features like password input, menu selection, or triggering specific actions based on the keys pressed.
This project not only teaches you how to connect and read a keypad but also shows you how to make it more interactive. You can add a display to show feedback to the user, making it easier to use. Whether you’re building a create projects. Using this project, you can effective way to bring your ideas to life.
Components
Connection:
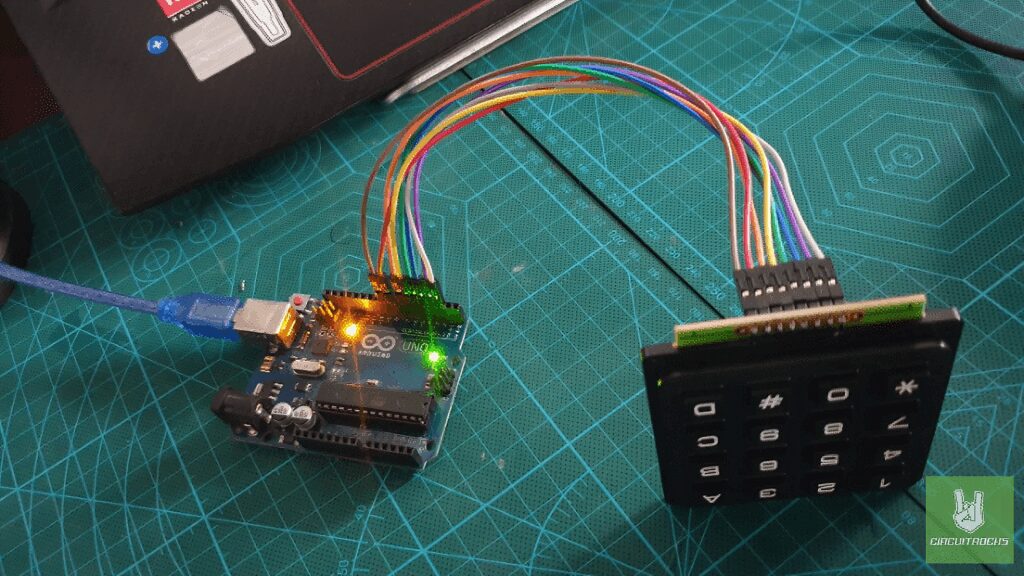
Using solder lead and a soldering iron, attach the male header to the 4×4 keypad to use it properly.

Connect the keypad’s pins to the Arduino:
- K1 to Arduino Pin 2
- K2 to Arduino Pin 3
- K3 to Arduino Pin 4
- K4 to Arduino Pin 5
- K5 to Arduino Pin 6
- K6 to Arduino Pin 7
- K7 to Arduino Pin 8
- K8 to Arduino Pin 9
Note:
- To use the code you provided, you need the
Keypadlibrary for Arduino. This library allows you to interface with a matrix keypad.
Code:
This code is designed to interface a 4×4 matrix keypad with an Arduino, allowing the Arduino to read and interpret key presses from the keypad. The keys are arranged in a matrix, with each key corresponding to a specific character as defined. This way, each key press is displayed in the serial monitor, enabling real-time monitoring of the keypad inputs.
#include <Keypad.h> // Define the number of rows and columns
const byte ROWS = 4;
const byte COLS = 4; // Define the symbols on the keypad buttons
char keys[ROWS][COLS] = { {'1', '4', '7', '*'}, {'2', '5', '8', '0'}, {'3', '6', '9', '#'}, {'A', 'B', 'C', 'D'}
}; // Connect keypad ROW0, ROW1, ROW2, and ROW3 to these Arduino pins
byte rowPins[ROWS] = {2, 3, 4, 5}; // Connect keypad COL0, COL1, COL2, and COL3 to these Arduino pins
byte colPins[COLS] = {6, 7, 8, 9}; // Create the Keypad object
Keypad keypad = Keypad(makeKeymap(keys), rowPins, colPins, ROWS, COLS); void setup() { Serial.begin(9600);
} void loop() { char key = keypad.getKey(); if (key) { Serial.println(key); }
}
Troubleshooting:
- Ensure that the keypad is wired correctly to the Arduino. Double-check the pin connections.
- Ensure that the Serial Monitor is set to the correct baud rate (9600) to match the
Serial.begin(9600);in yoursetup()function. - By following these troubleshooting steps. You should be able to identify and resolve the issue with your keypad and Arduino setup.
QUICK LINK
Frequently Asked Questions
What does this Simple Keypad Input with Arduino tutorial cover?
Simple keypad with an Arduino is a great way to learn about digital inputs and user interfaces.
What Arduino library does the Simple Keypad Input with Arduino tutorial use?
The sketch uses standard Wire.h (I2C) or SPI.h plus a part-specific library installable via Arduino IDE → Sketch → Include Library → Manage Libraries. See the Sample Code section.
Why does the Simple Keypad Input with Arduino act differently on USB power vs battery?
Battery voltage sags under load. Add a 100uF cap across the rails, use a 5V/2A regulator-backed pack, and never power motors from the Arduino's onboard regulator.