
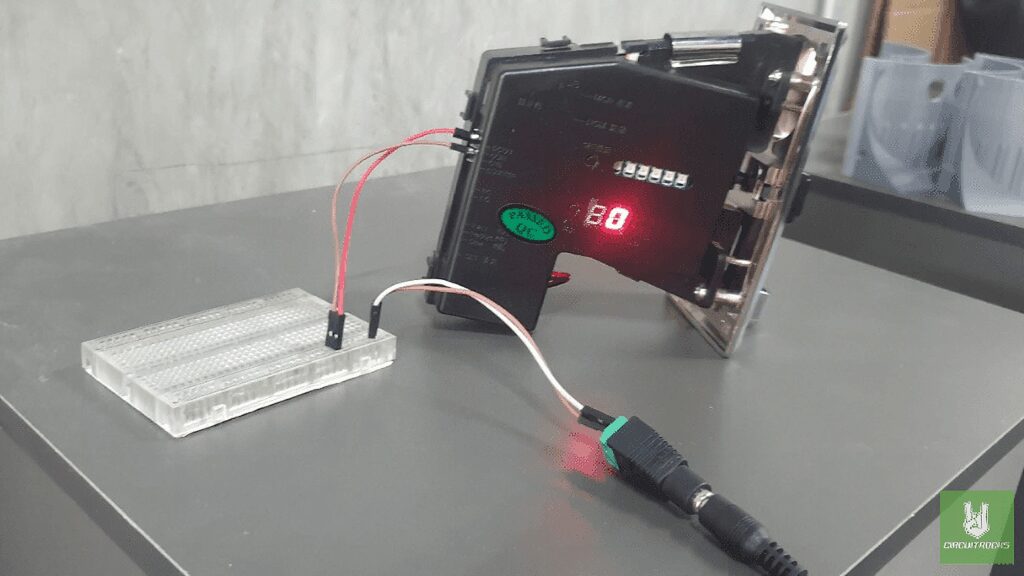
Setting up your 4-coin type acceptor for 1, 5, 10, and 20 Pesos is straightforward. Start by finding the DIP switches on the coin acceptor. These switches need to be set according to the instructions in the manual to match the 1, 5, 10, and 20 Peso coins. Adjust the switches to the correct positions as described in the manual.
Next, calibrate the coin acceptor. Turn on the device and enter calibration mode by pressing the designated button or switch. Insert the 1 Peso coin several times until the acceptor learns to recognize it. Do the same for the 5, 10, and 20 Peso coins, ensuring you insert them consistently each time. Use 20 samples of each coin, including both old and new versions of 1, 5, and 10 Peso coins, to ensure the acceptor can accurately recognize different variations.
Finally, test the coin acceptor by inserting multiple coins of each type. Check that the acceptor correctly identifies and registers each coin. If it doesn’t, repeat the calibration process. Proper setup and testing ensure that your coin acceptor will work reliably, making it easy to use. By using this coin acceptor, you can develop a variety of crucial projects such as a Piso WiFi, vending machines, or any other automated payment solution. This enhances the functionality and convenience of your projects, providing a seamless user experience.
Components
Methods for setting coin samples:
Here are samples coins need to calibrate in different “A”.
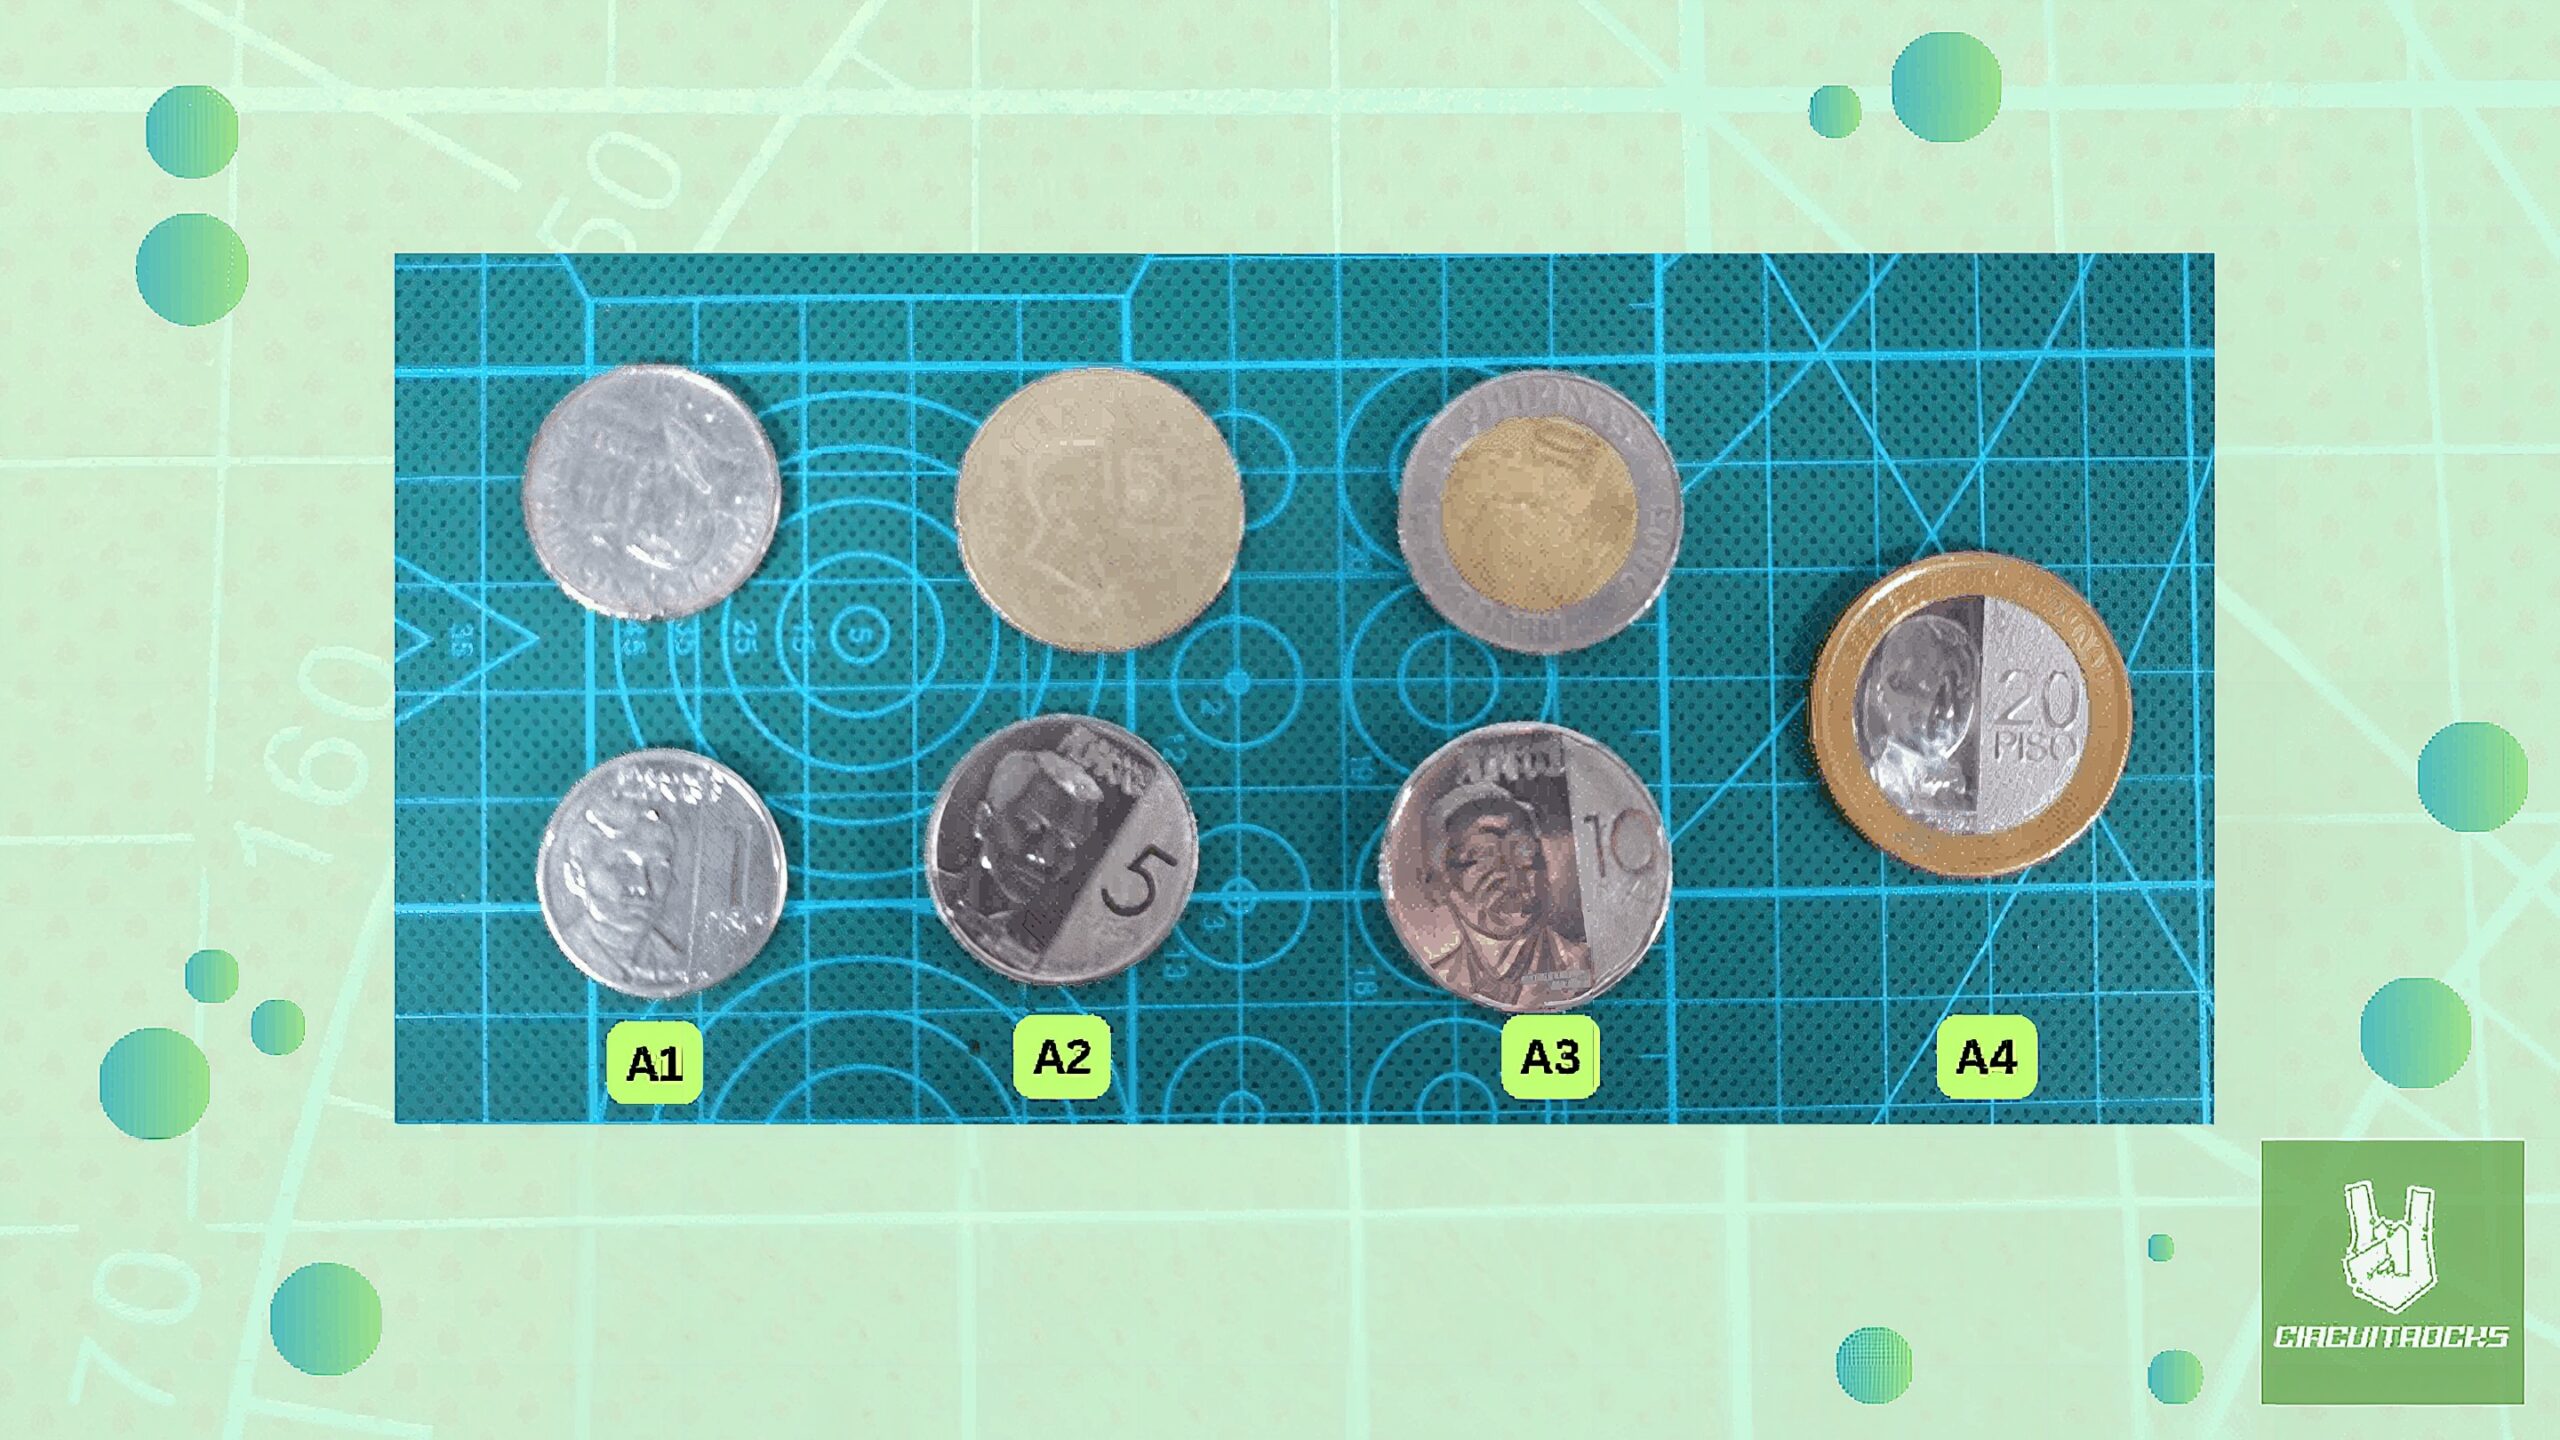
- Pressing the SET key, the letter A is shown. Then pressing the SET key again, the letter A1 is show. The first LED is always on. At this moment input 20 sample coins of 1 Pesos old and new by constant velocity. After inputting the coins, LED lights will flicker.
- When the letter A2 is show and the second LED are lights are on. Input the second 20 samples coins of 5 Pesos new and old of it. After it, LED lights will flicker.
- When A3 is show, the three LED are lights are on. Input the third 20 samples coins of 10 Pesos old and new of it. After inputting the coins, LED lights will flicker.
- When A4 is show, repeat the cycle using 20 Pesos and LED lights will flicker.
- After finishing the calibration process, it can be used normally.
QUICK LINKS
Frequently Asked Questions
What does this Setting Up Your 4 tutorial cover?
Setting up your 4-coin type acceptor for 1, 5, 10, and 20 Pesos is straightforward.
What's the working voltage of the Setting Up Your 4?
Check the Sample Code section for the exact pinout — most maker-grade sensors run on 3.3V or 5V. Wire VCC to the matching rail, GND common with your MCU, data to a digital or analog pin.
Why does the Setting Up Your 4 read garbage or saturated values?
Three usual causes: wrong voltage rail, missing pull-up resistor on I2C lines (4.7k–10k to VCC), or a floating data pin. Double-check wiring against the diagram, then probe with a multimeter.