

Bring the faucet to your desk. If the shared dispenser is a walk away, this pocket-size 3D Mini Water Dispenser puts a spout right beside your cup. 🥛 💧✨ Press the button and water flows; release and it stops—simple, fast, and tidy. It’s sized for a mug on a table so you can sip anytime without breaking your focus.
The star here is the 3D-printed case. It centers the spout over the cup, hides the pump and wiring, and keeps the unit stable even when you press quickly. Because you control the dimensions, you decide the spout height, button feel, and how the bottle locks in place. A couple of quick prints are usually enough to nail the fit.
Electronics are purposely minimal for rapid prototyping: a 6 V battery, a small DC pump, and a push-button switch in series. Fewer parts mean fewer failure points and faster iteration on the enclosure. Once the single-button version works, you can add features later without redesigning the whole body.
Why Build 3D Mini Water Dispenser?
First, it solves a real convenience problem. Instead of walking to a distant dispenser, you keep a neat, self-contained unit on your desk and refill your glass in seconds. That small reduction in friction encourages better hydration and fewer workflow interruptions. It’s intuitive for kids and elders, too.
Second, it’s a great enclosure exercise. You’ll translate real components into printable geometry—mounts for the pump, channels for wires, and a base that won’t tip. Building this kind of functional shell sharpens your tolerances, wall thickness choices, and fastener strategy, which carry into future projects.
Third, it’s a safe entry into power + loads. You’ll consider current draw, switch placement, and wet/dry compartmenting while keeping things compact. Those fundamentals map directly to bigger builds like plant watering systems, wash stations, and dosing rigs where pumps and power budgets matter.
What You’ll Learn
By building this3D Mini Water Dispenser, you’ll:
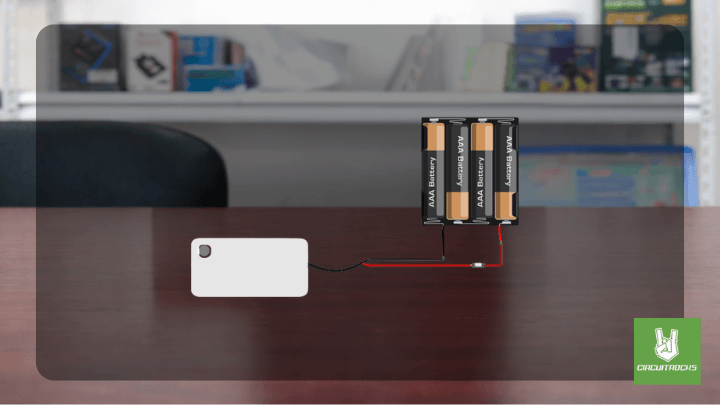
- Core wiring: 6 V battery → push-button → pump → back to battery (correct polarity, short wire runs).
- Fluid path basics: Silicone tube sizing, priming the line, and using a tiny check valve to hold prime.
- Enclosure design: Stiff base, splash guards, gasket lips, and service access with screws or snap tabs.
- Safety around water: Isolating the battery bay from the wet zone and adding strain relief on cables.
- Upgrade paths: Inline fuse, flyback diode/MOSFET, rechargeable pack + charger, or a simple dose timer.
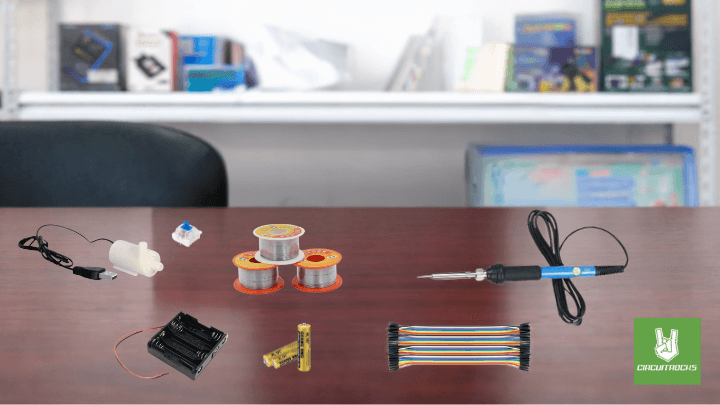
What You’ll Need:
Circuit Diagram
How It Works
Electrically, the circuit is straight series control. The push-button sits on the positive lead from the 6 V source to the DC pump; pressing it closes the loop so the motor spins and water flows. Releasing the button opens the circuit and the motor stops instantly, giving you natural “press-to-pour” control without extra boards.
Mechanically, a short length of food-grade silicone tubing connects the pump outlet to your printed spout. Keep bends gentle and the run short to reduce losses, and avoid kinks that collapse under suction. If you want the line to stay primed between presses, a tiny inline check valve near the outlet prevents back-drain into the reservoir.
Inside the 3D Water Dispenser case, separate wet and dry zones. The pump and tube live behind splash guards, while the battery holder and switch cavity stay dry with a lip or gasket. Provide strain relief where wires pass through, and leave service clearance so you can replace the pump or battery without cracking the print.
Applications & Extensions
Use it as a desk-side drink helper, a bench rinse tool for prints, or a mini plant-watering wand for succulents. Because it’s self-contained and quiet, it works well in classrooms, booths, and small workshops. The one-hand operation is also handy in tight spaces.
Add quality-of-life upgrades without changing the core layout. A small inline fuse protects the wiring, a power LED confirms readiness, and a flyback diode/MOSFET tames motor spikes if you later drive the pump from a board. Swapping the alkaline pack for a rechargeable Li-ion with a USB-C charger makes it travel-friendly.
For dosing or hands-free tasks, layer in timing or sensing. A 555-based pulse, a touch sensor, or a float switch can automate short bursts or prevent dry runs. You can also design quick-swap fronts for different bottle sizes or move to a peristaltic pump when you need a food-safe, sealed fluid path.


