
Another popular feature of the Raspberry Pi is its ability to interact with a wide range of electronic components, and the easiest way to do this is by using Python. In this tutorial, you will learn how to use the general-purpose input/output pins (GPIO) of Raspberry Pi using Python. 3
Things you need:
- Raspberry Pi
- LED
- Resistors
- Breadboard
- Jumper wires
GPIO
GPIO, short for General-Purpose Input/Ouput, is a bi-directional digital signal pin commonly found in microcontrollers and electronic circuit boards. A bi-directional pin can either output 3.3V when programmed HIGH or 0V when programmed LOW, or act as an input for sensors. Moreover, they have no dedicated function and are only used when its user needs to work with auxiliary electronic components outside of its system.
The Raspberry Pi includes 2 columns of GPIO pins along the edge of the board. These pins are very handy for a portable computer like the Pi because, with it, you can already read sensor data, spin motors, drive LCD displays, and etc.
Pinout
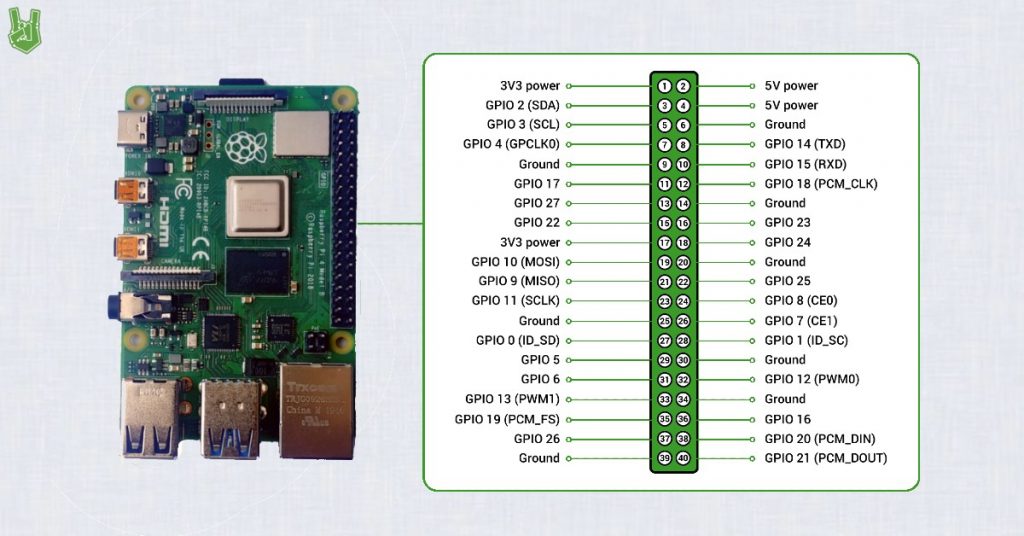
The Raspberry Pi uses a standard male header layout for its GPIO. It was initially 26 pins but was upgraded to 40 while retaining the original pinout.
Furthermore, there are two numbering schemes that reference to the pin numbers. One is the Broadcom chip-specific pin numbers layout (BCM) and another is the P1 physical pin numbers layout.
The BCM layout is the standard. In Figure 1 you will see the BCM names on the labels while the numbers inside the circles are for P1 scheme.
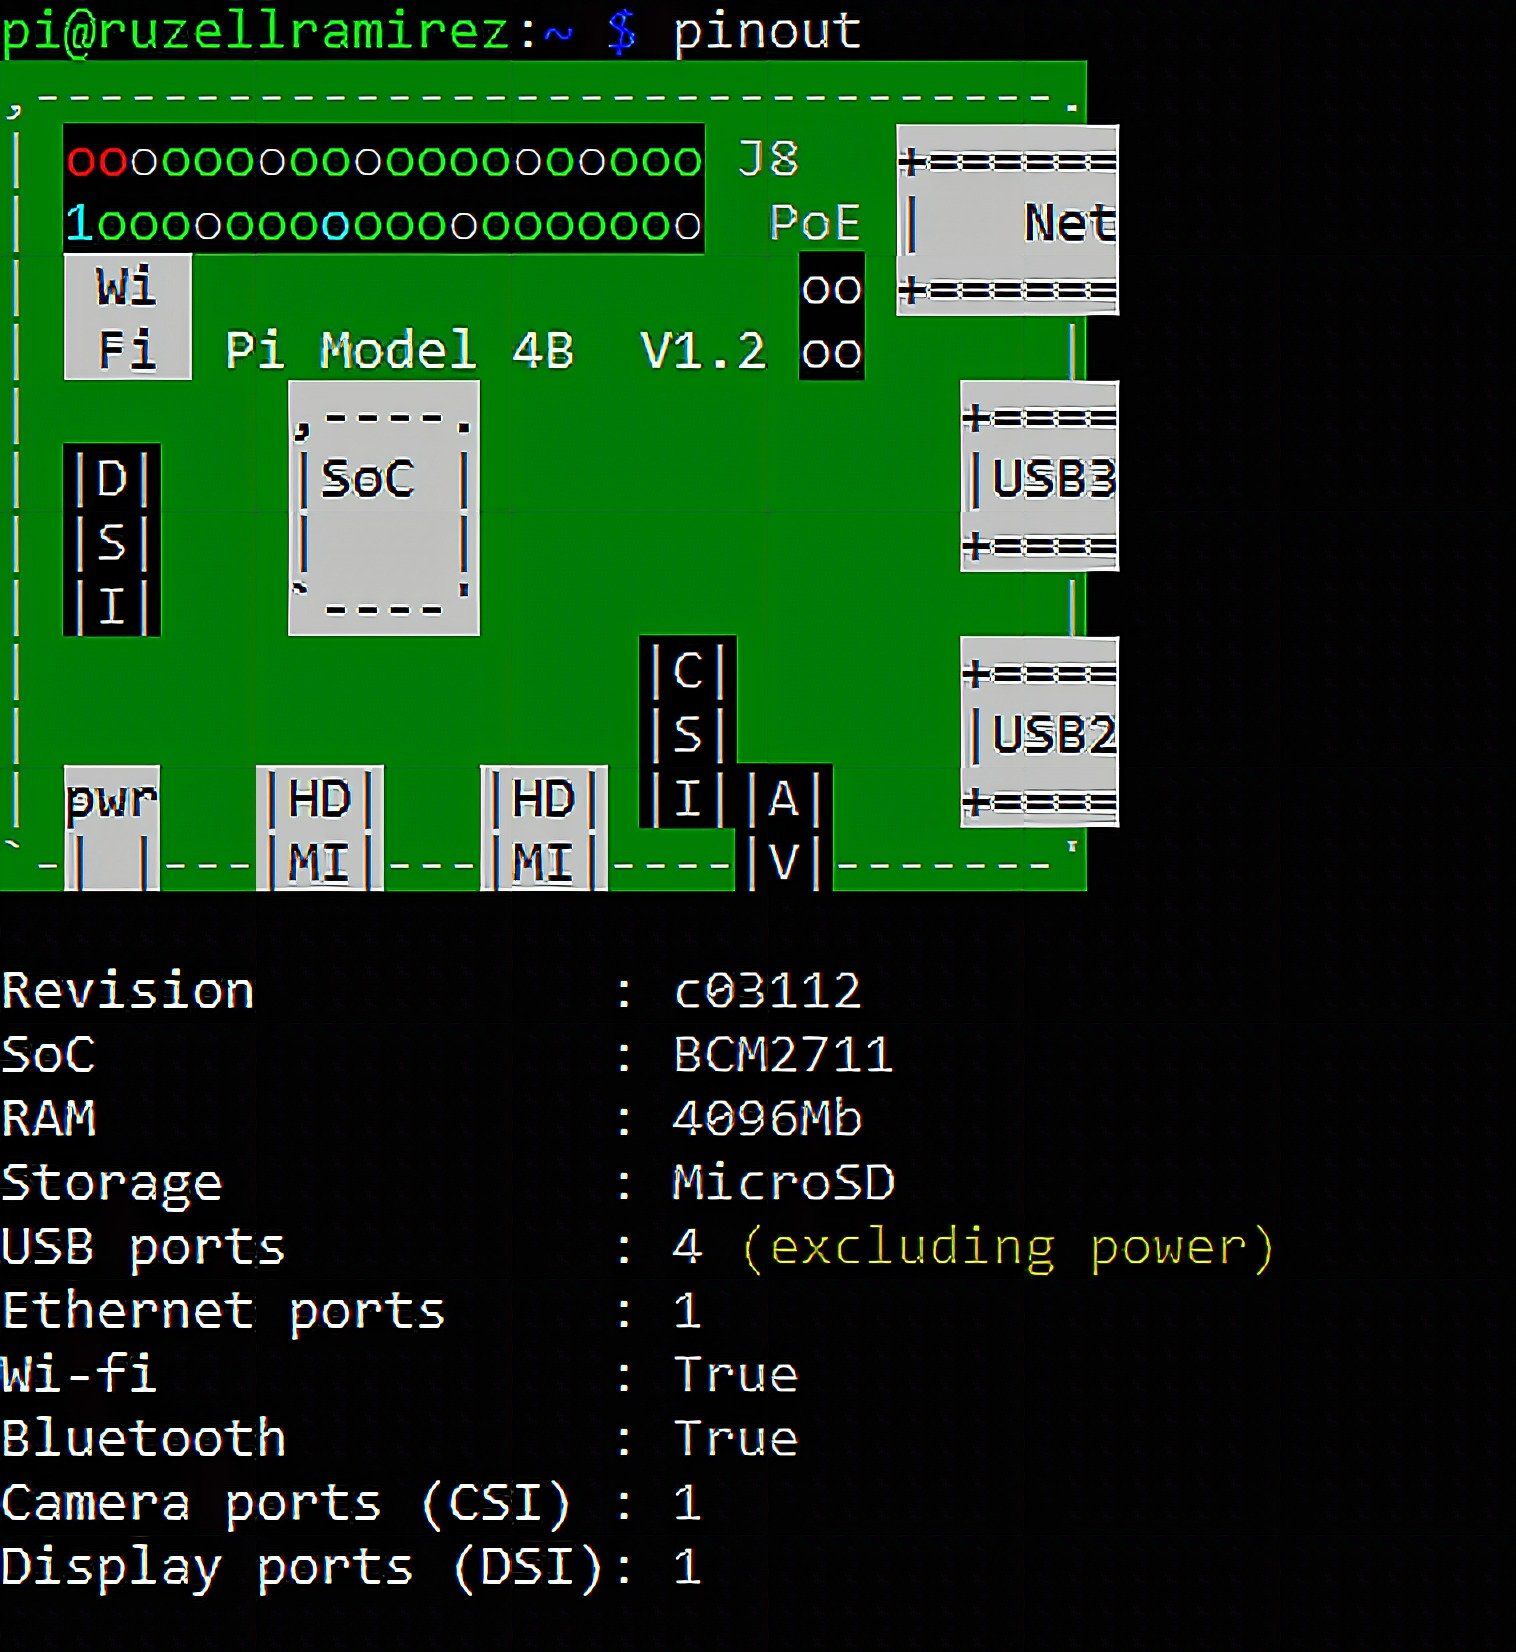
Alternatively, you can view the pinout directly in the terminal using the command, pinout. The command also shows you a labeled graphic of the Pi and some details on its hardware components.
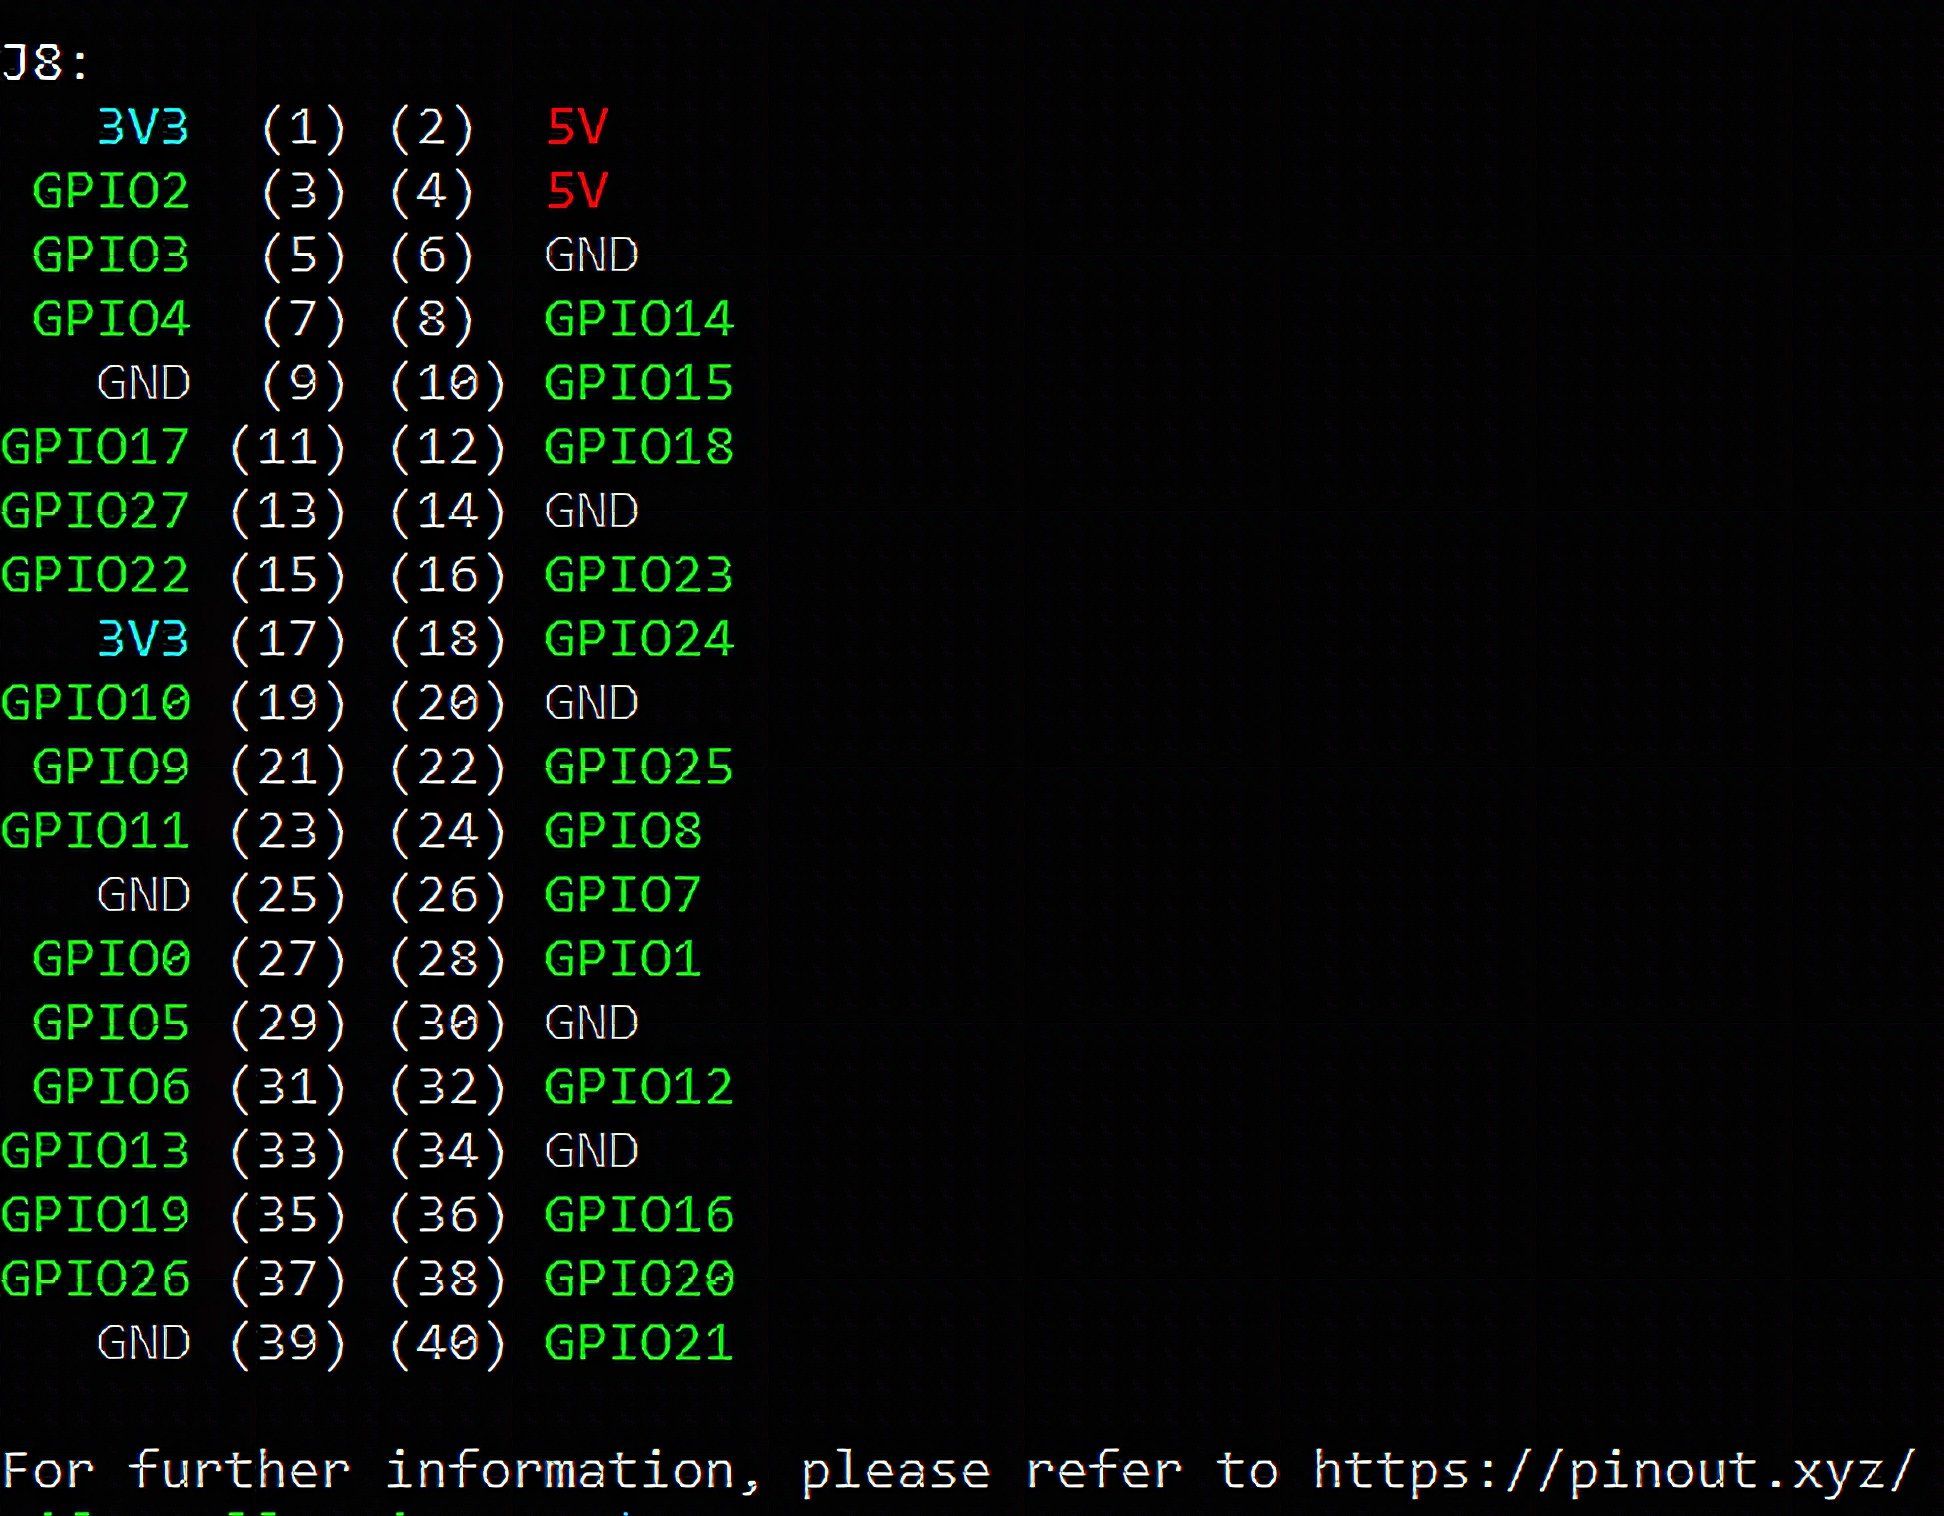
And if you scroll down, you will see the BCM pinout in colored labels along with the P1 pinout in parentheses. While the usage of these numbering schemes varies with the API used, the most common way for BCM is by directly referring to its GPIO number. For instance, if you want to use GPIO2, simply indicate 2. If you’re using the P1 scheme, it changes to 3.
Now that we’re familiar with the pinout, let us now try them using a Python module called gpiozero.
Preparing the Hardware
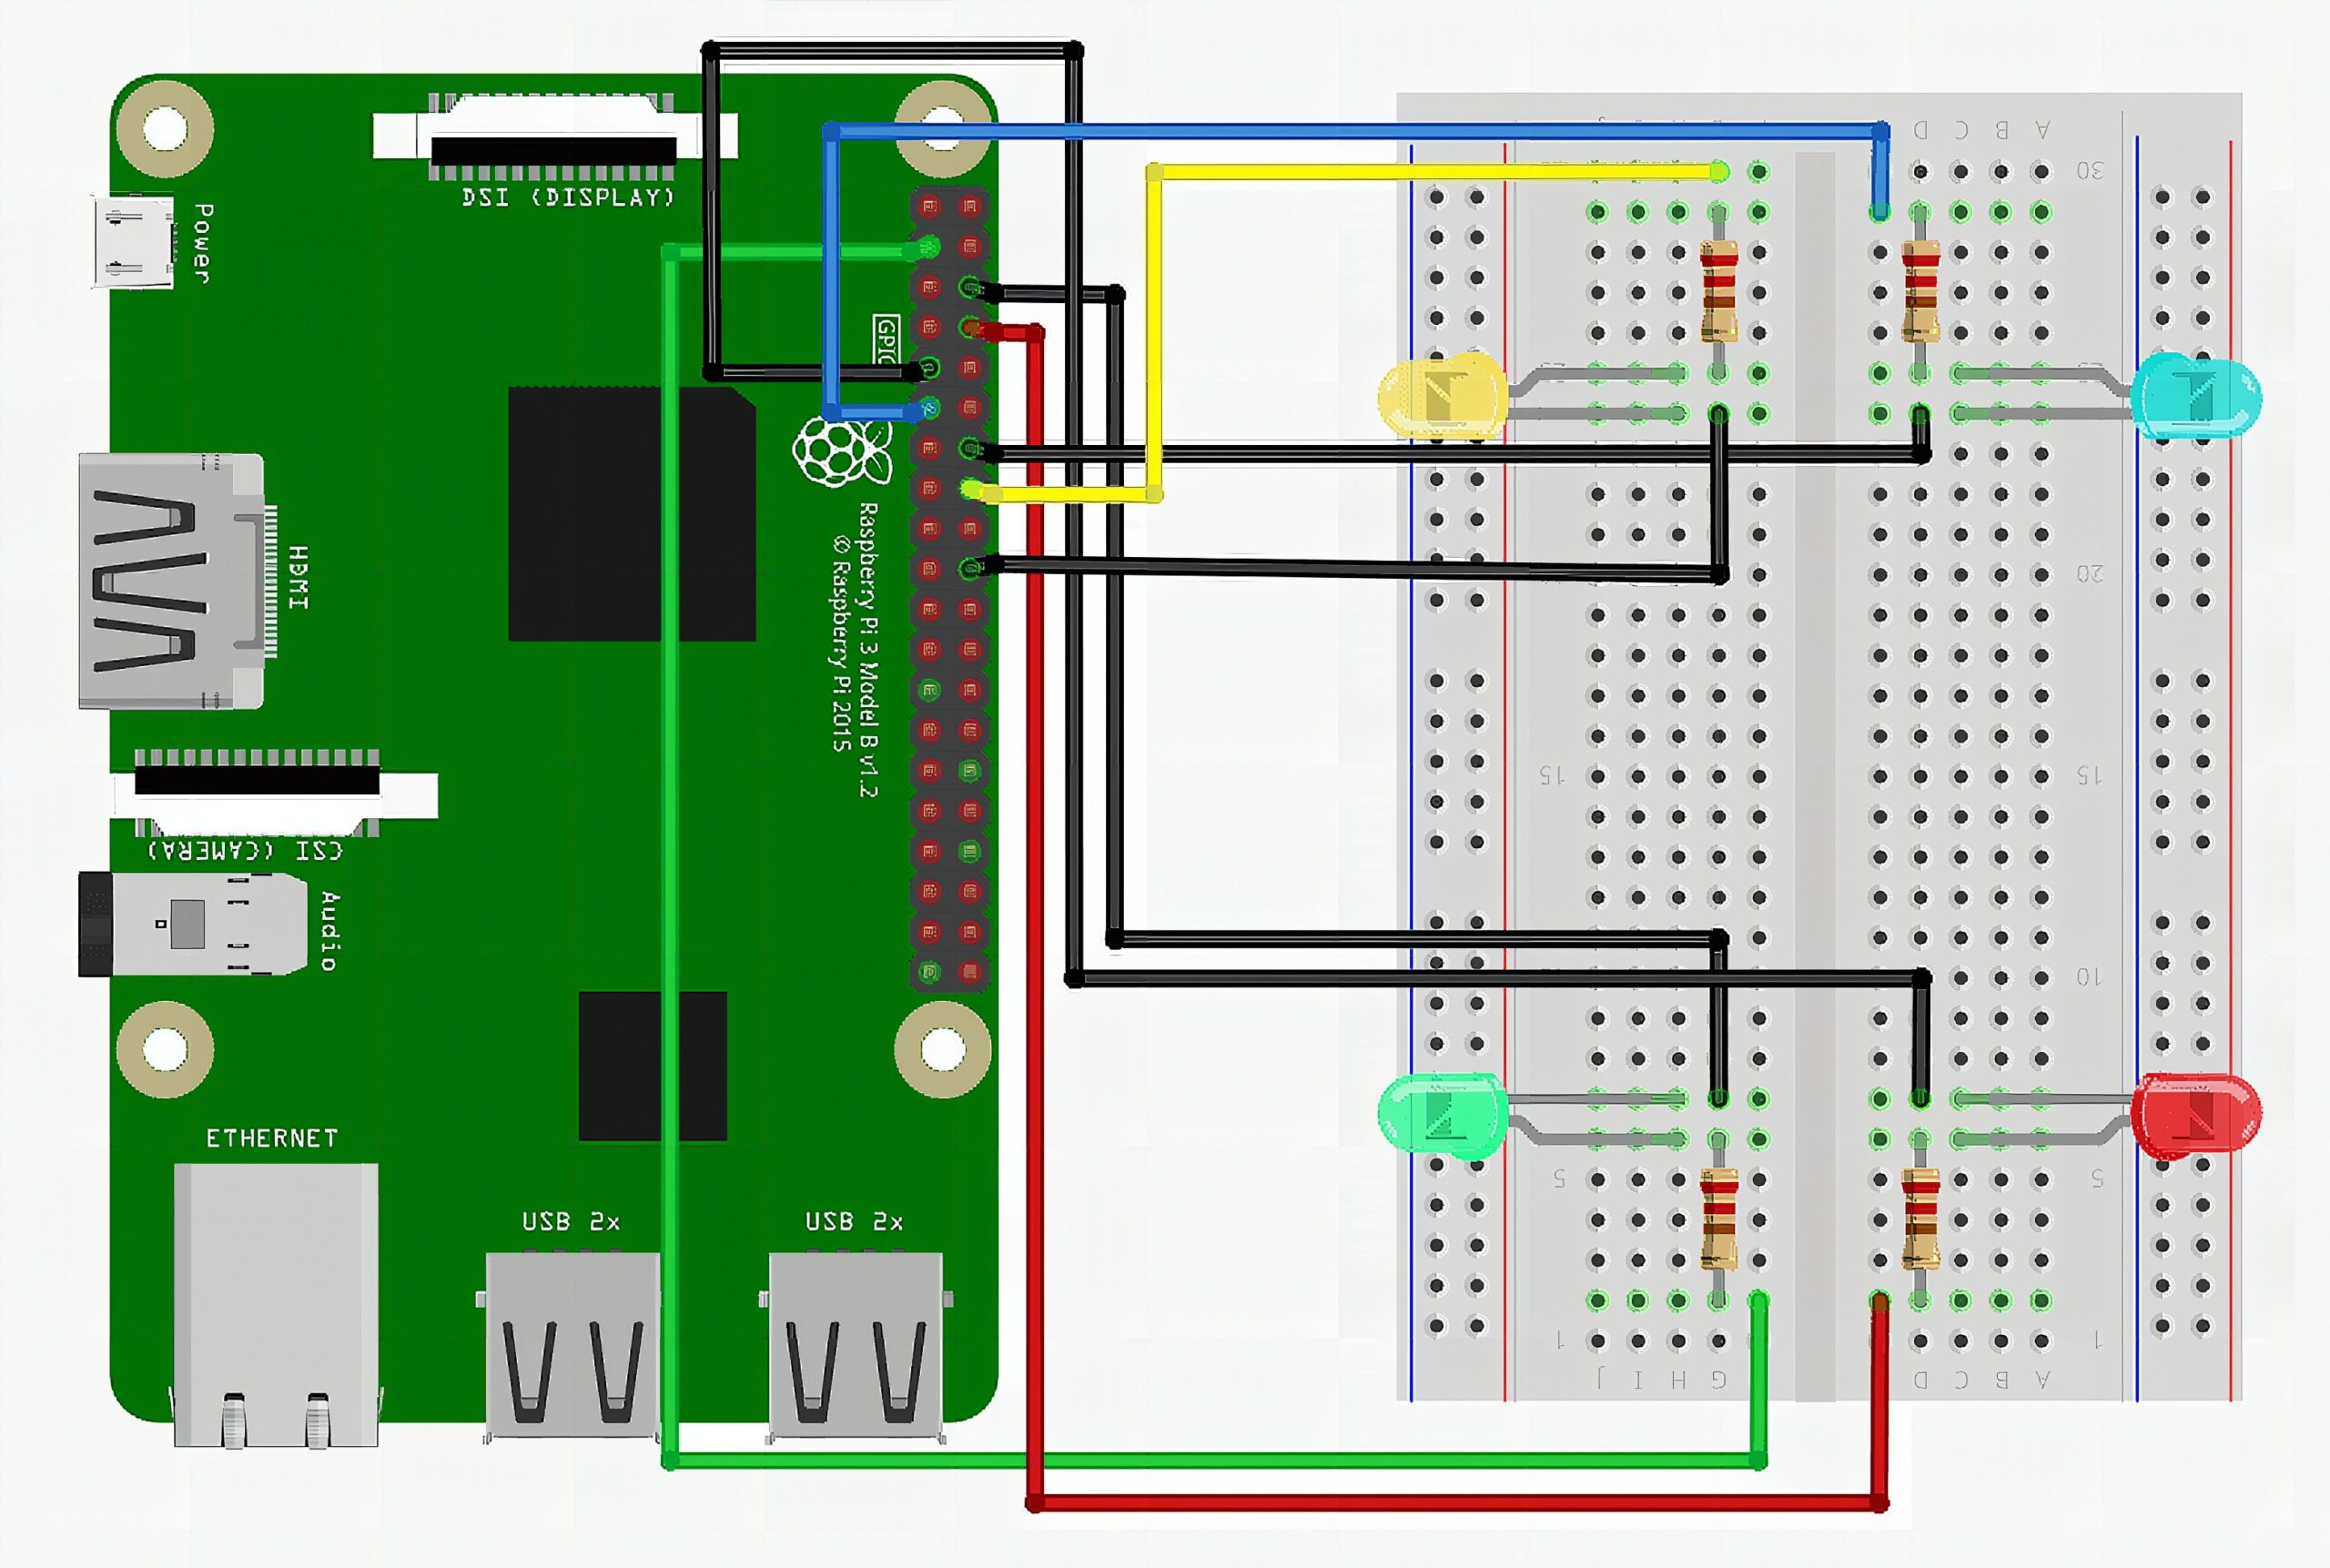
In this tutorial, we are going to control 4 LEDs using the gpiozero library in the Raspberry Pi. In order to do that, you will need the following components:
- Raspberry Pi
- 4 x 220? resistor
- 4 x LED
- Breadboard
- Jumper Wires
Connect them as shown in Figure 4.
Code
Copy the code to your favorite code editor or IDE.
from gpiozero import LED
from time import sleep led = LED(2)
led2 = LED(14)
led3 = LED(17)
led4 = LED(23) while True: for l in led,led2,led3,led4: l.on() sleep(0.03) l.off() sleep(0.03)
Note: For demonstration purposes, I used the LED function to trigger the 4 LEDs separately. Alternatively, you can use LEDBoard, which can do the same with even lesser lines.
Code Explanation
To make the blinking LEDs possible, we need to use two Python modules: time and gpiozero.
time
The time module lets you use time-related functions. There are a lot of functions under its hood, but you only need sleep() to perform the LED demonstration.
sleep() is a time function that accepts an integer or float argument to represent time (measured in seconds). It waits for that specified time before moving on to the next line of code.
gpiozero
The gpiozero module is a simple interface to GPIO devices with Raspberry Pi. It is installed by default in the Raspberry Pi OS image, so no need to install explicitly. Here’s an overview of how the library works:
Setup
Like any Python module, you first need to add this line at the top of your sketch:
import time
import gpiozero
This lines add the time and gpiozero libraries to your program’s dependencies. A program’s dependencies are anything it needs to work properly. Otherwise, if you only need one function in the library, you can explicitly state that by entering:
from time import sleep Pinout
The library uses BCM scheme for pinout. Unlike other libraries like RPi.GPIO, this is unchangeable. However, you can translate the P1 layout using the pinout command or by reference to Figure 1 and Figure 3 above.
Setting a Pin Mode
If you’re familiar with Arduino code, then you probably know that the GPIO has to be declared a pin mode before using it as an input or output. The same is needed with the gpiozero library, but it changes slightly depending on the component you’re using.
For example, if you’re using it as an input for any of these components:
- Button
- Motion Sensor
- Light Sensor
- Distance Sensor
You need to declare them using their own function like this:
import gpiozero button = Button(2) ##if you're using a button connected to GPIO 2
motionsensor = MotionSensor(4) ##motion sensor connected to GPIO 4
lightsensor = LightSensor(6) ##light sensor connected to GPIO 6
distancesensor = DistanceSensor(23,24) ##ultrasonic sensor connected to GPIO 23 and 24
On the other hand, if you’re using it as an output for the following components:
- LED
- Servo
- Motor
- Robot
You assign the pins like this:
import gpiozero led = LED(2) ##an LED connected to pin 2
servo = Servo(13) ##a servo motor connected to pin 13
motor = Motor(forward=3, backward=13) ##a dc motor connected to pin 3 and pin 13
robot = Robot(left=(4, 14), right=(17, 18)) ##a pair of dc motor from a robot connected to pins 4,14, 17, and 18
Creating the Python File
To begin programming in Python, you first need to create a Python file. Otherwise, you won’t fully enjoy the features of your code editor or IDE. Your coding environment needs to know that you’re writing a Python program so that it can help you with formatting, autocompletion, etc.
In this tutorial, we’ll use the GNU Nano. To create the file, simply enter:
nano GPIOpython.pyThis command will both create and open the file in your current terminal. Moreover, if you want to open a new window for the Nano editor and keep your current terminal, add a & switch after the python filename.
nano GPIOpython.py &After that, copy the sketch above and paste it to Nano.
Running the Program
To run the program, simply go to the Terminal and enter:
python GPIOpython.pyWhile the code is running, the LEDs will light up alternately depending on the speed you specified with the sleep() function. To exit, press CTRL + C.
That’s it! You already know how to control the Raspberry PI GPIO using Python. Check this link here, if you want to do the same thing but with the C programming language. If you want to learn more about the Raspberry Pi as a whole, visit the following links:
Frequently Asked Questions
What does this How to Control the Raspberry Pi GPIO using Python tutorial cover?
Another popular feature of the Raspberry Pi is its ability to interact with a wide range of electronic components, and the easiest way to do this is by using Python.
Which Raspberry Pi model fits the How to Control the Raspberry Pi GPIO using Python project?
Pi 4 (4GB) or Pi 5 for desktop apps and AI workloads. Pi Zero 2 W is enough for headless / sensor builds. Pi 3 B+ works but is slower for camera or ML.
How do I auto-start the How to Control the Raspberry Pi GPIO using Python script on boot?
Use systemd. Create /etc/systemd/system/myproject.service with ExecStart=/usr/bin/python3 /home/pi/script.py and Restart=always. sudo systemctl enable myproject.