
One of the neat projects you can run with Arduino is incorporating a joystick to work in tandem with a servo motor. This allows for various applications, such as a servo-mounted camera and a robotic arm. For our simplest example, the only library that needs to be included is the < Servo.h> library.
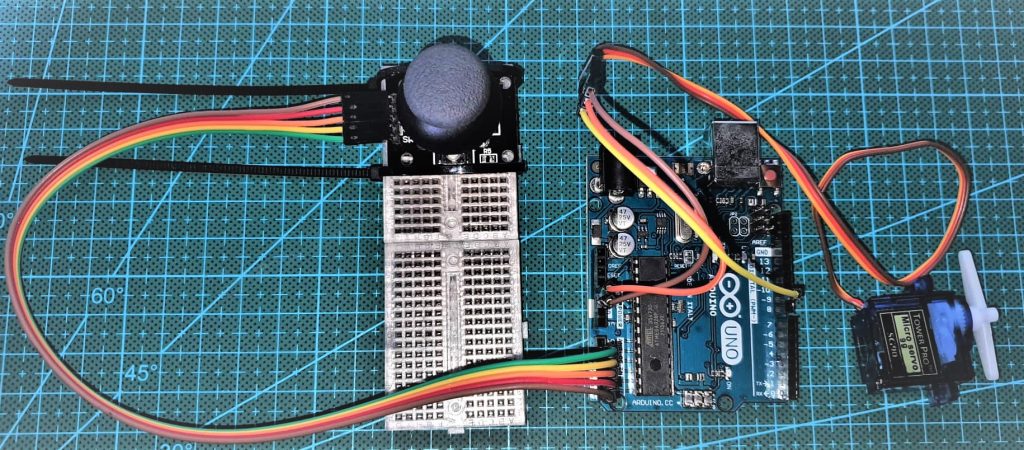
Wiring Diagram

Programming
Finally, we create the code to upload to the Arduino. As mentioned a while ago, the only library we need for this activity is. Below is the code that was used for this activity.
#include <Servo.h> #define SERVO_PIN 9 #define GROUND_JOY_PIN A5 #define VOUT_JOY_PIN A4 #define XJOY_PIN A3 #define YJOY_PIN A2 #define SJOY_PIN A1 int servo_val; Servo myservo; void setup() { Serial.begin(9600); pinMode(VOUT_JOY_PIN, OUTPUT); //pin A4 shall be used as output pinMode(GROUND_JOY_PIN, OUTPUT); //pin A5 shall be used as output digitalWrite(VOUT_JOY_PIN, HIGH); //set pin A4 to high (+5V) digitalWrite(GROUND_JOY_PIN,LOW); //set pin A5 to low (ground) myservo.attach(9); } void loop() { delay(200); int joystickXVal = analogRead(XJOY_PIN); servo_val=map(joystickXVal, 4, 1017, 10, 175); Serial.print(joystickXVal); Serial.println(" = input from joystick"); Serial.print(servo_val); Serial.println(" = output to servo"); Serial.println(); myservo.write(servo_val); }Serial Monitor
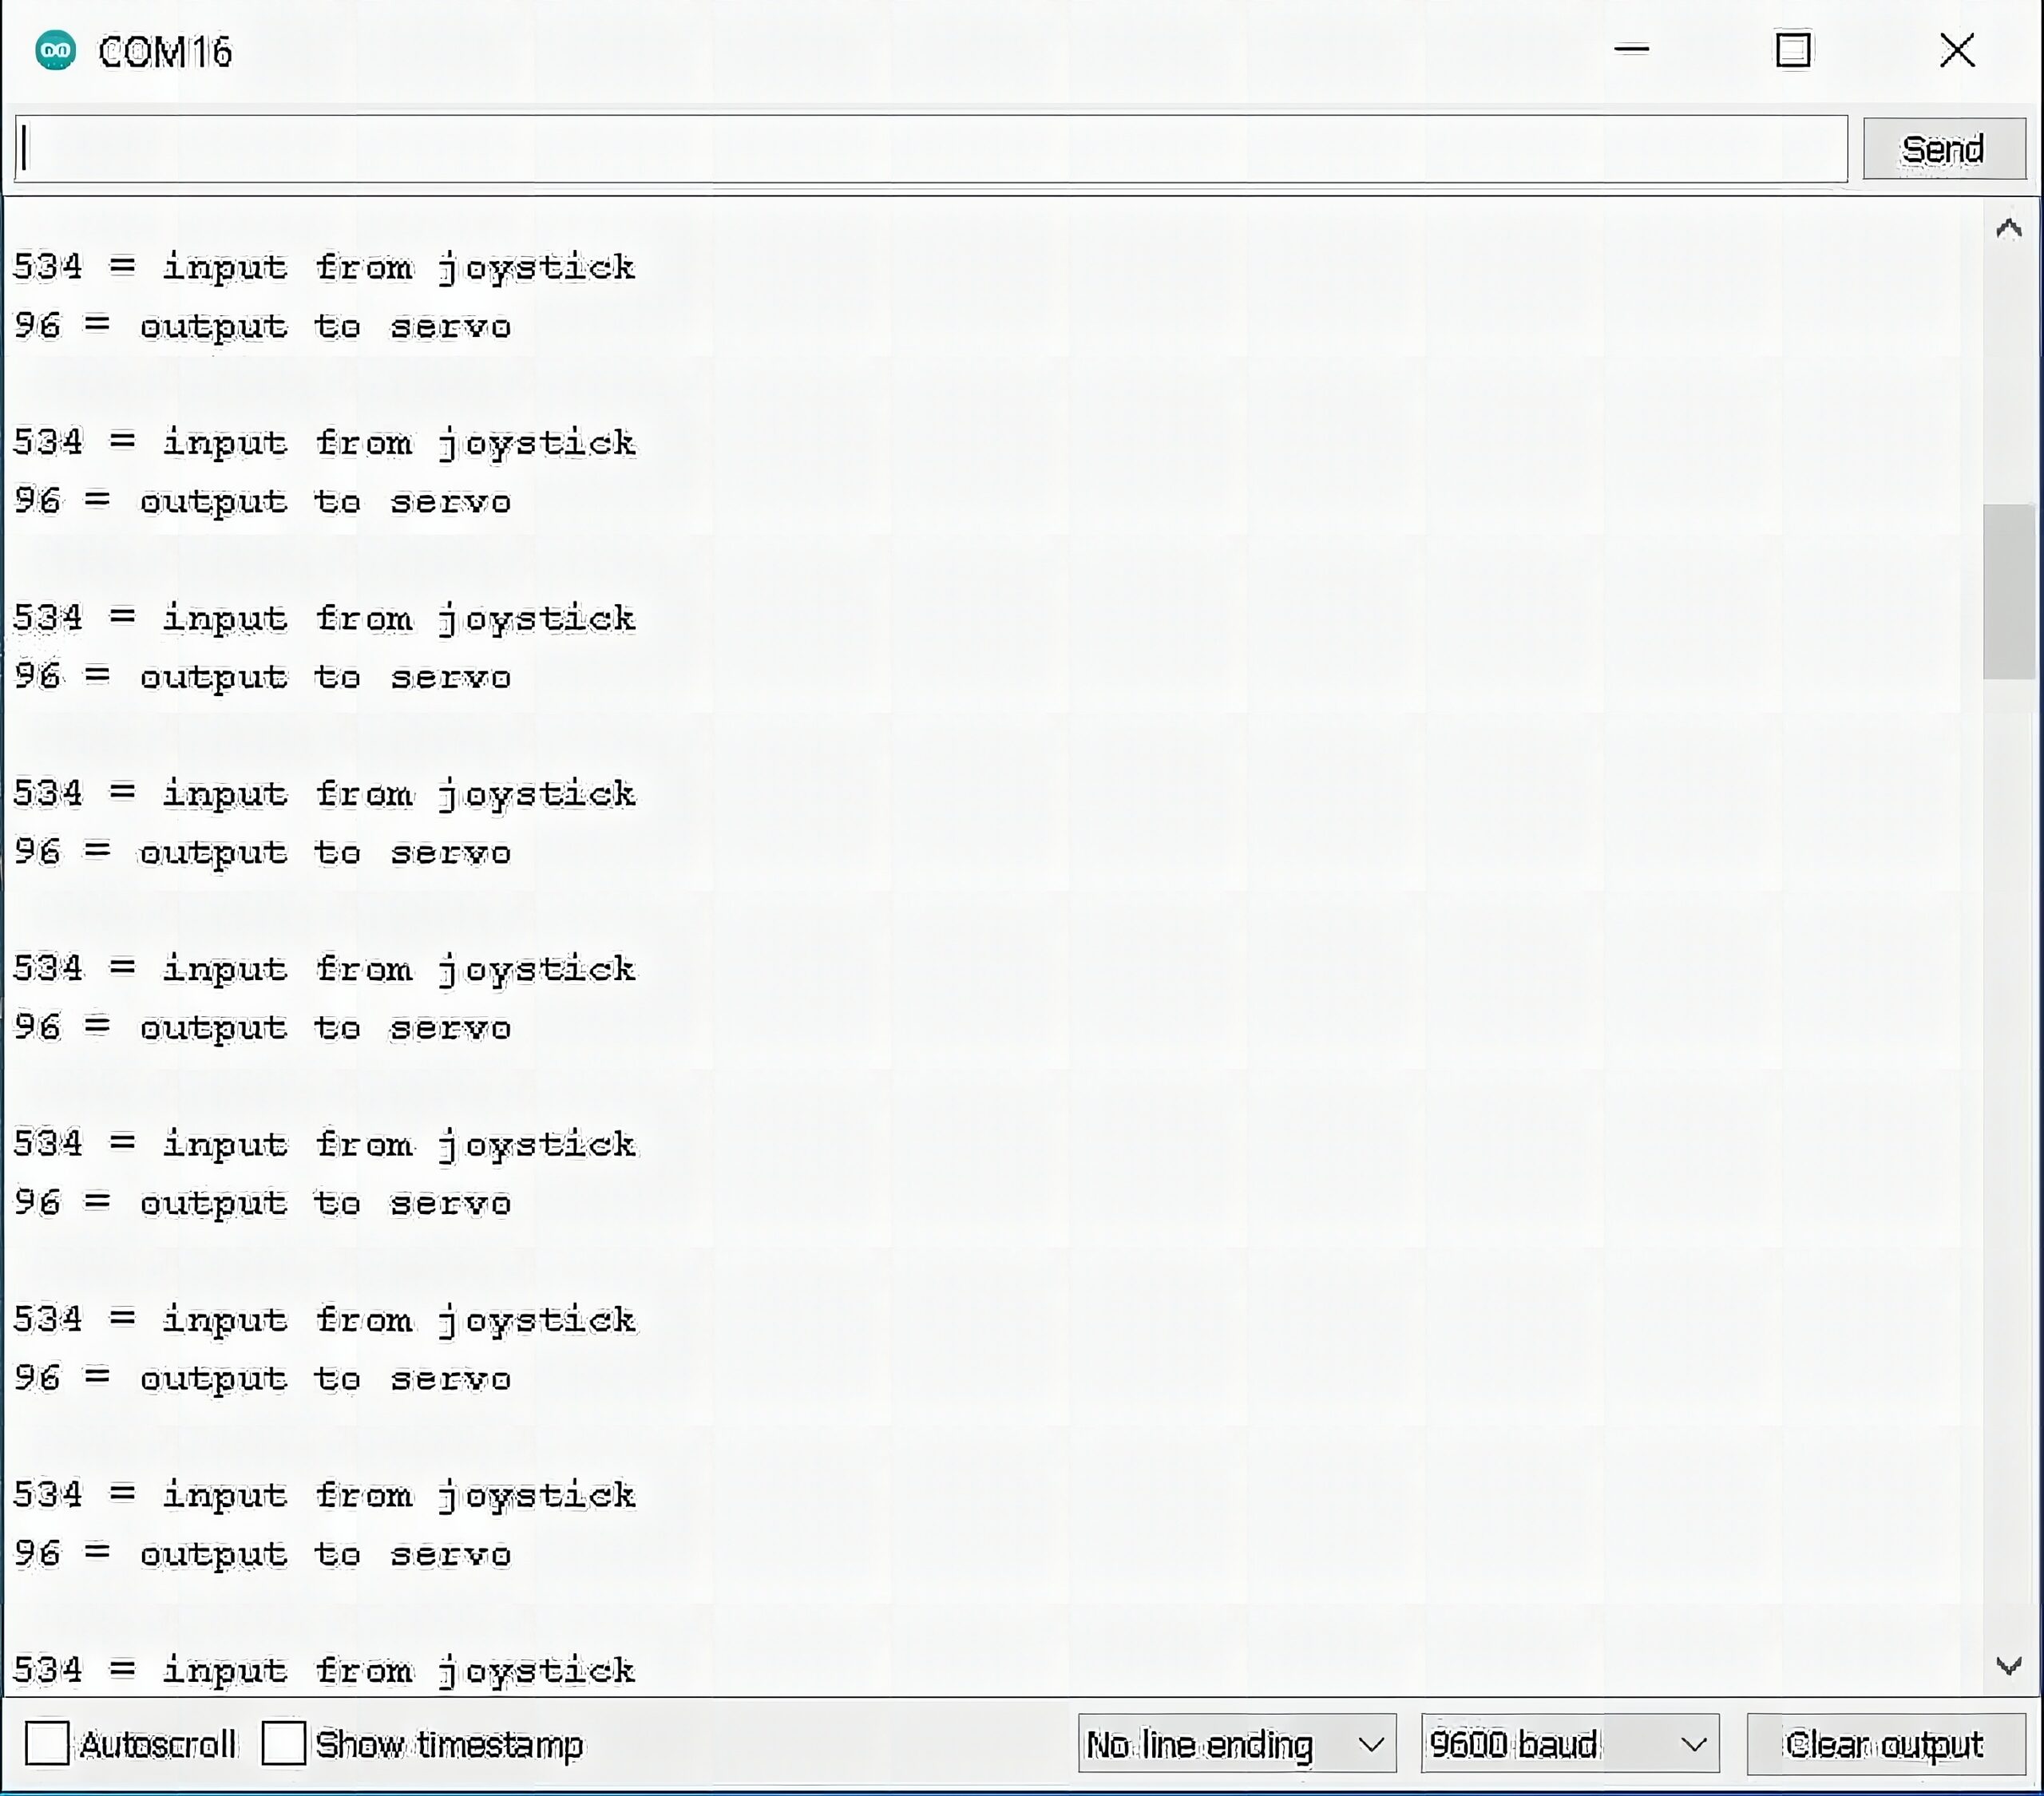
Lastly, for additional information, the serial monitor will print the reading that it gets from the joystick. The value indicated in the “output to servo” is the value from the joystick that has gone through the map() function and then pushed to the Servo.
[faq] [faq_q]How does a thumb joystick control a servo motor with Arduino?[/faq_q] [faq_a]The joystick is two analog potentiometers (X and Y axes) feeding 0 – 5V into the Arduino’s ADC pins. The Arduino reads each axis (0 – 1023), maps it to the servo range (0 – 180°), and sends the angle to the servo. Move the stick, the servo follows.[/faq_a][faq_q]What pins do you connect a joystick and servo to?[/faq_q] [faq_a]Joystick: VCC→5V, GND→GND, VRx→A0, VRy→A1, SW (button)→D2 (optional). Servo: red→5V (or external 5V supply for stronger servos), brown/black→GND, signal (orange/yellow)→D9 (any PWM-capable pin works).[/faq_a][faq_q]How do you calibrate the joystick center position?[/faq_q] [faq_a]Read the analog values when the stick is at rest and treat that as zero. Most joysticks rest near 512 (out of 1023) but ±20 of drift is normal. Add a deadband – ignore movements within ±30 of the rest value – to prevent jitter when the stick is centered.[/faq_a][faq_q]Can one joystick control two or more servos?[/faq_q] [faq_a]Yes. The X axis drives one servo (e.g. pan), the Y axis drives a second (e.g. tilt). For 3+ servos you can use the joystick button to cycle which servo Y controls, or add a second joystick. Power servos from a separate 5V supply if you have more than one – the Arduino’s onboard regulator can’t drive multiple servos under load.[/faq_a][/faq]Frequently Asked Questions
What does this Joystick Controlled Servo for Arduino tutorial cover?
One of the neat projects you can run with Arduino is incorporating a joystick to work in tandem with a servo motor.
What Arduino library does the Joystick Controlled Servo for Arduino tutorial use?
The sketch uses standard Wire.h (I2C) or SPI.h plus a part-specific library installable via Arduino IDE → Sketch → Include Library → Manage Libraries. See the Sample Code section.
Why does the Joystick Controlled Servo for Arduino act differently on USB power vs battery?
Battery voltage sags under load. Add a 100uF cap across the rails, use a 5V/2A regulator-backed pack, and never power motors from the Arduino's onboard regulator.