
Electronics and robotics can seem complex at first. For example, understanding motion control can be challenging for beginners. However, the “Controlling Servo Movement with a Joystick Using Arduino Uno” project makes learning easier and more affordable. In addition, it combines a standard joystick input, an Arduino Uno microcontroller, and an SG90 servo motor to create an interactive machine. As a result, this project helps users learn basic control systems in a fun and practical way.
The main goal of this project is to teach beginners how to connect input devices to microcontrollers for real-time control. First, it shows how to use a joystick to send signals to the Arduino. Next, the Arduino processes these signals and moves the servo motor in response. Moreover, the project covers important concepts like analog and digital signal processing. Because it explains how servo motors work, learners can see the entire control system in action.
Finally, the “Controlling Servo Movement with a Joystick Using Arduino Uno” project is a perfect starting point for anyone interested in electronics and robotics. For instance, it offers hands-on experience with real components and easy-to-follow coding examples. Therefore, it encourages beginners to explore, experiment, and build their confidence. In the end, this simple project opens the door to more advanced ideas and makes learning about technology both fun and accessible.
Components
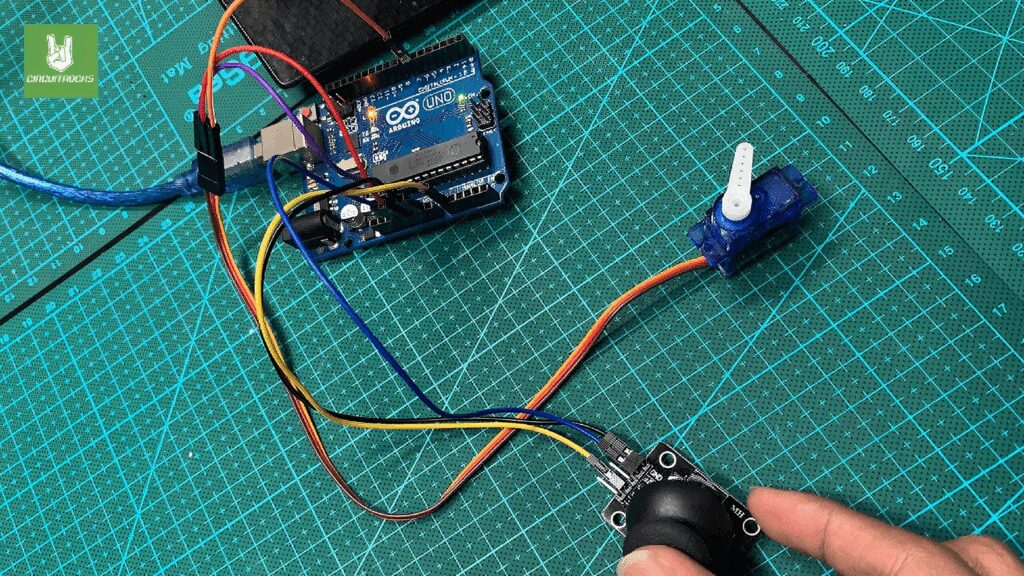
Connection:

Servo Motor to Arduino:
- Signal wire to Digital Pin 7 on the Arduino.
- Power wire to 5V on the Arduino.
- Ground wire (brown or black) to GND on the Arduino.
Joystick to Arduino:
- Y-axis output to Analog Pin A0 on the Arduino.
- VCC to 5V on the Arduino.
- GND to GND on the Arduino.
- X-axis output can be left unconnected if not used, or connected to another analog pin if you wish to extend the functionality.
This setup allows you to control the angle of the servo motor by moving the joystick right and left. The vertical movement is read as an analog input on pin A0, which is then mapped to a range that the servo understands (0 to 180 degrees).
Additional Notes:
- The
Servo.hlibrary is included to interface with servo motors easily. It abstracts away the PWM (Pulse Width Modulation) details, allowing you to control the servo position by specifying an angle between 0 and 180 degrees. Themyservo.attach(7);line in thesetup()function initializes the servo on pin 7, andmyservo.write(val);in theloop()function sets the servo’s position based on the mapped value of the analog input.
Code:
#include <Servo.h>
const int Y_pin = A0; // analog pin connected to Y output Servo myservo; int val; void setup() { myservo.attach(7); } void loop() { val = analogRead(Y_pin); val = map(val, 0, 1023, 0, 180); myservo.write(val); delay(15); }
Troubleshooting
Servo Not Responding:
- Ensure the servo is correctly connected: signal wire to pin 7, power to 5V, and ground to GND on the Arduino.
- Verify that the servo can operate on the power supplied by the Arduino’s 5V pin. Some servos require more current than the Arduino can provide, necessitating an external power source.
Erratic Servo Movement:
- Noise in the analog signal can cause jitter. Try adding a small capacitor (e.g., 10µF) between the ground and the signal line of the analog sensor to smooth out the readings.
- The
delay(15);might be too short, causing the servo to react to minor, insignificant changes in the sensor’s output. Adjusting the delay or implementing a software debounce could help.
Inaccurate Servo Positioning:
- The
delay(15);might be too short, causing the servo to react to minor, insignificant changes in the sensor’s output. Adjusting the delay or implementing a software debounce could help.
Power Issues:
- If using multiple servos or other power-hungry components, the Arduino’s voltage regulator might be insufficient, leading to resets or erratic behavior. An external power supply, with a common ground shared with the Arduino, might be necessary.
QUICK LINKS:
Frequently Asked Questions
What does this Controlling Servo Movement with a Joystick Using Arduino Uno tutorial cover?
Electronics and robotics can seem complex at first.
Can I use an Arduino Nano or Mega instead of UNO for the Controlling Servo Movement with a Joystick Using Arduino Uno build?
Yes. Nano shares the same ATmega328P and pinout. Mega has more I/O if you outgrow UNO. The code stays the same — just match the pin numbers used in the Sample Code section.
Why does my Controlling Servo Movement with a Joystick Using Arduino Uno sketch fail to upload?
Usually wrong COM port, missing CH340/CH341 driver for clone boards, or another program holding the serial port. Disconnect the board, install the driver, reselect the port, retry.