Starting a journey to create dynamic visuals can be exciting for people of all ages. For example, this guide is perfect for beginners who want to learn about animated OLED displays controlled by Arduino. In addition, Arduino’s user-friendly platform and OLED screens with clear, high-contrast visuals make animations easier than ever. As a result, you can design effects you never thought possible. Whether you want to make your project more vibrant or simply explore OLED technology, this guide helps you gain the skills to create your own lively animations. Because it opens up new possibilities, you can unlock your creativity and the full potential of Arduino and OLED displays.
This project focuses on showing what OLED technology and Arduino can do together. First, it helps you generate dynamic, eye-catching animations. Next, it serves many purposes, such as educational demonstrations for learning programming and electronics. Moreover, it works well for decorative or entertainment projects. By cycling through different animations, you can spark new ideas and see how simple code can create impressive results. Therefore, it’s a practical way to learn and experiment at the same time.
Finally, the dynamic OLED animation display arduino is designed to be fun, rewarding, and educational. For instance, it encourages both creativity and technical skills as you build your own animations. Because you’ll learn about programming, electronics, and design, this project becomes a solid foundation for more advanced work. In the end, it offers a great introduction to the world of digital art while giving you the confidence to take on more complex projects in the future.
Components:

Connections:
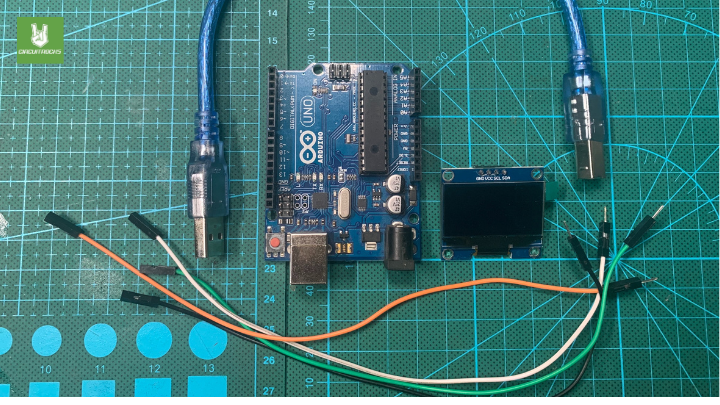
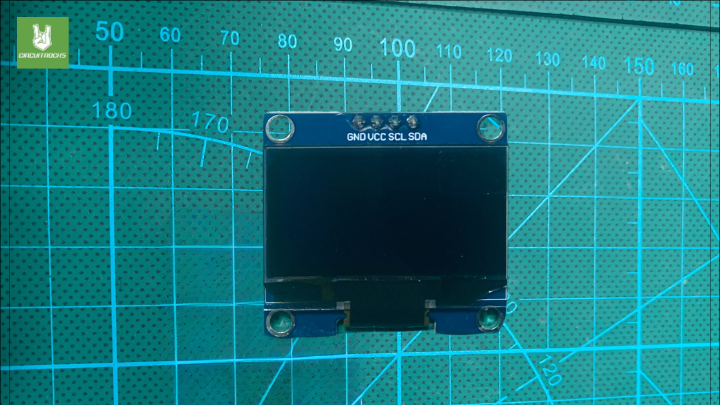
OLED Display to Arduino via I2C:
- VCC of OLED to 5V on Arduino
- GND of OLED to GND on Arduino.
- SCL (Serial Clock) of OLED to A5 on Arduino Uno
- SDA (Serial Data) of OLED to A4 on Arduino Uno
Additional Notes:
- Ensure you have installed the necessary libraries (
Adafruit_GFXandAdafruit_SH110Xor a library specific to the SH1106 if using that) in the Arduino IDE before uploading your code. - Your sketch involves drawing a cloud and moving raindrops. The
drawCloudfunction and the logic in theloopfunction handle these animations. - The raindrops are reset to the cloud’s position once they exceed the screen height, simulating continuous rain.
Code:
#include <SPI.h>
#include <Wire.h>
#include <Adafruit_GFX.h>
#include <Adafruit_SH110X.h>

#define i2c_Address 0x3C // OLED display I2C address, adjust if necessary
#define SCREEN_WIDTH 128 // OLED display width, in pixels
#define SCREEN_HEIGHT 64 // OLED display height, in pixels
#define OLED_RESET -1    // Reset pin (not used with I2C interfaces)

Adafruit_SH1106G display(SCREEN_WIDTH, SCREEN_HEIGHT, &Wire, OLED_RESET);

#define NUM_DROPS 10
struct Raindrop {
  int x, y;
  int speed;
} drops[NUM_DROPS];

int cloudX = 0; // Initial position of the cloud
int cloudY = 10; // Fixed vertical position of the cloud
int cloudWidth = 40; // Width of the cloud
int cloudHeight = 20; // Height of the cloud
int cloudSpeed = 1; // Speed of cloud movement
bool movingRight = true; // Direction of cloud movement

void setup() {
  Serial.begin(9600);
  if (!display.begin(i2c_Address, true)) {
    Serial.println(F("SSD1306 allocation failed"));
    for(;;); // Don't proceed, loop forever
  }
  display.display();
  delay(2000); // Pause for 2 seconds

  display.clearDisplay();

  // Initialize raindrops with positions relative to the cloud and random speeds
  for (int i = 0; i < NUM_DROPS; i++) {
    drops[i].x = cloudX + random(cloudWidth);
    drops[i].y = cloudY + cloudHeight;
    drops[i].speed = random(1, 4); // Adjust for faster or slower drops
  }
}

void drawCloud(int x, int y) {
  // Simple cloud representation using filled circles
  display.fillCircle(x + 10, y, 10, SH110X_WHITE);
  display.fillCircle(x + 20, y - 5, 15, SH110X_WHITE);
  display.fillCircle(x + 30, y, 10, SH110X_WHITE);
}

void loop() {
  display.clearDisplay(); // Clear the display buffer

  // Draw the cloud
  drawCloud(cloudX, cloudY);

  // Move the cloud
  if (movingRight) {
    cloudX += cloudSpeed;
    if (cloudX > SCREEN_WIDTH - cloudWidth) movingRight = false; // Change direction
  } else {
    cloudX -= cloudSpeed;
    if (cloudX < 0) movingRight = true; // Change direction
  }

  // Move and draw each raindrop
  for (int i = 0; i < NUM_DROPS; i++) {
    if (drops[i].y > SCREEN_HEIGHT) {
      drops[i].y = cloudY + cloudHeight; // Reset to start from the cloud
      drops[i].x = cloudX + random(cloudWidth) - cloudWidth / 2; // Recalculate X to follow the cloud
      drops[i].speed = random(1, 4); // Reset speed
    } else {
      drops[i].y += drops[i].speed; // Continue falling
    }

    // Draw raindrop
    display.drawPixel(drops[i].x, drops[i].y, SH110X_WHITE);
  }

  display.display(); // Show the display buffer on the screen
  delay(50); // Update every 50 milliseconds for smoother animation
}
Troubleshooting:
- If the display doesn’t turn on or show the expected graphics, double-check the wiring, ensure the I2C address is correct, and verify that the display is powered correctly.
- If you encounter compilation errors related to the display initialization, confirm that you’re using the right class and library for your SH1106 OLED display. The code snippet mentions
Adafruit_SH1106G, which might be a typo or mix-up with library classes.


