
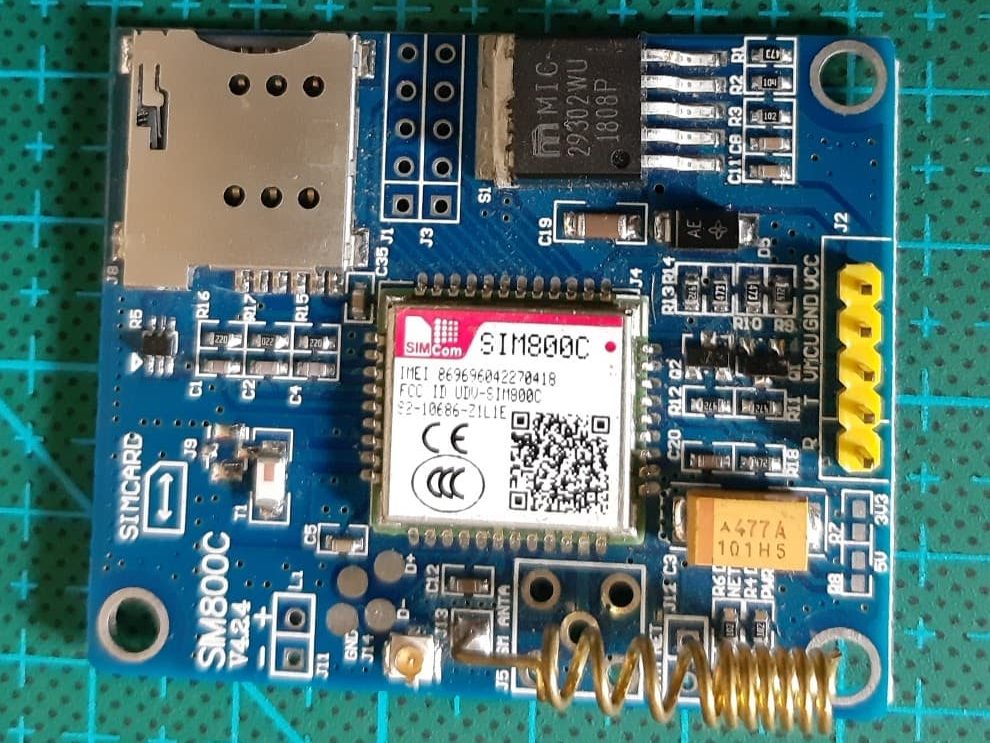
Here, we take a look at the SIM800C GSM-GPRS-BT Shield by ROHS. We’ll connect the SIM800C module to an Arduino UNO R3 and run a few AT Commands to demonstrate the functionality of the module. Here, we’ll look at the materials and items we need in order to demonstrate a simple connection between the SIM800C and the Arduino UNO R3.
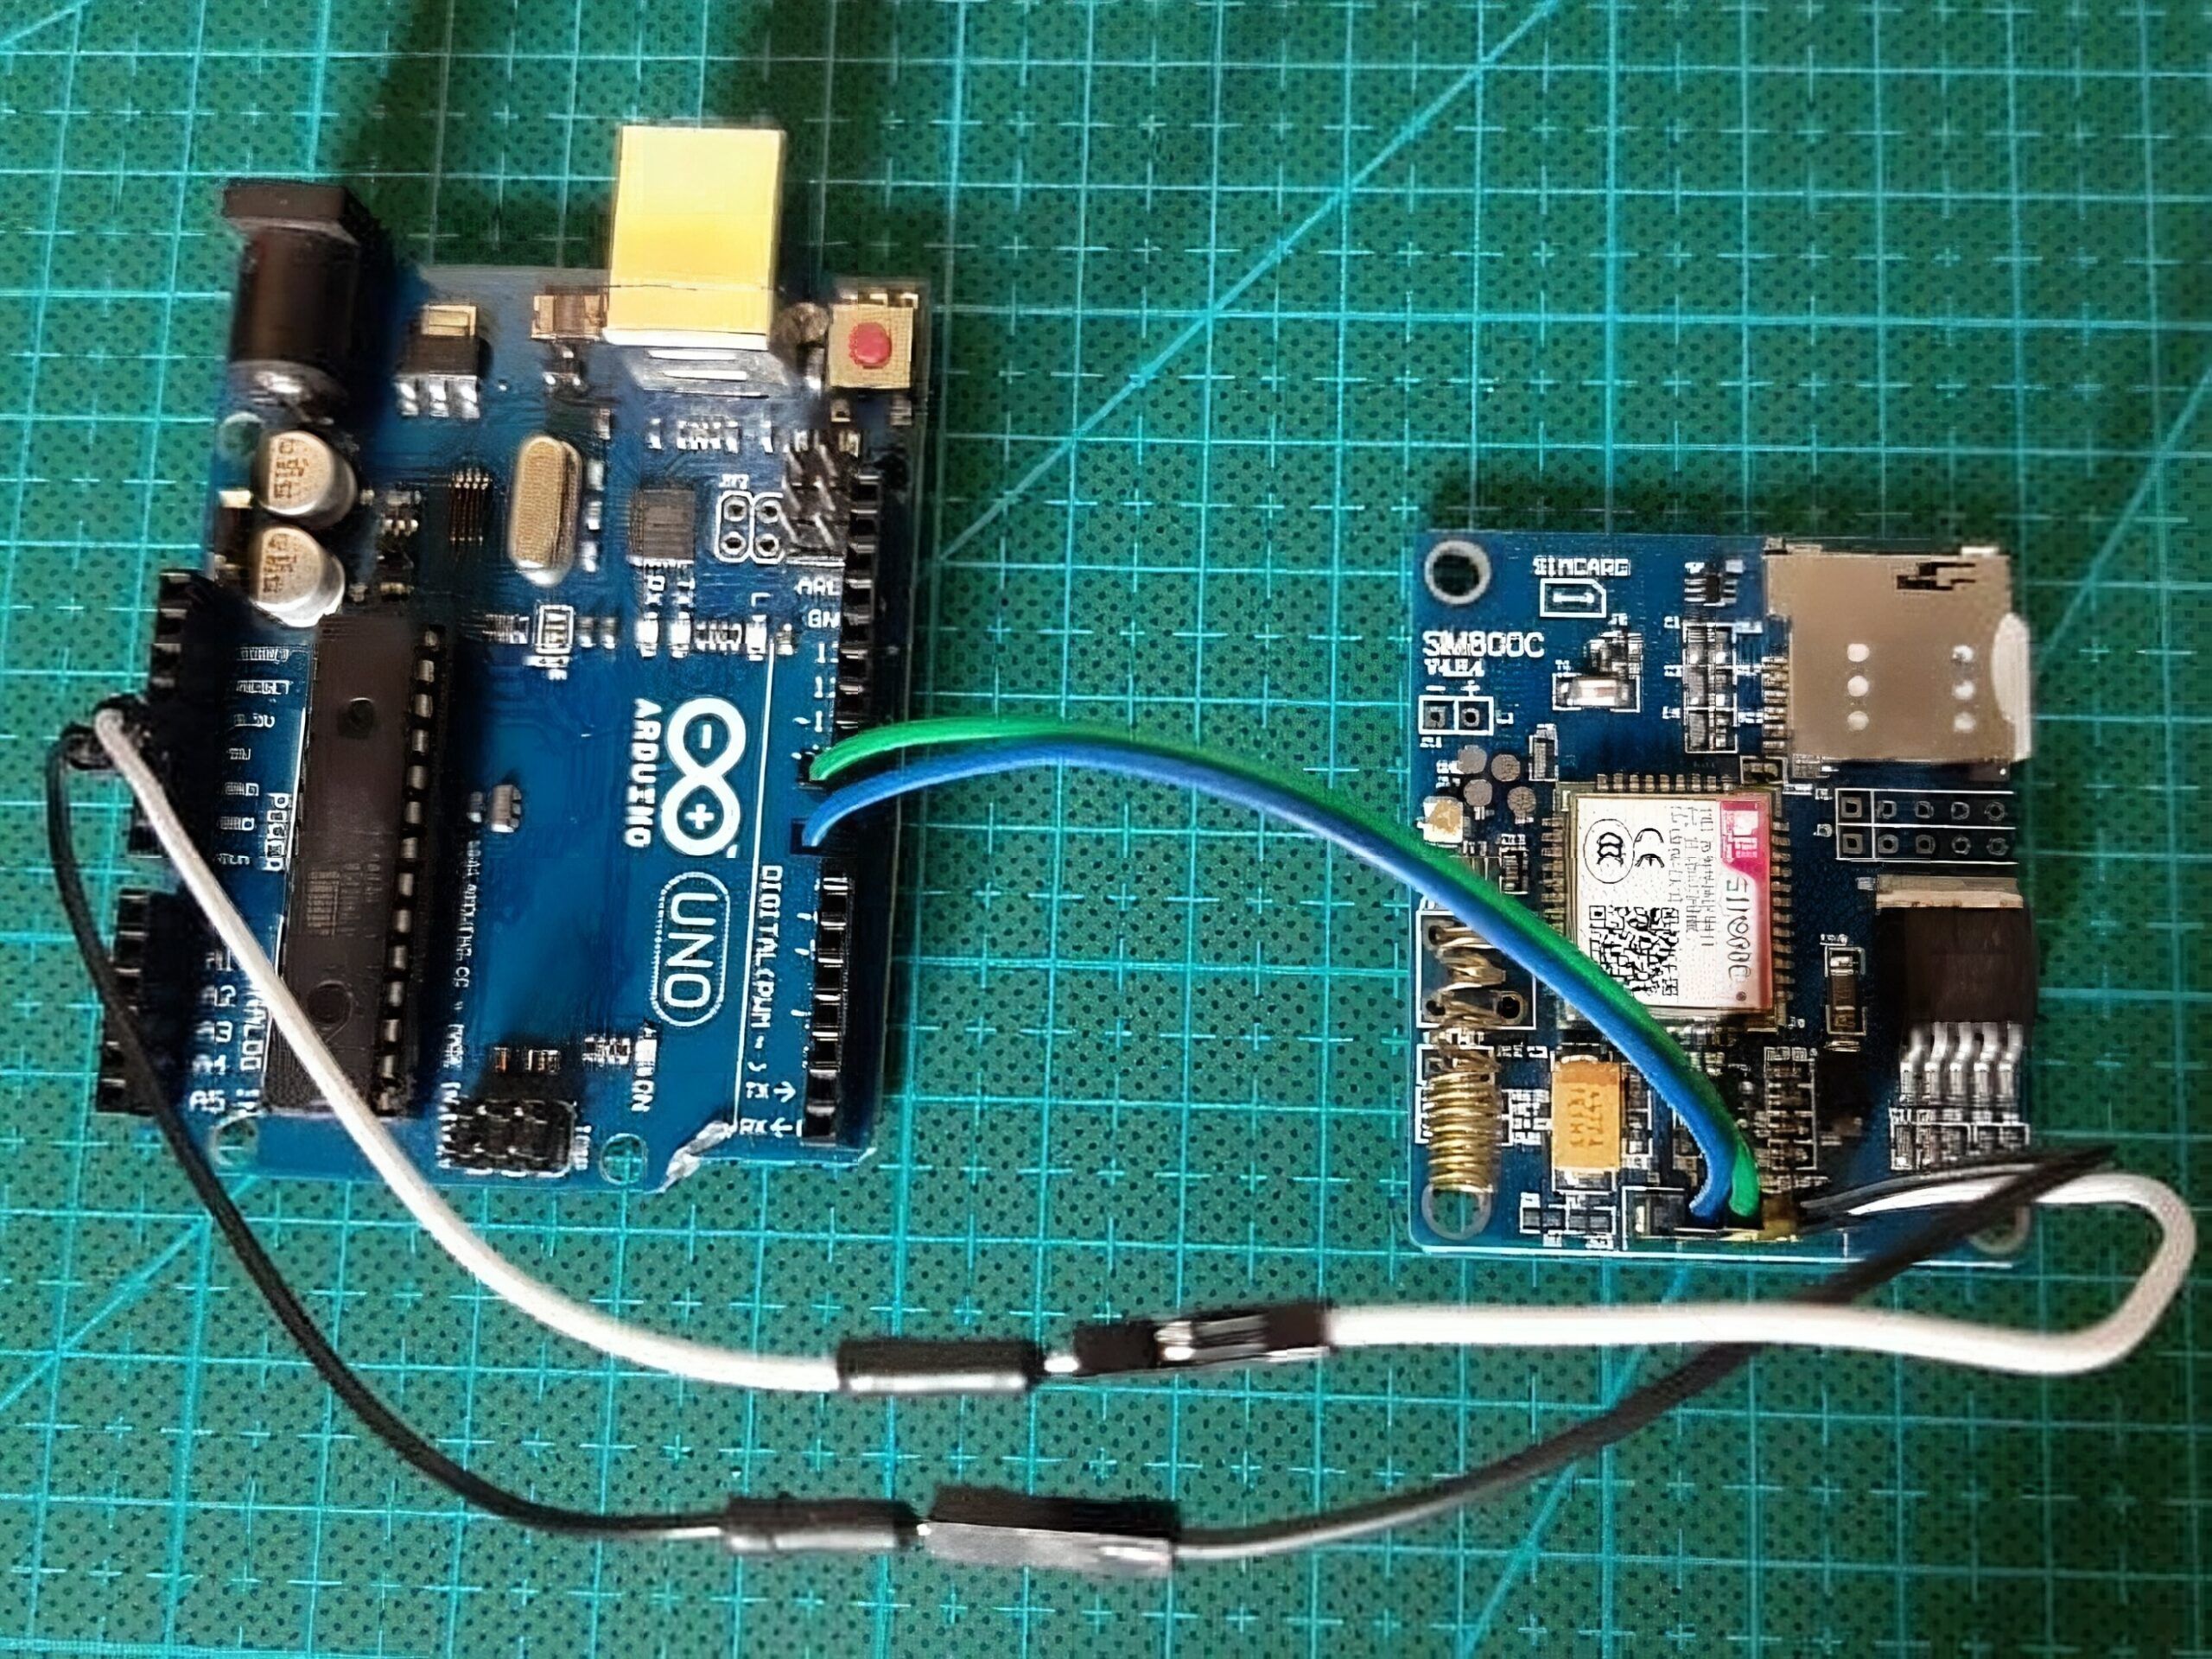
Wiring Diagram
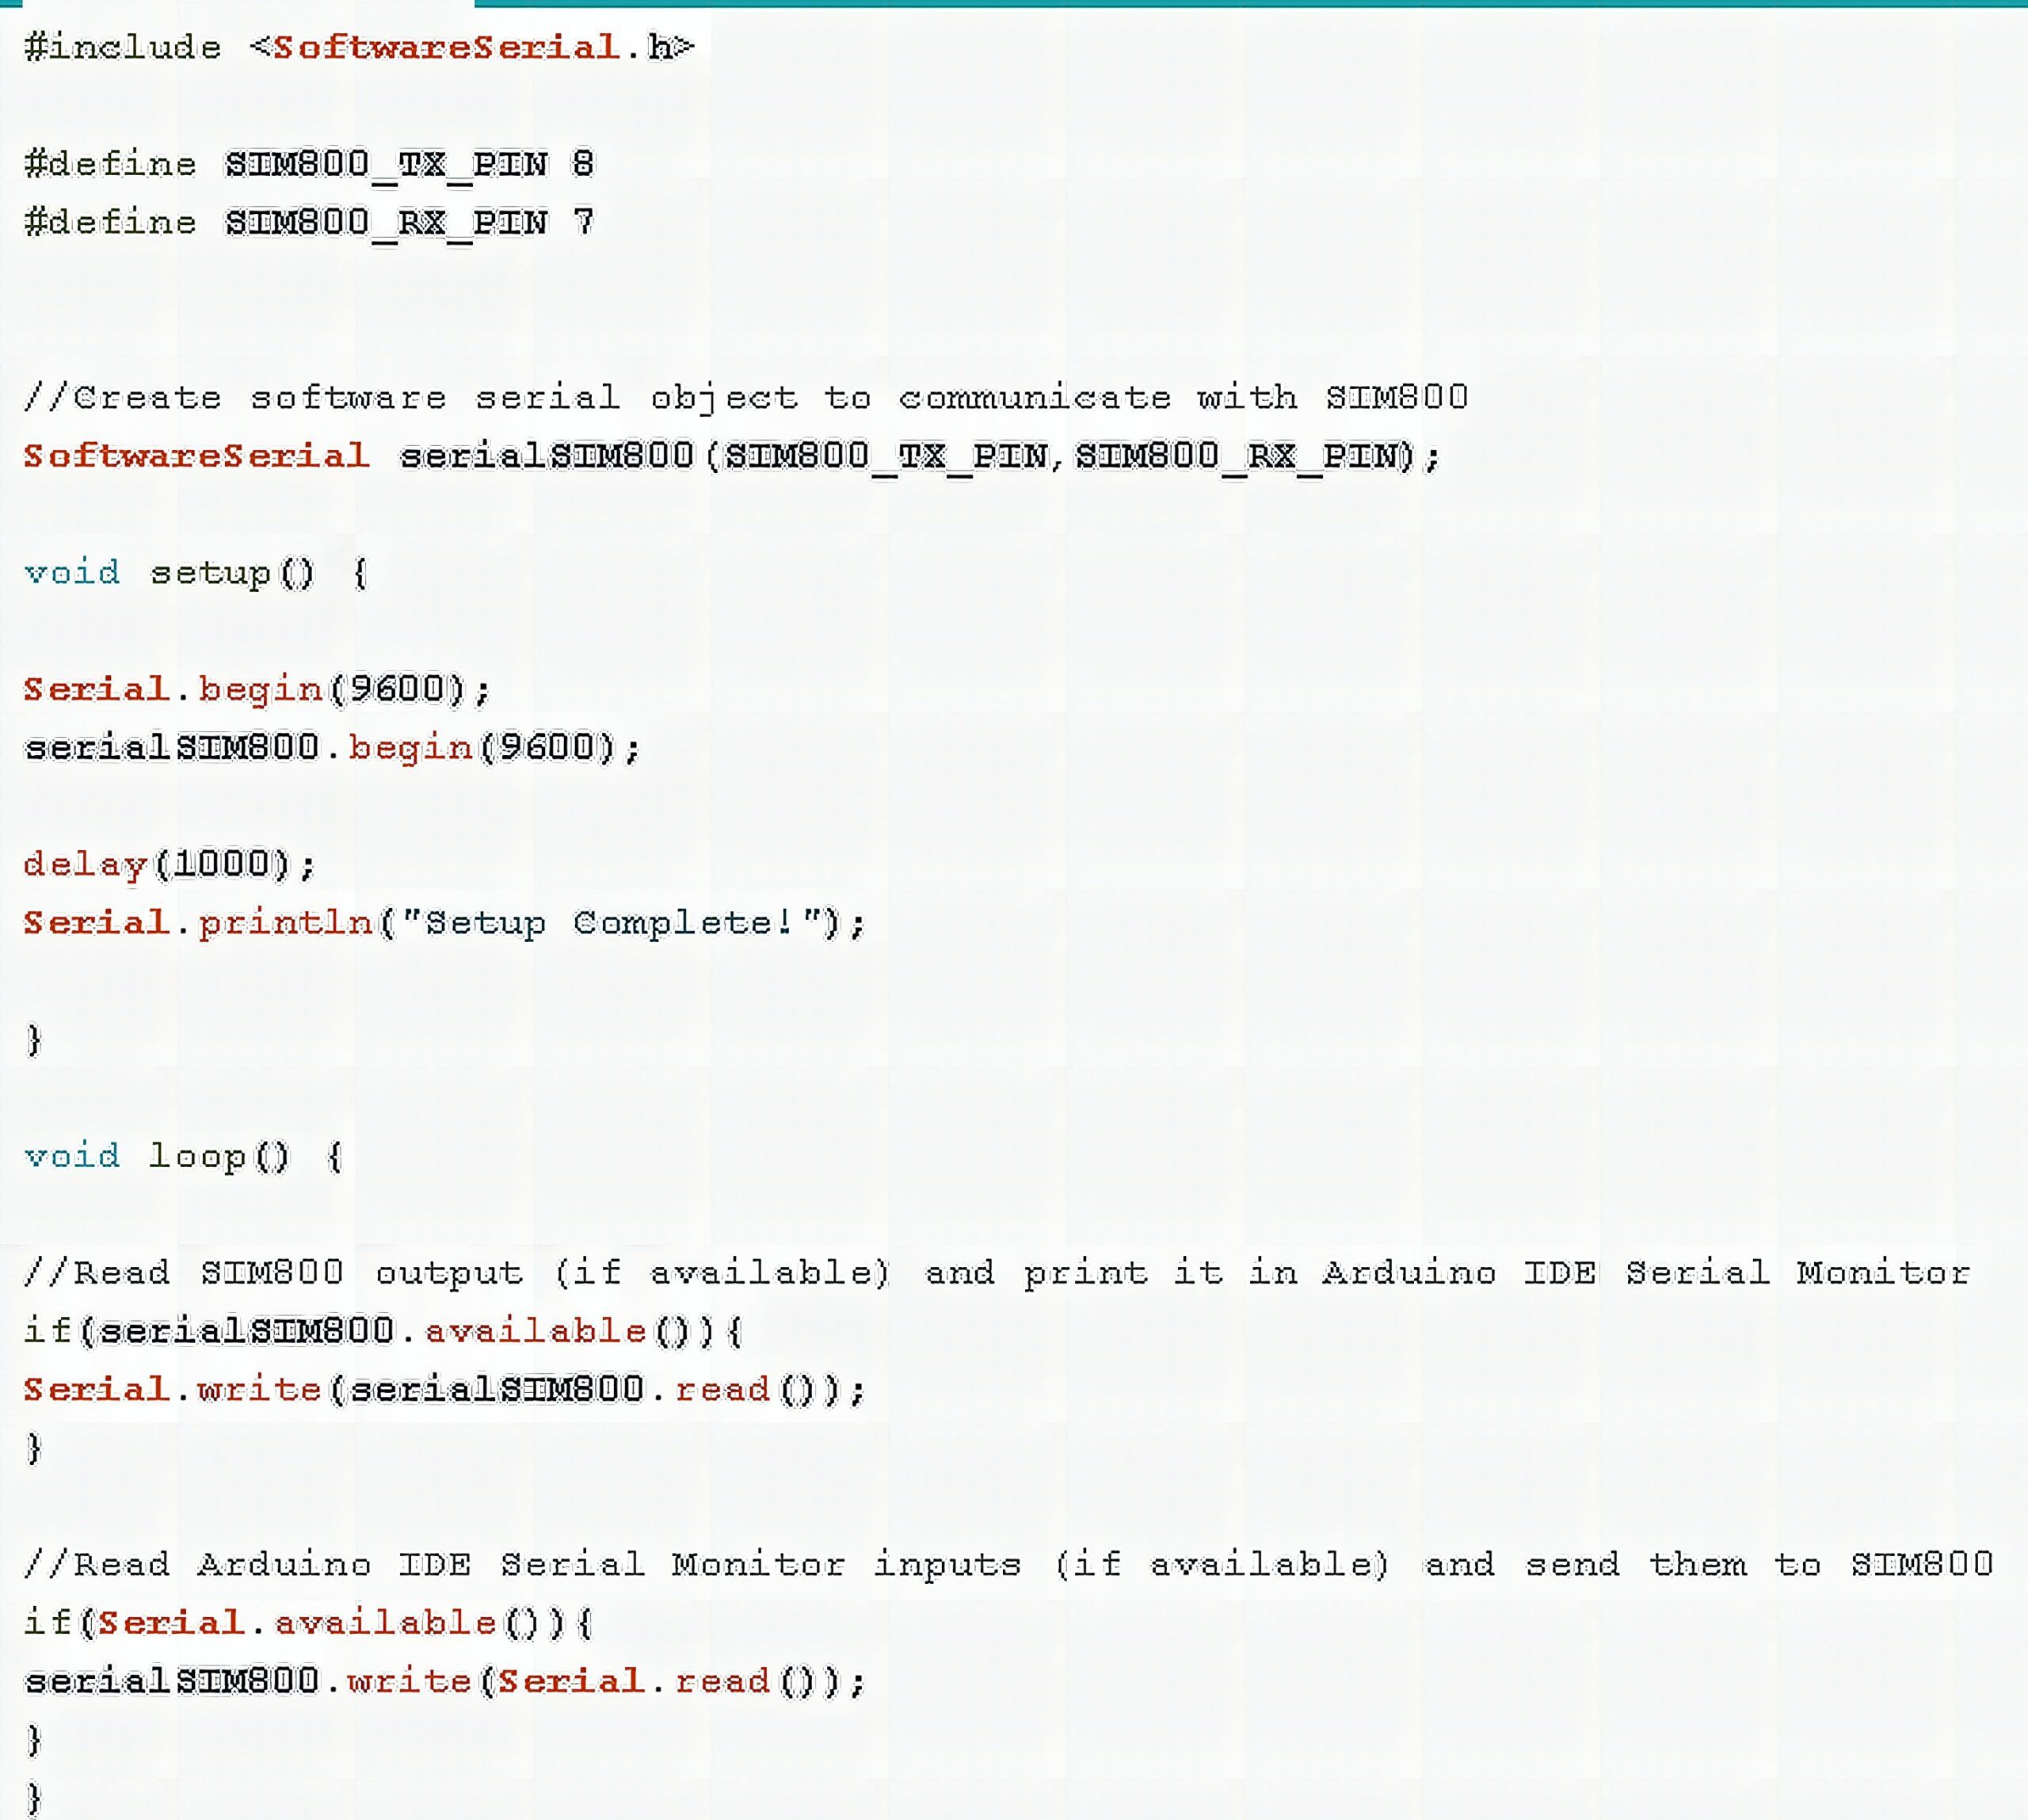
Library
For this example, the only library used is “<SoftwareSerial.h>,” which is used to communicate between the Arduino and the GSM-GPRS-BT Module.
Code
Results
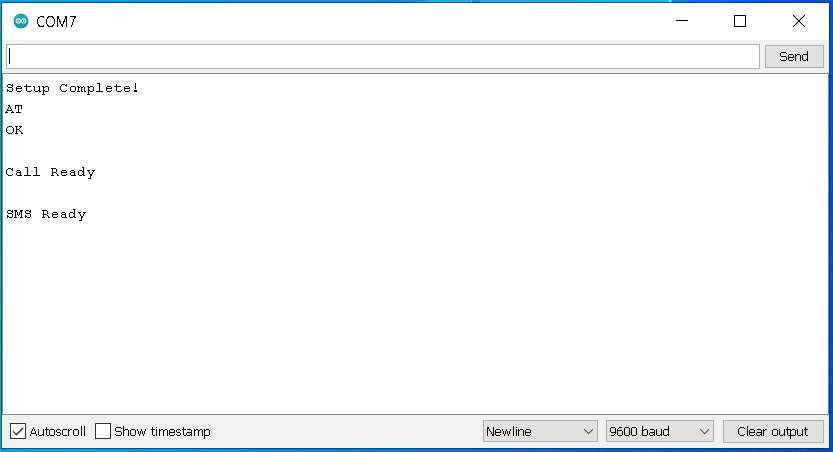
After opening the Serial Monitor, you should be greeted with the following serial messages.
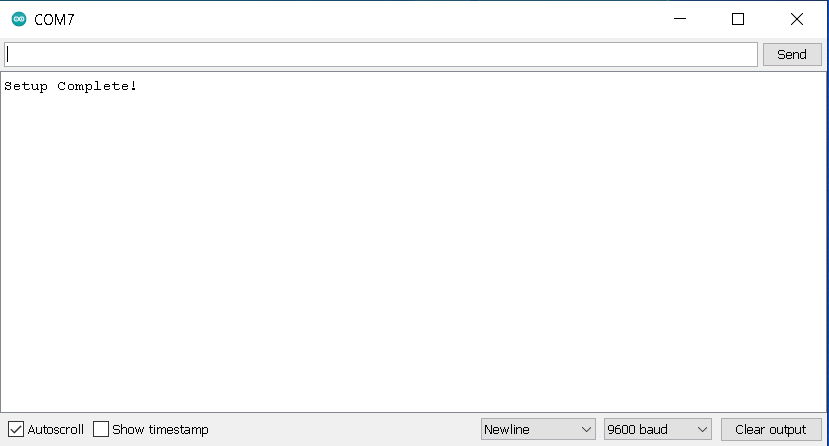
You may then type “AT” in the Serial input bar. If no SIM card is present, a Serial reply of “OK” is expected. If a SIM card is present, the response would be “OK” followed by “Call Ready” and “SMS Ready.”
You may now proceed to input AT Commands. Enjoy!
Resources
N.a. (2019 September 6). SIM800L internet connection tutorial – AT command list to make HTTP/GET request. Retrieved from: https://miliohm.com/at-command-list-to-make-http-get-request-at-command-of-sim800l/
Frequently Asked Questions
What does this SIM800C with Arduino UNO R3 tutorial cover?
Here, we take a look at the SIM800C GSM-GPRS-BT Shield by ROHS.
Can I use an Arduino Nano or Mega instead of UNO for the SIM800C with Arduino UNO R3 build?
Yes. Nano shares the same ATmega328P and pinout. Mega has more I/O if you outgrow UNO. The code stays the same — just match the pin numbers used in the Sample Code section.
Why does my SIM800C with Arduino UNO R3 sketch fail to upload?
Usually wrong COM port, missing CH340/CH341 driver for clone boards, or another program holding the serial port. Disconnect the board, install the driver, reselect the port, retry.