
Overview
Microcontrollers. Python. Two words that rarely fell into the same sentence – until now.
Everyone needs a robotic arm at some point in their lives. This tutorial will show you how to use Circuit Python to make the simplest version of a robotic arm – nothing but a couple of servo motors and a microcontroller!
In this tutorial you’ll learn how to use:
- The Trinket M0
- Circuit Python
- Analog Joystick Modules
- Servo Motors
Components
Trinket M0
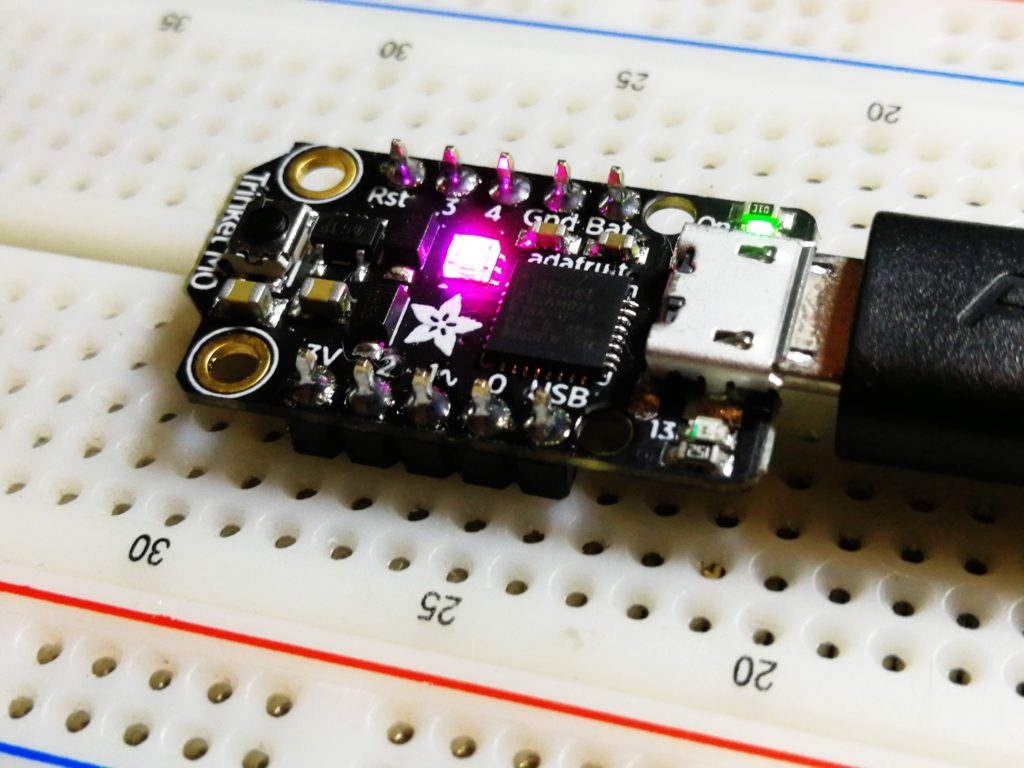
The Trinket is an incredibly small board based on the Atmel ATSAMD21 – a 32 bit, 48MHz processor. It may be tiny, but it packs quite the punch.
It also comes with CircuitPython on board. When you first plug in your Trinket M0, it pops up much like a flash drive, allowing you to directly edit the code.py file in real time, changing the code on the fly by simply opening the file using your favorite text editor or IDE, and saving your changes.
CircuitPython is a smaller version of python tweaked to work on microcontrollers. It has extensive libraries for working with different ICs as well as access to regular python libraries and APIs.
If you’re a data scientist, you should feel right at home!
Analog Stick
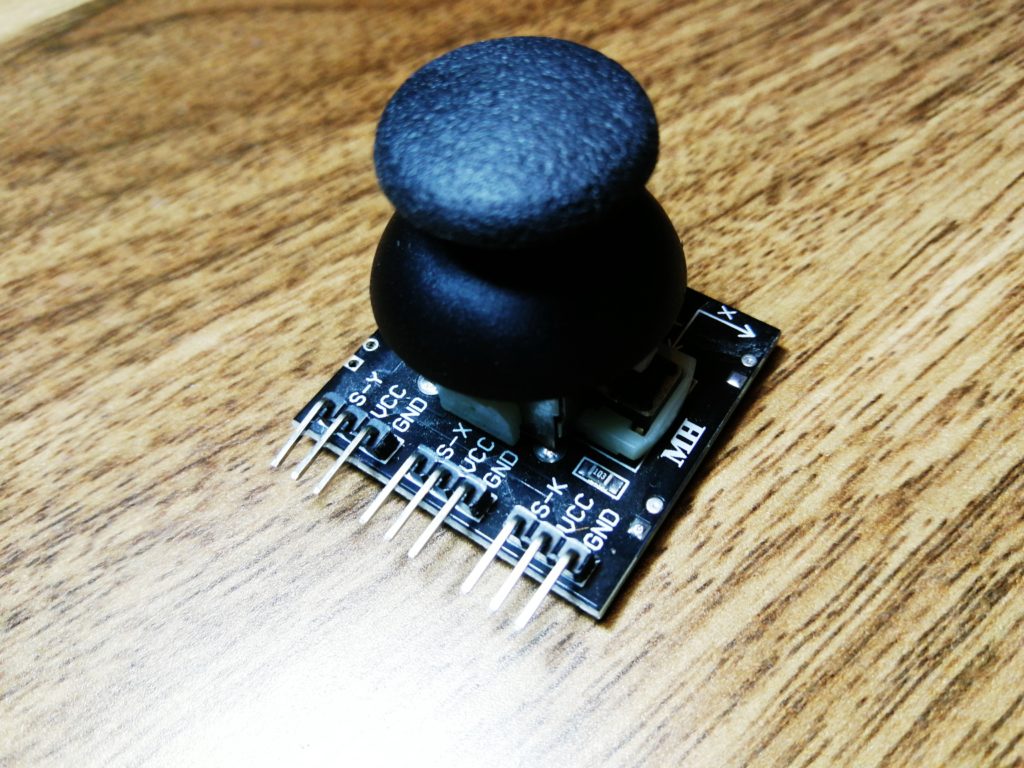
The most intuitive way to control a robotic arm – or almost anything really, is with analog sticks!
The analog stick modules use built-in potentiometers to create a variable voltage divider between your supply voltage which you provide to the potentiometer, and your reference voltage – ground.
Servo Motor
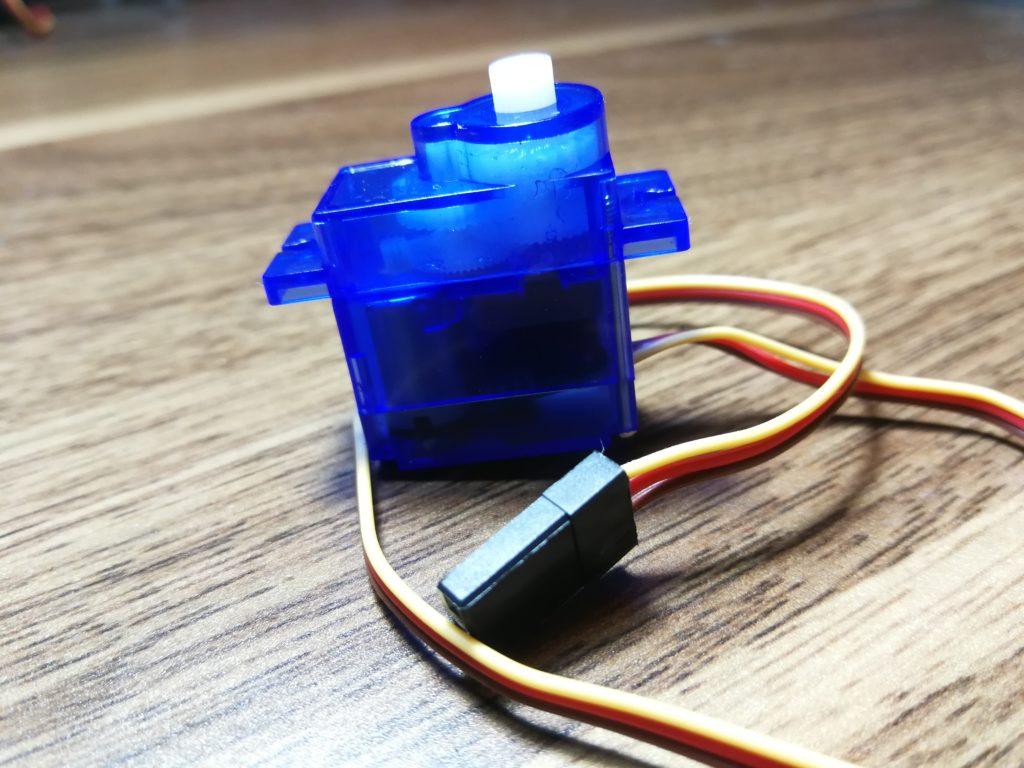
The SG-90 is the cheapest, most popular servo motor available for hobbyists and rightly so – with a modest 2.5kg-cm of torque, it should be able to handle panning and tilting our arm assembly.
Servo motors are motors that are fitted with encoders to provide feedback on the position of the motor, enabling accurate positioning. Interfacing with servo motors is typically done via a PWM signal with varying pulse width to represent different angle positions.
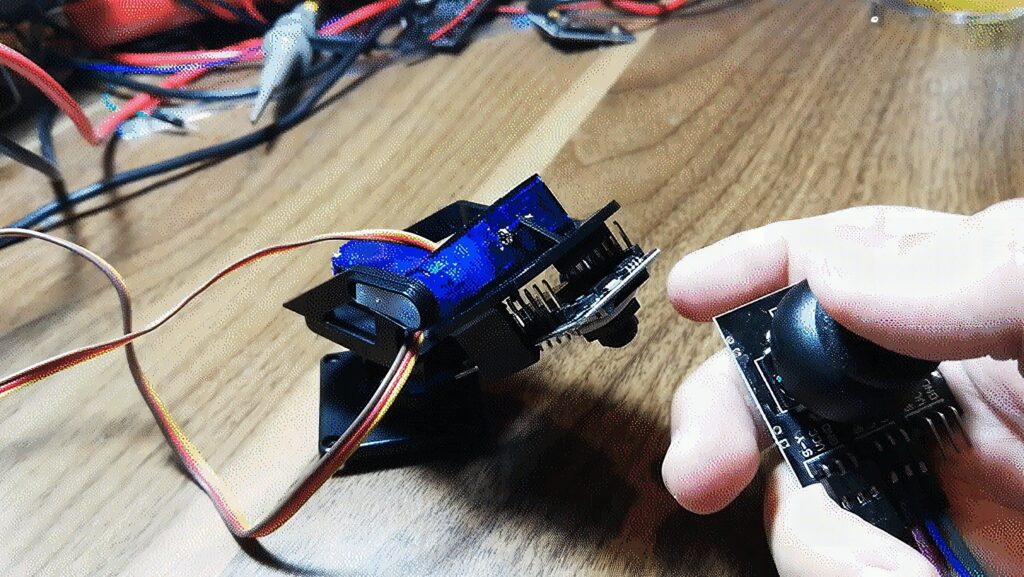
Pan/Tilt Kit
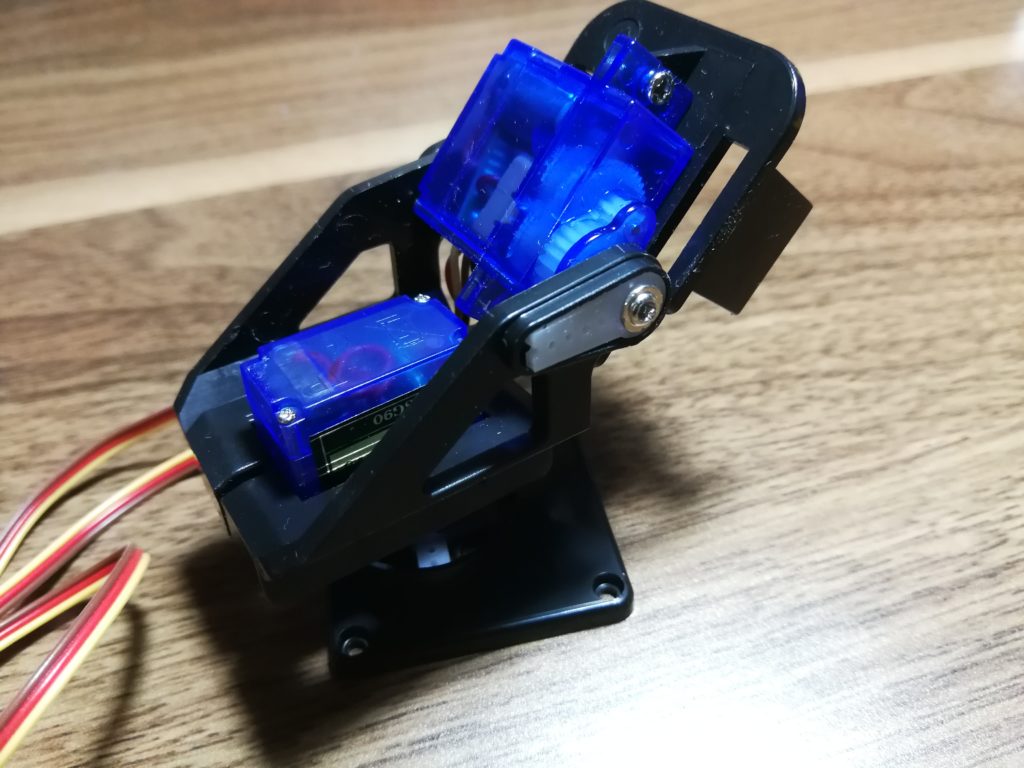
This kit provides an interface between our two servos, allowing both panning and tilting our arm. It’s built specifically for hobby servos like the SG-90 – but requires some modifications to be made to the servo arms in order to fit the arms into the assembly. These modifications are very simple, and can be made using a pair of scissors. The instructions for modifying the arms can be found here.
Wiring
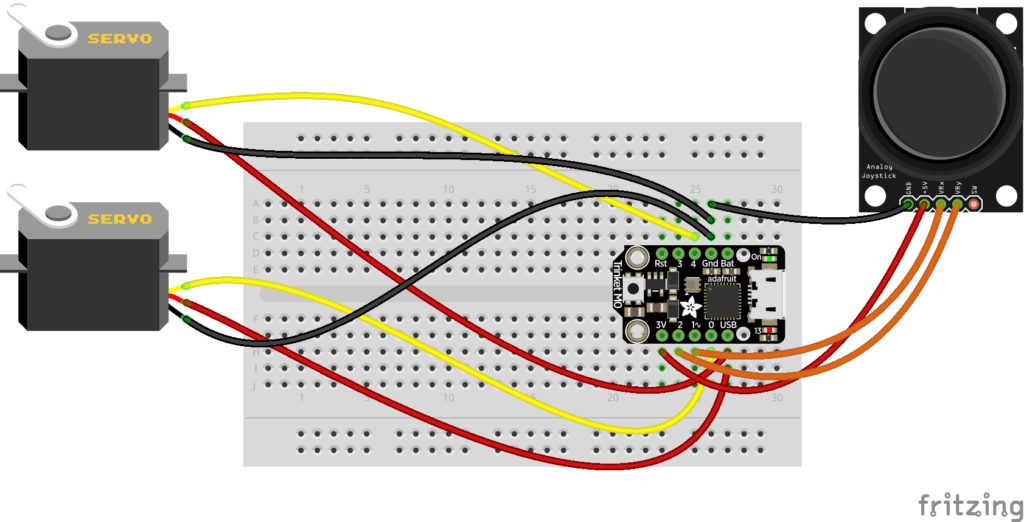
Power
The servo motors run on 4.8V-6V, which is more than the normal operating voltage of the Trinket M0, so you’ll want to pull power from the nearest 5V source, in this case, 5V coming off the USB port.
The analog joystick on the other hand is just a potentiometer/voltage divider, so you’re going to want to hook it up to 3.3V instead, coming off the 3V pin of the Trinket M0. This will ensure that the maximum output voltage of the analog joystick is 3.3V at full tilt, which matches the 3.3V GPIO on the M0.
Signals
The servos are connected to GPIO 0 and GPIO 4, which are A2 and A3 respectively – both PWM output capable. The analog stick X and Y position signals can be connected to GPIO 1 and GPIO 2, which will be used as analog input pins, to read the varying output voltage from the joystick.
Libraries
Here are the libraries you would want to have installed to get these devices up and running quickly.
Unzip the bundle that has the same version number as the version of circuit python on your board.
In the library folder, take the adafruit_motor folder and copy it to the lib folder on your circuit python board.
Installing libraries is that simple!
Software Setup
The beauty of circuit python is that it requires virtually no software setup, you’re good to go because the Trinket M0 already comes with the circuit python bootloader installed by default.
Circuit python is updated regularly, so you may want to have the latest version on your board!
Follow this link to download the latest UF2 file for your board. This will be copied to your board shortly.learnfasfa
Press the reset button twice in a row to enter the bootloader. This will cause the board to reboot and show up as Trinketboot on your PC. Drag and drop the UF2 file into the Trinketboot drive and the board should automatically install the latest version of Circuit Python and reset.
After resetting, it should now show up as CIRCUITPY. That’s all the setting up you’ll have to do.
Just use your favorite text editor or IDE to edit the code.py file in the CIRCUITPY drive. Visual Studio, Eclipse, or even notepad will work!
Code
import time
import board
import pulseio
import analogio
from adafruit_motor import servo #Pin 0,4 servo A2, A3
#Pin 1,2 analog stick A0, A1 stick_y = analogio.AnalogIn(board.A1)
stick_x = analogio.AnalogIn(board.A0) # Mapping function
def valmap(value, istart, istop, ostart, ostop): return int(ostart + (ostop - ostart) * ((value - istart) / (istop - istart))) # Create a PWMOut object on Pin A2.
pwm_x = pulseio.PWMOut(board.A2, duty_cycle=2 ** 15, frequency=50)
pwm_y = pulseio.PWMOut(board.A3, duty_cycle=2 ** 15, frequency=50) # Create a servo object
servo_x = servo.Servo(pwm_x)
servo_y = servo.Servo(pwm_y) # Input loop
while True: val_x = stick_x.value val_y = stick_y.value angle_x = valmap(val_x,0,65535,0,180) angle_y = valmap(val_y,0,65535,0,180) servo_x.angle = angle_x servo_y.angle = angle_y time.sleep(0.05)
In typical python fashion, you can add or modify lines of code and run them immediately just by saving the code.py file.
That’s all folks!
You’ve now expanded your repertoire to include CircuitPython, allowing you to prototype your projects very quickly.
Python is particularly useful in machine learning applications, which is going to be necessary for some of our more advanced tutorials.
Good luck, and stay creative!
Frequently Asked Questions
What does this Controllable Robotic Arm w/ CircuitPython tutorial cover?
Overview Microcontrollers.
What's the working voltage of the Controllable Robotic Arm w/ CircuitPython?
Check the Sample Code section for the exact pinout — most maker-grade sensors run on 3.3V or 5V. Wire VCC to the matching rail, GND common with your MCU, data to a digital or analog pin.
Why does the Controllable Robotic Arm w/ CircuitPython read garbage or saturated values?
Three usual causes: wrong voltage rail, missing pull-up resistor on I2C lines (4.7k–10k to VCC), or a floating data pin. Double-check wiring against the diagram, then probe with a multimeter.