
GPS is rapidly evolving from just being useful to being essential in our current world. Fortunately, there is an easy-to-configure, low-powered, Arduino-supported chip called UBLOX NEO-6M.
All About GPS

GPS Triangulation
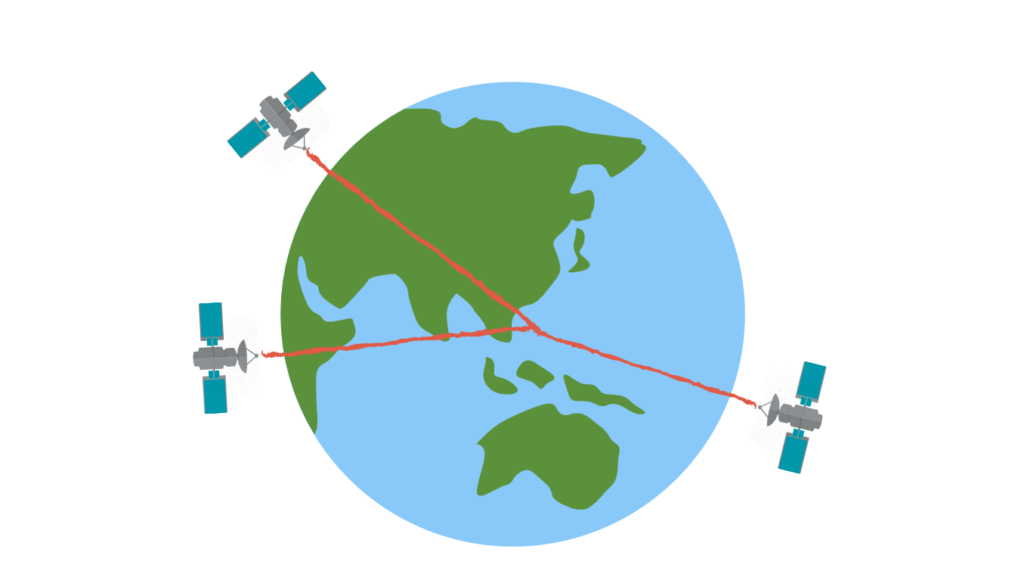
GPS (Global Positioning System) is a navigational system that is composed of 30+ satellites surrounding the earth. This satellite system in space is about 12,000 miles (19,300 kilometers) above the earth’s surface, orbiting at around 7,000 miles per hour (11,200 kilometers per hour).
How GPS work?
The GPS system consists of satellites, ground stations and receivers. Satellites serve as landmarks in space. Ground stations, on the other hand, serve as landmarks on the ground. They work simultaneously so that the information you receive on your GPS receiver is highly reliable.
Each GPS satellite constantly transmits a signal message. This message contains the satellite’s current position, orbit, and the exact time.
Further, a GPS receiver consolidates the message from multiple satellites using a method called triangulation. As the name suggests, three satellites are required to start triangulation. Using the messages from the satellites, the receiver calculates its exact position and even know the current date and time based on the location. GPS data improves the more satellite connections it has.
Establishing a connection takes several minutes to a few hours depending on the strength of receiver. However, GPS modules are often installed with circuits that enable them to remember its previous location. With this, they connect significantly faster the next time they are powered up.
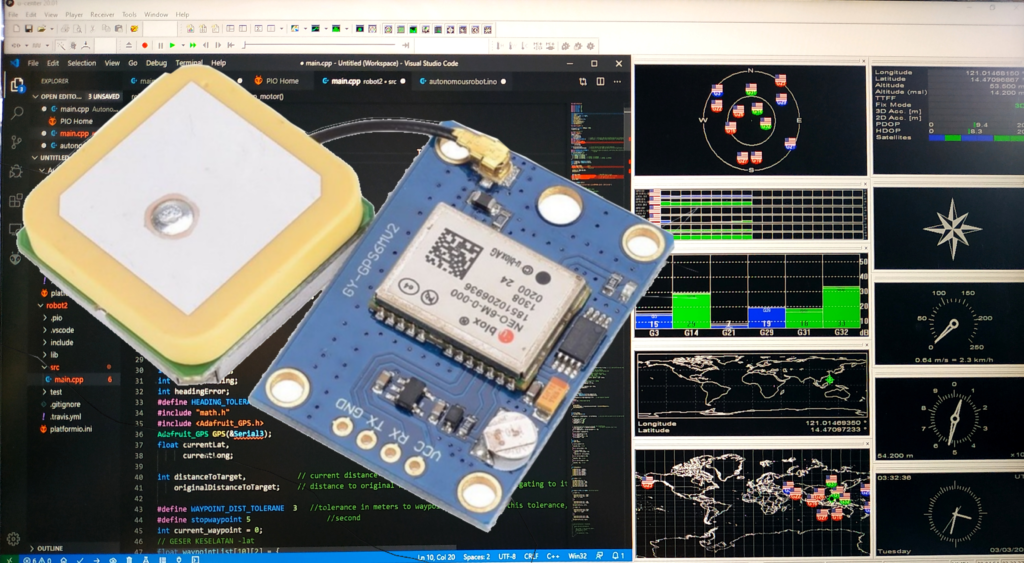
The UBLOX NEO-6M GPS Chip
The UBLOX NEO-6M chip can be found on various Arduino shields and modules. However, I am going to use the GY-GPS6MV2 GPS module as an example since it’s the only one I have experience with. You can get it from here for less than $10.
This chip is often used on drones and is actually called a flight module on our shop. It can connect to up to 22 satellites on 50 channels and achieve the highest level of sensitivity of a GPS receiver. All this on an operating current of 45mA.
Moreover, the NEO-6M can give 5 location updates in one second with 2.5-3 horizontal position accuracy. It is also equipped with a 1 second TTFF (Time to First Fix) positioning engine.
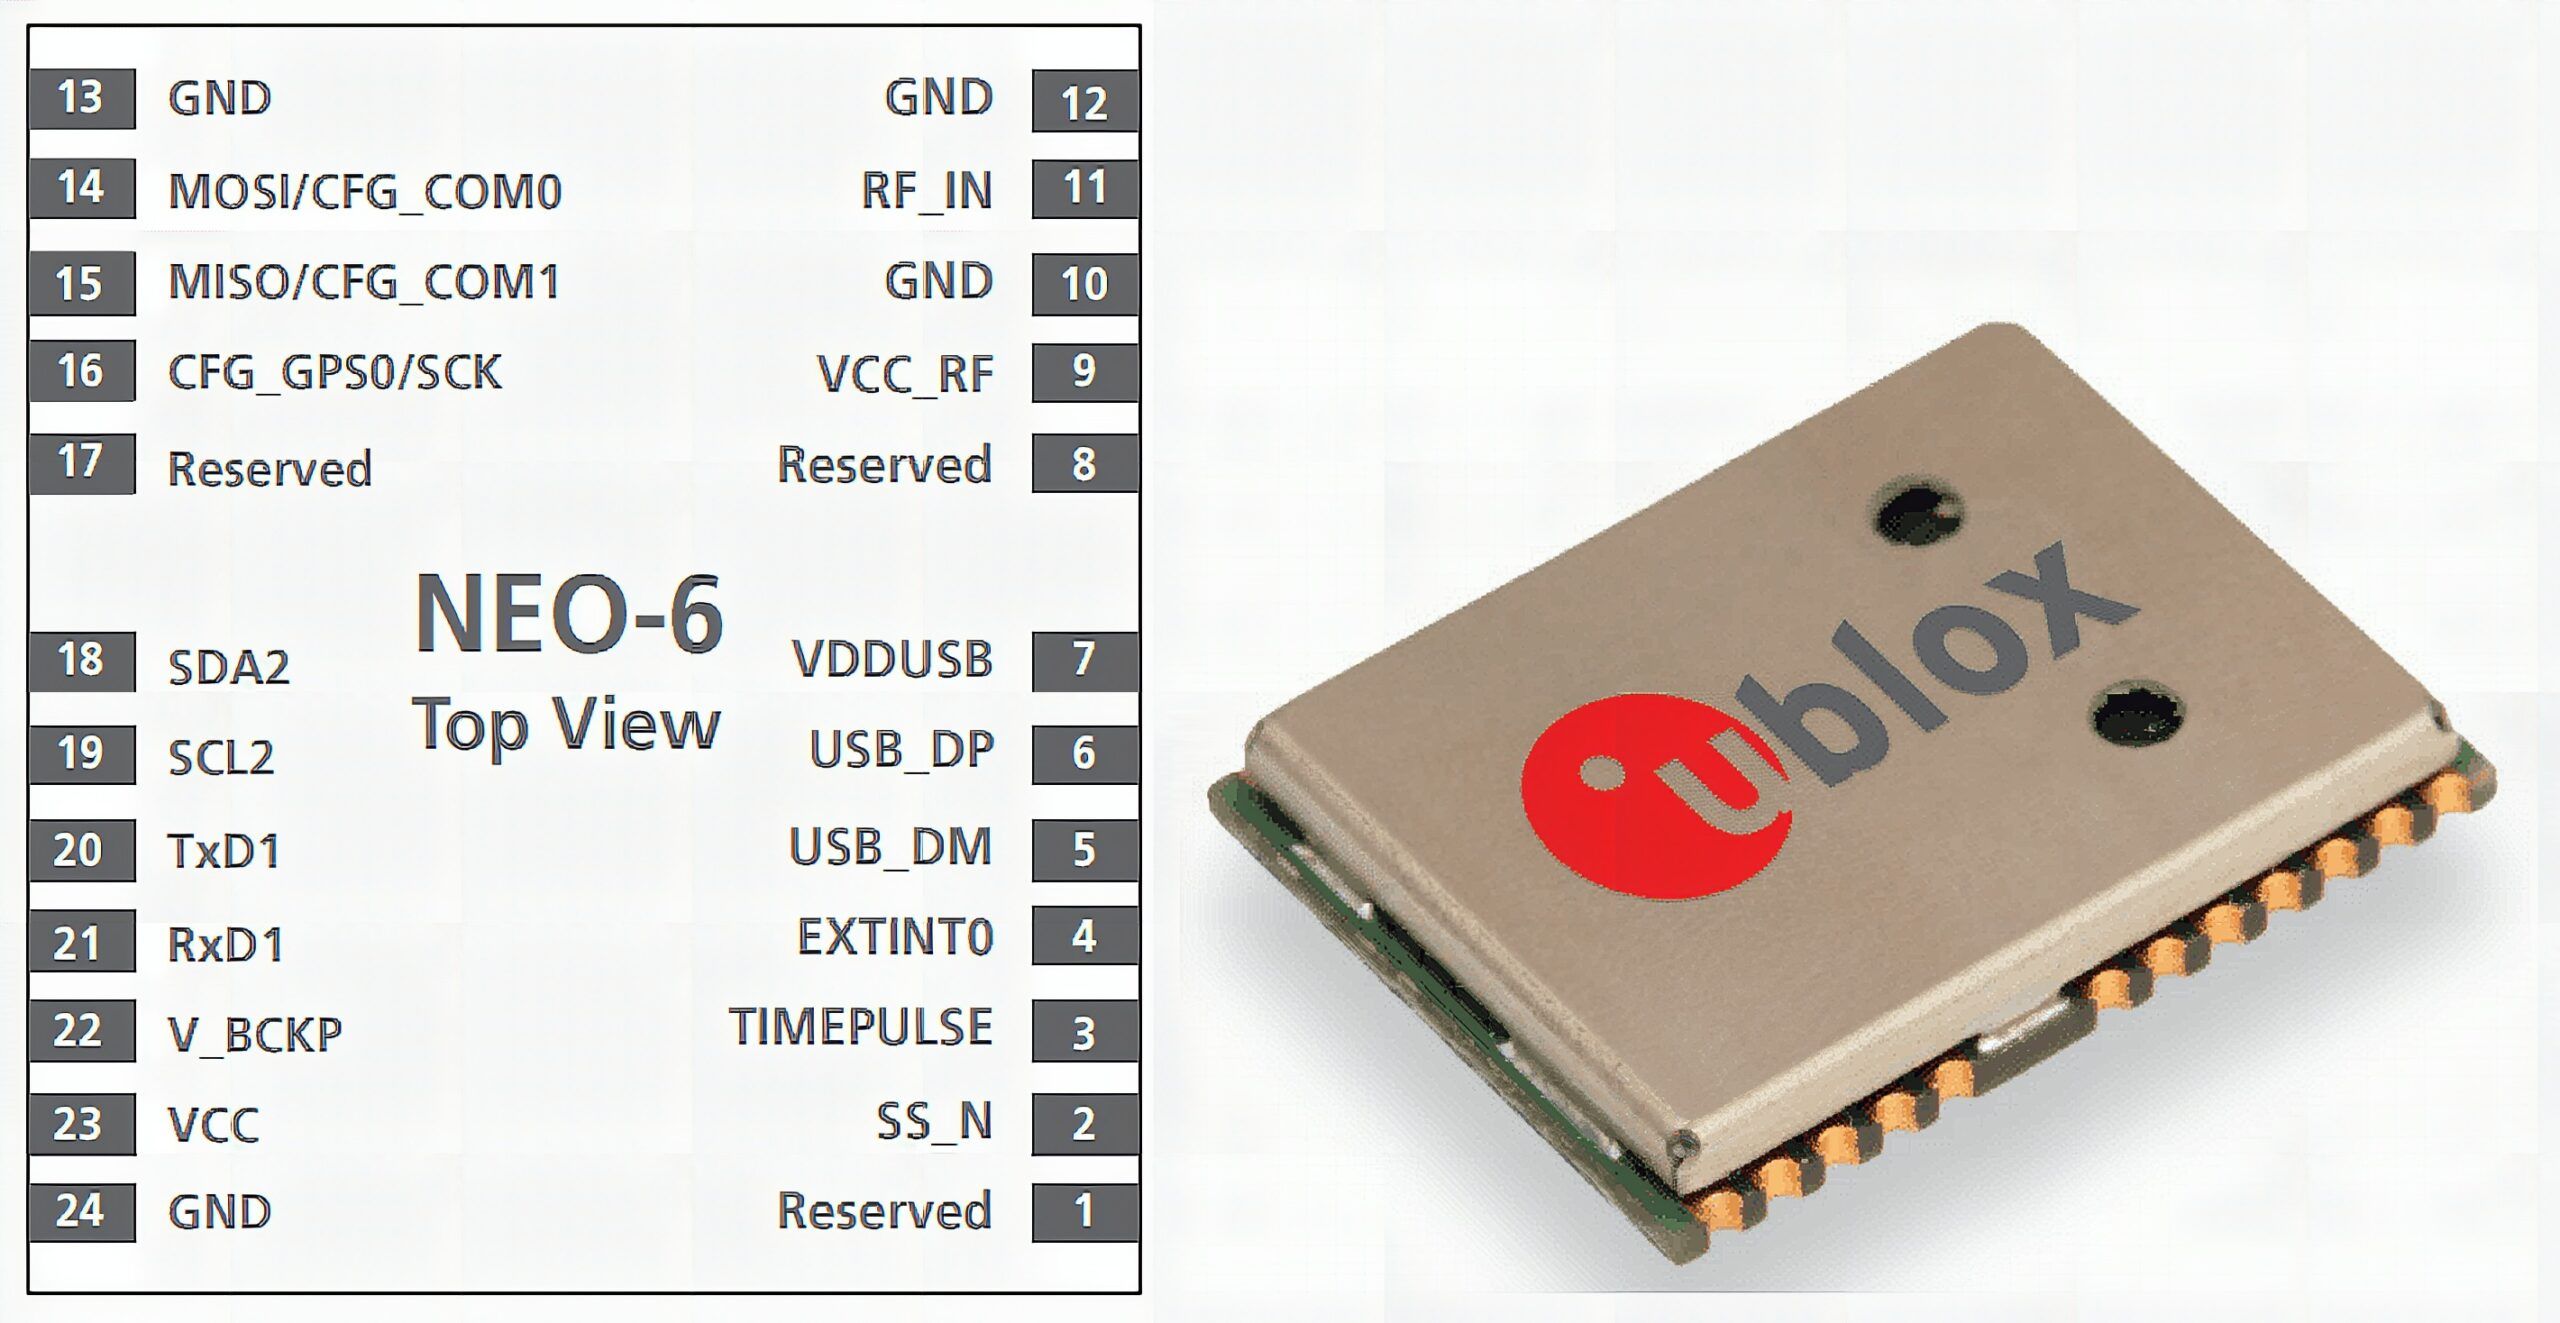
Lastly, the NEO-6M communicates via UART communication. While the chip supports baud rates from 4800bps to 230400bps, the GY – GPS6MV2 module only works at 9600 baud.
You can download the datasheet here:
GY-NEO6MV2 GPS Module

The GY-NEO6MV2 is a GPS module capable of interfacing NEO-6M to Arduino. It is composed of the following parts:

The GY-NEO6MV2. Image Credit: Acoptex
NEO-6M GPS Chip – The chip that works with GPS data.
Position Fix LED indicator – Like any standard module, the GY-NEO6MV2 has standard indicator LEDs. It only blinks when it has already established position fix (connected to enough number of satellites).
HK24C32 serial EEPROM (Electrical, Erasable, and Programmable Read-Only Memory) – This chip stores the previous GPS data read by the GY-NEO6MV2. It is 4KB and communicates with the NEO-6M via I2C.
Rechargeable Button Battery – The battery acts as a super capacitor and when paired with the HK24C32, acts as a battery backed RAM (BBR). With the BBR, the GPS module locks position in a second. This battery automatically charges when power is applied to the module. A full charge lasts up to two weeks.
3.3V LDO Regulator – The operating voltage of the NEO-6M chip is 2.7 to 3.6V. The job of the LDO regulator is to make the supply constantly throw 3.3V. The pins are also 5V tolerant.
UFL Connector and Antenna – The GY-NEO6MV2 comes with a passive patch antenna. If your projects requires more sensitivity, you can connect a an alternative active antenna fot the cost of a higher power rating.
Pinout
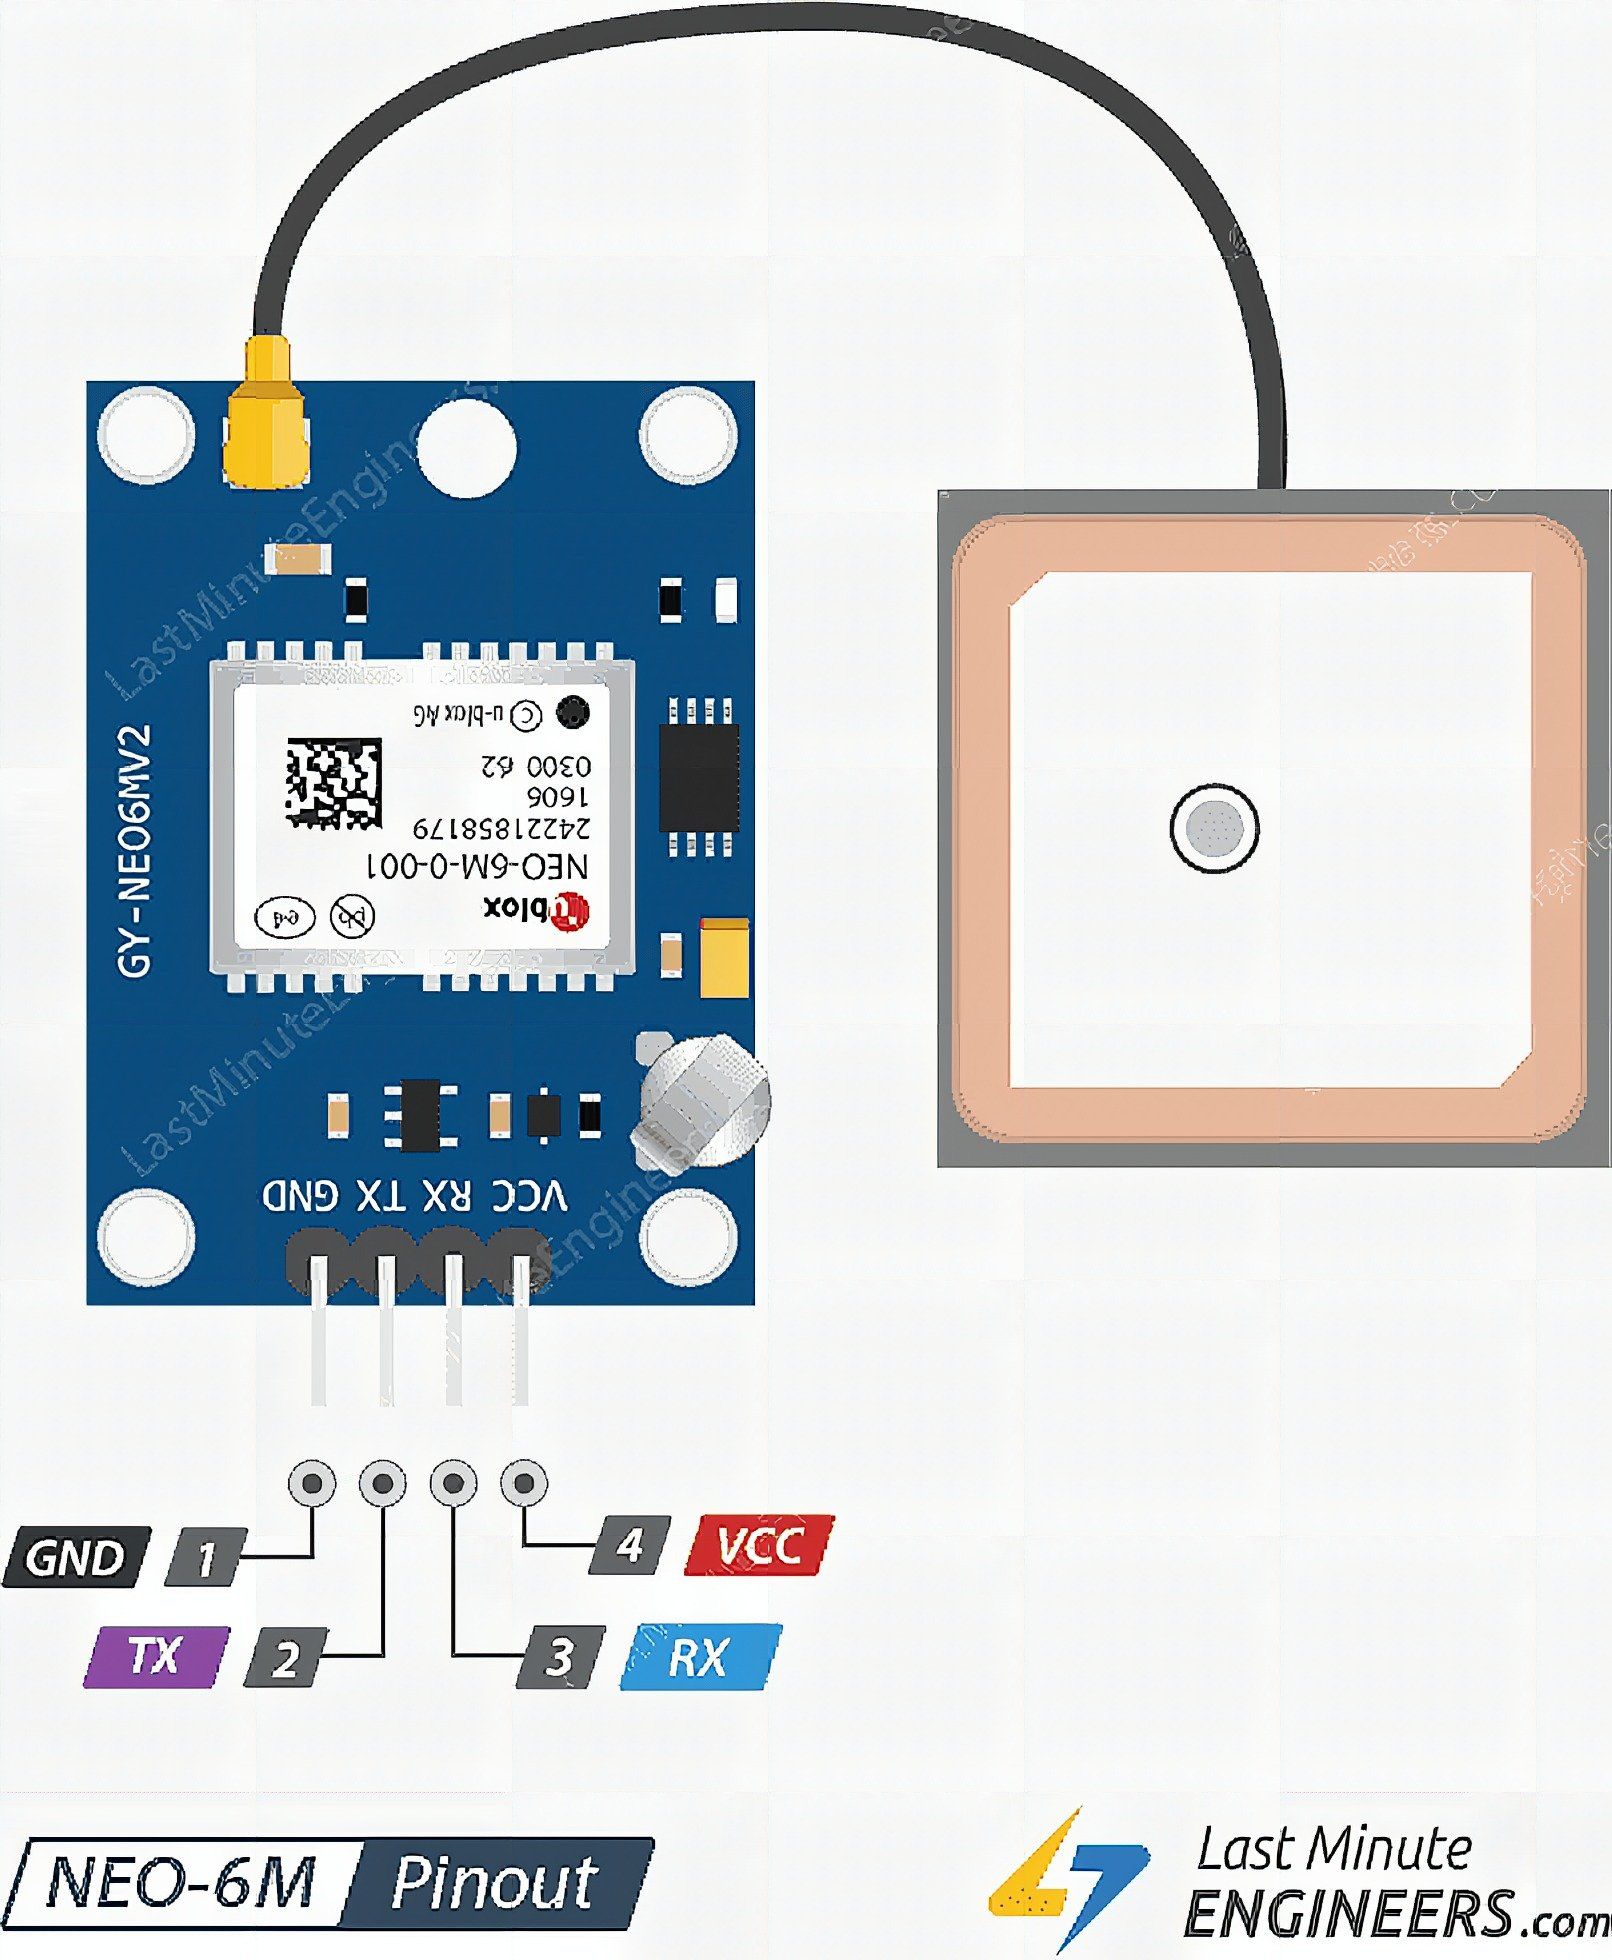
GY-NEO6MV2 Pinout. Image Credit: LastMinuteEngineers
GND – Ground pin.
TX – Transmit pin for Serial Communication.
RX – Receive Pin for Serial Communication.
VCC – Power Supply.
Programming
There are plenty of Arduino libraries for the NEO-6M. A quick search reveals TinyGPS, TinyGPS+, and NeoGPS. I use TinyGPS++ as it has easy to understand commands and is faster than its progenitor, TinyGPS. Download the GPS from Github or press the button here:
Upload this sample program to your Arduino:
#include <TinyGPS++.h>
#include <SoftwareSerial.h> // Choose two Arduino pins to use for software serial
int RXPin = 2;
int TXPin = 3; int GPSBaud = 9600; // Create a TinyGPS++ object
TinyGPSPlus gps; // Create a software serial port called "gpsSerial"
SoftwareSerial gpsSerial(RXPin, TXPin); void setup()
{ // Start the Arduino hardware serial port at 9600 baud Serial.begin(9600); // Start the software serial port at the GPS's default baud gpsSerial.begin(GPSBaud);
} void loop()
{ // This sketch displays information every time a new sentence is correctly encoded. while (gpsSerial.available() > 0) if (gps.encode(gpsSerial.read())) displayInfo(); // If 5000 milliseconds pass and there are no characters coming in // over the software serial port, show a "No GPS detected" error if (millis() > 5000 && gps.charsProcessed() < 10) { Serial.println("No GPS detected"); while(true); }
} void displayInfo()
{ if (gps.location.isValid()) { Serial.print("Latitude: "); Serial.println(gps.location.lat(), 6); Serial.print("Longitude: "); Serial.println(gps.location.lng(), 6); Serial.print("Altitude: "); Serial.println(gps.altitude.meters()); } else { Serial.println("Location: Not Available"); } Serial.print("Date: "); if (gps.date.isValid()) { Serial.print(gps.date.month()); Serial.print("/"); Serial.print(gps.date.day()); Serial.print("/"); Serial.println(gps.date.year()); } else { Serial.println("Not Available"); } Serial.print("Time: "); if (gps.time.isValid()) { if (gps.time.hour() < 10) Serial.print(F("0")); Serial.print(gps.time.hour()); Serial.print(":"); if (gps.time.minute() < 10) Serial.print(F("0")); Serial.print(gps.time.minute()); Serial.print(":"); if (gps.time.second() < 10) Serial.print(F("0")); Serial.print(gps.time.second()); Serial.print("."); if (gps.time.centisecond() < 10) Serial.print(F("0")); Serial.println(gps.time.centisecond()); } else { Serial.println("Not Available"); } Serial.println(); Serial.println(); delay(1000);
}
Then, open your serial monitor to see your output.
TinyGPS+ has functions for all the features of the NEO-6M. Better check Mikal Hart’s Github page to understand them more.
Interested in wireless communications? Check this previous article about LORA gateways. Until next time!
Frequently Asked Questions
What does this GPS Fundamentals with UBLOX NEO-6M GPS Chip tutorial cover?
GPS is rapidly evolving from just being useful to being essential in our current world.
What Arduino library does the GPS Fundamentals with UBLOX NEO-6M GPS Chip tutorial use?
The sketch uses standard Wire.h (I2C) or SPI.h plus a part-specific library installable via Arduino IDE → Sketch → Include Library → Manage Libraries. See the Sample Code section.
Why does the GPS Fundamentals with UBLOX NEO-6M GPS Chip act differently on USB power vs battery?
Battery voltage sags under load. Add a 100uF cap across the rails, use a 5V/2A regulator-backed pack, and never power motors from the Arduino's onboard regulator.